It is my extreme pleasure to announce a change in roles for me (Ammon Shepherd)
in the Scholar’s Lab. Beginning this new year, I will be the full-time Manager
of the Scholars’ Lab Makerspace and the Lead Research Technologist. I started
in the Scholars’ Lab 5 years ago as a Digital Humanities Developer, building
websites, working on various projects, and helping to maintain our technical
infrastructure. Since then I have enjoyed learning the technology and skills
available in the Makerspace, and, like the metaphorical
camel, I found a way to get
myself all in. 😊
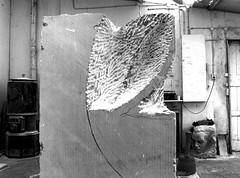
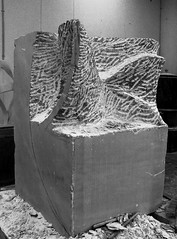
From the beginning (Summer 2014), the Makerspace had a great vision
under the outstanding leadership of Laura Miller and Jeremy Boggs. As their
roles have changed over the years, this left an opportunity for me to join the
Makerspace team full-time. As Manager, I will oversee the administration and
day-to-day running of the Makerspace and supervise our wonderful team of
student employees who we affectionately call Makerspace Technologists. As the
Lead Research Technologist, I will conduct research about Makerspace
technology, methodology and pedagogy, and collaborate with scholars throughout
the UVA community.
With the new year and the new decade, we’ve enhanced our vision of the Makerspace, and put in place a mission.
Scholars’ Lab Makerspace Vision
The Scholars’ Lab Makerspace is strategically situated within the UVA Library to be open, provide a low barrier to entry, and be a helpful resource of information, technology and support. The space invites all people, and proactively encourages those in underrepresented academic studies, ethnicities, genders, economic classes and skill levels to come, learn, make, and be empowered to improve their education, research, and community. The Makerspace is an active participant in academic research through independent and collaborative work with scholars to explore, understand, and report on emerging technologies, methodologies and pedagogies in a variety of disciplines.
Mission
All humans are dreamers, creators, and achievers. Our mission is to provide the place, the tools, and the support to empower people to dream, create, and achieve.
Follow Us
I encourage you to check the blog often this year, and our social media pages,
as we will be more active in posting the very cool things that the UVA
community creates in the Makerspace.
Sometimes the seemingly long way round is actually the quickest way. I recently had a project at work that returned a bunch of results from a Solr database. The results are processed by Javascript and written to the page. The original page I was recreating had paginated results (10 results to a page). I thought it would be too much work to get that written into the page, and wanted to just let the JavaScript write all the results to the page. Unfortunately, this meant some queries took up to a full 30 seconds to load! That’s an eternity for the web!
After playing with the settings and different ways of writing the results to the page I finally decided to just implement pagination. I thought it would take forever. It took a few hours…
The trick is to complete the process in two steps.
Step 1) create a function that returns an array of page numbers based on the number of results, the desired number of results per page, and the current page being viewed.
Step 2) create a function that turns the array from the previous function into a bunch of links.
There are two functions, pagination() and buildPagination().
pagination()
pagination() returns an array of page numbers between one (1) and a given end number, returning a maximum of 10 numbers, with missing ranges replaced with elipses (which are included in the maximum return count). A ‘current page’ is supplied, and the current page number is surrounded by the two sequential numbers before and after.
The number of numbers to return is determined by the total number of
results to expect divided by the number of results to display per page. This
is further affected by the current page displayed. Possible outcomes of the
function could look like so:
[1, 2, 3, 4, 5, 6, 7, '...', 44, 45]        // 1-7 is the current page
[1, 2, 3, '...', 7, 8, 9, 10, 11, 12]       // 2 is the current page
[1, 2, '...', 10, 11, 12, '...', 44, 45]    // 8-39 is the current page
[1, 2, '...', 33, 34, 35, 36, 37, 38, 39]   // 33-39 is the current page
The function takes three parameters:
total_results (Required: The total number of results to expect, the end number.)
start_number (Required: The value/start number of the page currently displayed.)
results_page (Optional: The number of results to show for each page. Defaults to 10.)
The function returns an array containing the range numbers that can be turned
into links..
buildPagination() takes in a number (the total number of results returned from what ever search query you ran), and builds the HTML for the page numbers and links using the pagination() function.
Usage
To use these functions, call the buildPagination() function on page load, and put a script tag in the HTML page where it should be used. It should go at the bottom of the HTML page. In the code below, "200" is where you can put the total number of results returned from the search query.
You can change three variables in the pagination.js file (located at the top of the file):
RESULTS_PER_PAGE = how many results per page you want to show. The default is ten (10).
SEARCH_RESULTS = the ID of the HTML element to use for displaying the
search results. This is only used to display text when zero is passed to
the buildPagination() function. You should probably have something in place
to deal with zero results from a search query before you use this function.
PAGINATE = the ID of the HTML element to use for displaying the
pagination HTML.
You can also call the buildPagination() function from a JavaScript file and feed the total number of results in dynamically.
We’ve been introducing this idea of setting BEST goals to our kids, and they want a way to track it. So I whipped up this sheet to track two months of BEST goals.
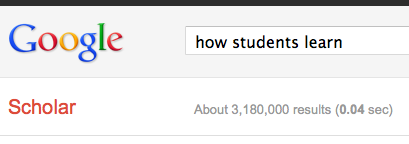
So, I finally get to teach a college course this semester. Way excited! But I refuse to do the normal lecture format. Seriously, we are still stuck on that teaching method after alltheresearch and scholarshipabout the bestways to teach? (These all came up as results for searching in Google Scholar with the terms “how students learn” and “scholarship of teaching and learning”, which returned over 3.7 million results.)
over 600,000 results for “scholarship of teaching and learning” on Google Scholar
Over 3 million hits for “how students learn” on Google Scholar. You’d think we would know how students learn by now…
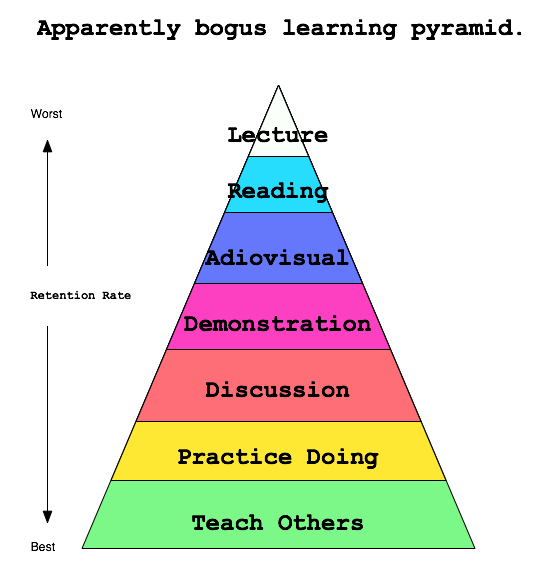
I still believe the “learning pyramid” has merit despite it’s obviousover-generalizations and fabricated percentages. Lecturing has it’s place, but not in my class room. If anything, I want to be less boring. 🙂
Apparently false learning pyramid, created by me.
So, I got to thinking, what format do I want to use for my Monday-Wednesday-Friday, History 100 Western Civilization class? I landed on a discussion based lecture format for Monday and Wednesday, and what I’m calling a History Lab for Friday. The sciences have this same format. Lecture on two days a week, then go to a lab where you practice what was preached. I figured we could do the same thing with critical thinking skills taught by the humanities. Monday and Wednesday will be a bit of me talking about the time period, with a healthy dose of questions and comments from the students based on the reading they have done. Then on Friday we have a History Lab where we critically examine a primary document from the time period we are learning about. I’m open to other ideas on what to do during the History Lab. I’m excited to see if any students offer suggestions.
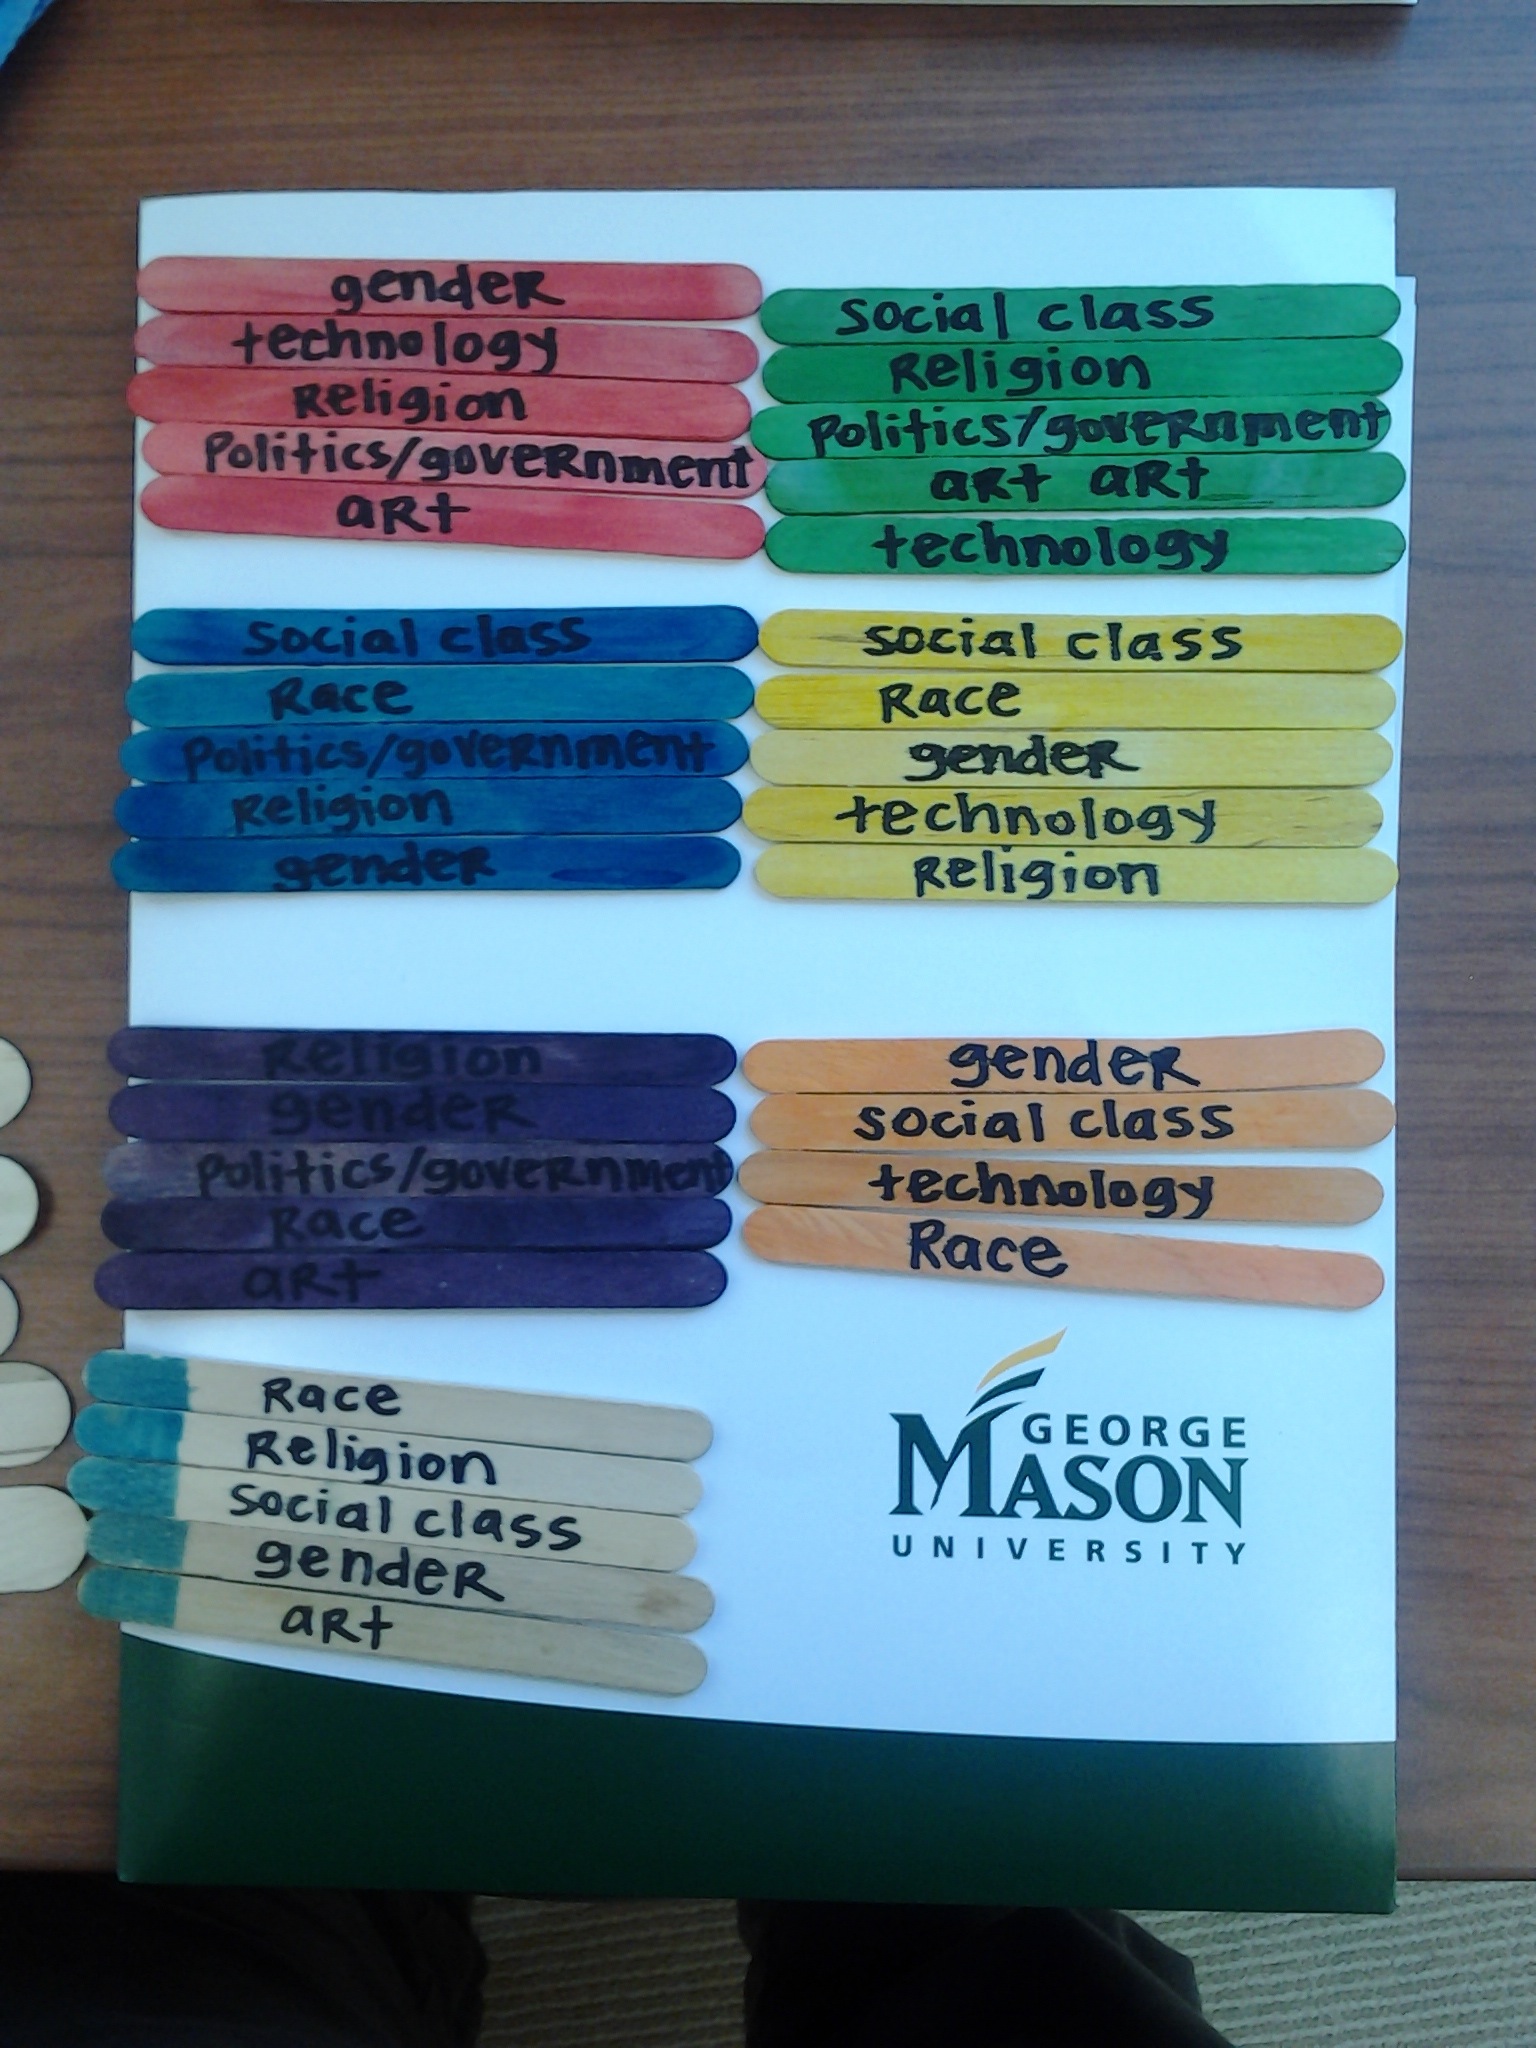
Popsicle sticks!
Today was our first History Lab, and it went very well, I think. I will get the students opinion on Monday, to make this exercise an all around learning experience. For today’s History Lab I divided the students into groups of five (any more than that gets a bit unmanageable). They each picked a popsicle stick I had in a cup at the front of the desk. There were five popsicle sticks with the same color, but a different “filter” written on each of the five sticks. The filters are the biases, or lenses through which to look at history. They included race, gender, science/technology, social class, art, religion, and politics/government. After the students organize into groups, I give them a primary source document to read together, then discuss the document based on the filter that they have. After enough time to allow individual groups to discuss, we discuss altogether as a class. To track participation, attendance and provide accountability, each group had to write a summary of their discussion on the back of the paper, including their names and which filter they had, to be turned in at the end of class.
This seemed to work out pretty well, and the students had great comments. We looked at “The Spartan Creed”, a poem written by Tyrtaeus in the 7th Century B.C. (unfortunately no reliable source found, just this post in a forum). The most noticeable thing about this document is how heavily male centric it is. Granted, it’s a man writing about war, but there is absolutely no mention of a female. It can be implied by the use of the word “children”, but no fighting for the protection of wife and family, just city and children. Here are some of the comments the students made on their papers for a few of the filters.
Directions are an absolute necessity for group work to function well.
Gender: Men are dominant, only men are warriors. No reference to women. The society was very male dominated. Women had no role in the Spartan military, so the code is less relevant to them. Females are not even mentioned in the creed, so men are obviously the dominant gender. Among the men, they are expected to be strong, courageous, honorable, every trait that makes them a mighty soldier, a protector of their city-state.
Art: War is their art, the structure of their army, how they fought, etc. It doesn’t specifically say anything about art, but the way this is written is a form of art and the way the author makes out a man to be is like a piece of art.
Religion: War was treated as a religion. Soldiers were treated as gods when they returned. In death, a Spartan man becomes immortal as his memory is honored as if he is a god. To understand this one must know that in his life he was worshiped for being a good fighter and so that is carried over in a glorious death. Religion and personal values seem to all be related to war; gods are mentioned but the creed is centered around the personal honor of a warrior.
I was pleased with the results. All of the students were engaged in the group work and came up with something intelligent to write about. The beauty of this model is that each student has a focused purpose to look at a historical document, and then is held accountable for sharing something.
Do you have ideas for what we can do in our History Lab? Leave a comment below, and I’ll give it a try!
[Post image from Wikimedia Commons: Glass containers, experimental magnifiers and chemical or alchemy paraphernalia in the Lavoisier Lab 1775 by Jorge Royan. http://commons.wikimedia.org/wiki/File:Munich_-_Deutsches_Museum_-_07-9631.jpg]
I was asked to lead a discussion on the current status of 3D printing in the humanities, particularly the field of history with a great group of fellow PhD students here at GMU during one of their classes.
Here is what we came up with.
First of all, 3D printing (in general, but specifically for history) can be summarized by the following formula.
3D printing for history now = HTML for history in the early 1990's
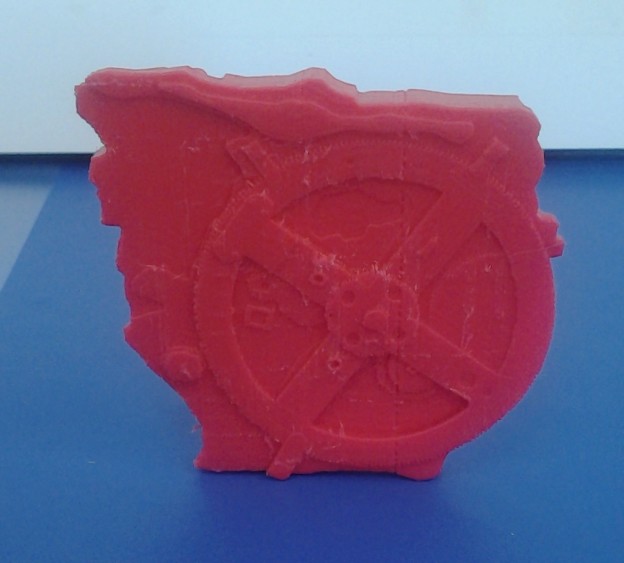
A replica of the Antikythera Machine, a 1 BCE clockwork device discovered on a shipwreck near Greece in the early 1900’s.
There is much that can be done, but using a 3D printer for historical research, study, learning, etc, is still very much in a nascent stage. So the question are, what can be done with 3D printing and how does it help us learn about history? We came up with a few ideas.
First, what can we print with a 3D printer? The limits are just about endless, as long as then are condensed to a 5-inch x 11-inch x 12-inch box.
The bigger question is what do 3D printed objects help us learn about history? Here we had some good ideas. Printing buildings to scale, along with figurines, can help us determine the scale of real life objects. Determining scale can help us analyze why some things are larger than others, for instance monuments. Why would the Lincoln monument be larger than the Jefferson, and what does that say about our views (or the creators views) about the subject? Life size objects can show true size that are often distorted or masked when never seen in person, like the Mona Lisa, for example, which is remarkably small.
Preserving rare, fragile, or expensive artifacts has obvious benefits in that it keeps things from getting lost, broken or stolen. 3D historical prints also put physical objects in the hands of students, especially those who might never have the opportunity to handle a real civil war cannonball, a Roman sword, a model of the Antikythera Mechanism, or a scale model of the Titanic. A physical object also offers the additional learning opportunity of tactile feedback over images in a book or on screen.
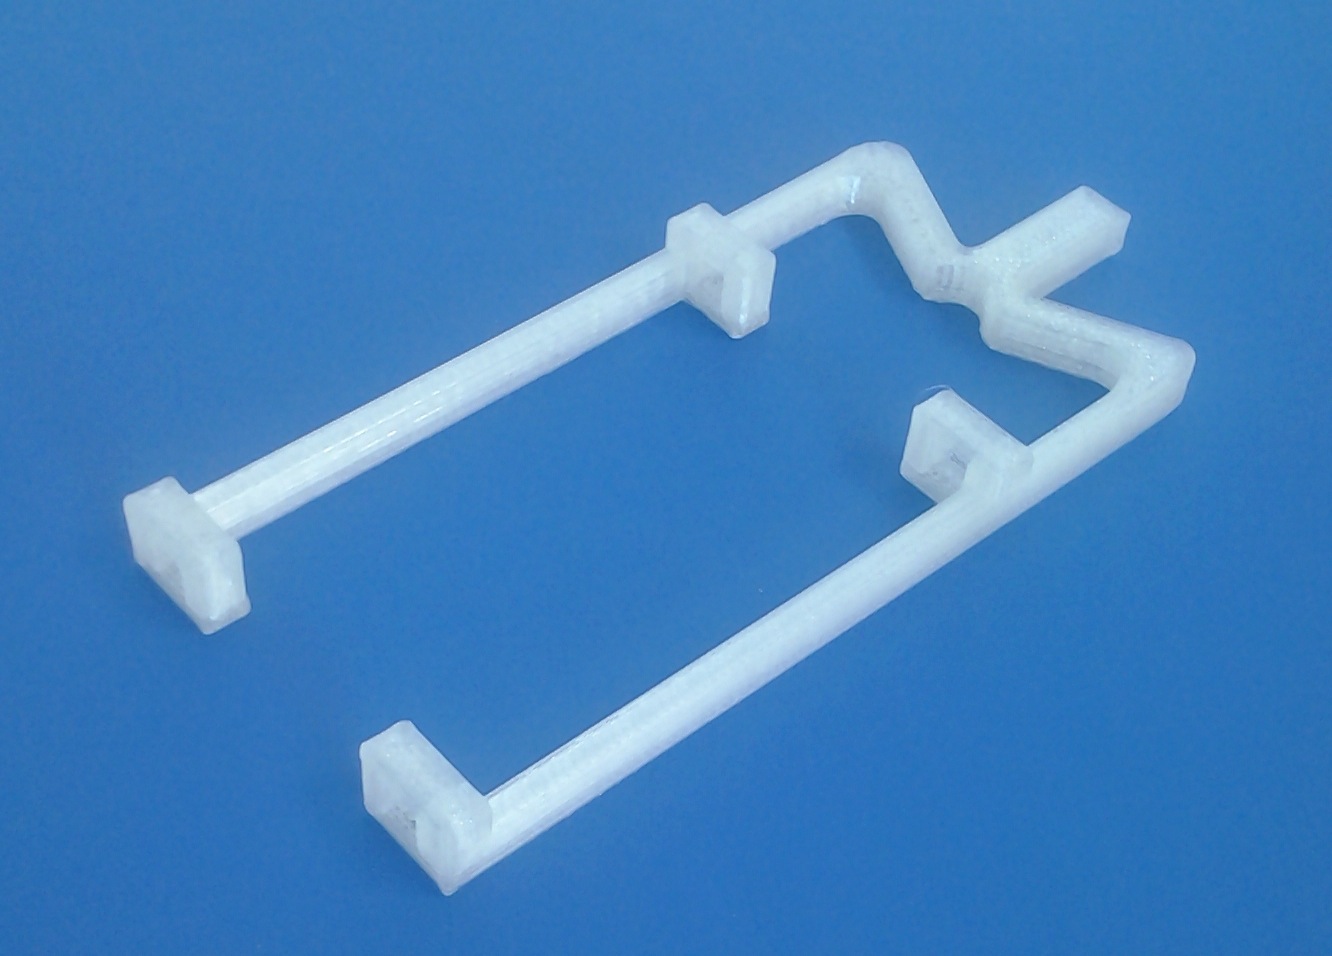
Chopstick holder.
3D printing also offers the opportunity to create inventions that may never have made it into production, such as those from old patents. We even got to look at one, a chop-stick holder from 1967.
Using a 3D printer and associated hardware and software in a history classroom provides yet another opportunity to combine multiple disciplines in an educational atmosphere. Everybody benefits when science, engineering, math, technology and the humanities combine (as was noted about a high school class that built a trebuchet).
We also talked about the ramifications of 3D printing on the future. Interestingly, similar issues that have voiced throughout history to the introduction of new technology, were also raised during the discussion. What happens when we move production of items back to the individual and away from factories? How do we cope with the replacement of humans by technology?
At present, the cost to own a printer in your home is still a bit much, but definitely within reach. Three different printers range from $800 (the do-it-yourself RepRap) to $2500 (Makerbot Replicator 2), with a middle priced option by Cubify at $1500. Filament, the plastic line used to create objects, costs around $50 a spool.
Not quite the same feeling and fun as a road trip, but fun enough.
Yeah, archive work! Yeah, Germany! Yeah, yeah archive work in Germany! So I just spent the last two weeks in Germany (by myself, not so yeah) doing some archival research for the dissertation. Here are some thoughts on the trip.
1. Internet!
The Starbucks with Internet… saved my bacon.
Make sure you have a good internet connection where you will stay. I booked a decent hotel with Internet included, and free breakfast. The only problem is, the connection to the Internet is spotty at best. I have to get a new user/pass combination to connect to the Internet every 24 hours, too. It’s so frustrating to want to communicate, but not be able to. Especially when you’re trying to get in touch with family back home. So, do some research and hope you get lucky. Also, it is important to know any quirks about the Internet in the country you go to, if going out side of the USA. In Germany, they use 13 channels for their routers, in the USA we only use 11. So if your place of stay uses channel 12 or 13, you’re almost out of luck. You can pick up a relatively cheap USB wireless adapter in the country that should get you all of their available channels. But you will most likely have to find some place with Internet to download software. Enter in the great Internet hubs scattered throughout the world: Starbucks and McDonalds! Even BurgerKing has Internet available. Find out where they are and use them.
2. This is only a test.
Getting ready for Christmas!
Don’t get your hopes up too high for your first trip. I kind of went on this trip with the attitude that it would be a test run of a later real trip. This was possible because I know that I’m coming back in a few months. If you don’t know if you’ll ever go back, then you need to do a lot of background research and contacting before hand. I had scheduled to go to the archive Tuesday through Friday the first week and Monday through Thursday the second week. The first day ended up being a get settled day; exchanging money, finding my way around, finding the Starbucks for Internet, etc. It often felt like I was wasting time, but if you know you are going to go back, then it is time well spent to get your bearings and figure things out. I lived in Germany for two years, but that was a life time ago (like 15 years ago). So I am a bit rusty on speaking German, and German customs, and such. Luckily that mostly all came back easily.
3. Talk to me.
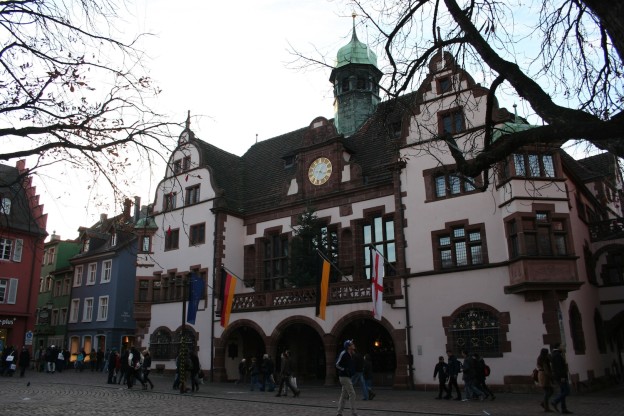
A house divided… will make a good restaurant.
Talk with your contacts before leaving home. Or email them. Let them know exactly what you want to do, what you want to research, where you are going to look, etc. They can save you lots of time. I had one contact at the University of Freiburg, Professor Ulricht Herbert. I met with him twice, and he gave me sound advice. I should have emailed him more often before hand, but nothing really beats face to face contact anyway. My one contact here has turned into two or three. He also helped me realize I am trying to do too much in my dissertation. As it stands, its really a life’s work project. Going through the sources helped me understand that too. There is just way too much for me to be able to grasp it in two years time (my goal). Instead, I’m going to scale back and only cover one tunnel project, and cover that in depth. The reason there is no all encompassing history about the underground projects from World War II is because it was a huge project. Basically the whole of the German economy was turned to focus on these projects towards the end of the War. There is just too much to understand, too many documents to go through, and too much to grasp before this history can be written. That’s why nobody has done it, yet. It would take lots of financing and lots of time. Dr. Herbert suggested four years of work, but only after I had perfect understanding of German, have read all that has been written on the subject so far, and had an intimate grasp of Germany in World War II. That ain’t gonna happen in two years when I have a full-time job, a family, and no financial support. Perhaps that will be my ongoing project as a professor…
4. I’ll make a note of that…
Hotel Schemmer. Home away from home.
Figure out a good note taking routine. I have several hundred documents digitized from another archive already, and figured out a good naming scheme for them. I have a spread sheet for taking notes on each file, and for later import into Omeka for an online archive. This time around was a little different. The Bundesarchiv-Militärarchiv in Freiburg had lots of documents for me to go through. Whereas before it was one collection/folder in one archive, I now had many collections/folders in one archive. So I had to figure out something a little different. I also didn’t have enough money to make digital copies of any of the records I found. It turned out that I didn’t need to make any, but that should be budgeted and planned for as well. There were a handful of documents that I wanted copies of, so I just transcribed them into a word processing document. I thought about making them plain text documents, but ran into a few formatting issues. I chose to make them LibreOffice (OpenOffice) Text documents, because there will always be a program that can open those, and that program is free. Of course, any program nowadays can open Microsoft Word documents, too, and there is no fancy formatting, so that would work fine too. One of my greatest struggles so far is keeping the documents in place chronologically. So my naming scheme for the files takes care of that. Start the name of the file with the year, then month number, then day number (YYYY-MM-DD), and the documents sort themselves! The file viewer (File Explorer for Windows or Finder for Macs) will usually sort by alphabet, so there’s nothing to it. Another thing I did was to go through the documents as quickly as I could. If It looked like it was helpful, I jotted notes about it, or quickly transcribed it. I will be able to go through the notes and transcriptions later to make sense out of them. That leads into the next point.
5. Plan it right.
Trolly going through the tunnel.
Leave a day on either end for miscellaneous things. I unintentionally had a whole day with nothing to do. I was finished with the archives on Wednesday, and didn’t need to leave until Friday. That left me with the whole day on Thursday to tie things up and get ready to leave. I did some laundry, packed my bags and wrote this. It’s also a good time to go through the notes to make sure you don’t forget anything.
6. Enjoy!
The final tip is to just enjoy the time. If you’re in a foreign country, take a day to go see the sights. I had a weekend where the archive was not even open, so I spent the day walking around the awesome Altstadt (the oldest part of town, buildings from the 1400’s!). If you have funding for your trip, just think, who else gets paid to go look at old documents. Man, history is great! 🙂
…copy somebody’s code. Or at least your own from the past that works.
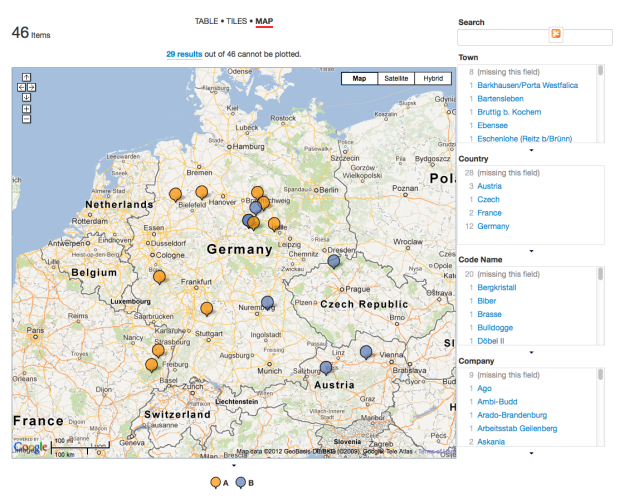
I finally got the map to work for my Exhibit exhibit. See.
First I copied the tutorial here. When that was working, I carefully copied it to the file I wanted it to be in and… nothing. Still broken.
So next I commented out all extraneous stuff, and finally got it to work. Now came the fun part of tracking down what code was making my awesome map look like nothing. I narrowed it down to something within the <header> tag. So line by line I uncommented and tested until I tracked the issue down to the bootstrap.css file I was using.
Then came the same process within the bootstrap.css file. It was easily 1000 lines long, so a line by line process wasn’t going to work. Instead I commented out the first have of the file. Bing, the map displayed, so it was somewhere within that first 500 lines. Then I commented out the first 250 lines. Bing again. I kept dividing the culprits in half until I narrowed it down to styles for the img tag. Commented those out and I was in business.
Through that grueling process I lost the images of the documents on the first page. Now I have to figure out how to get those back, apply some styling and we’re all set.
Unfortunately I wasn’t ever able to get it to pull in the data from a spreadsheet, so the JSON file will have to do. The process for making a JSON file from a spreadsheet is simple:
1. Make the spreadsheet file so that the headers are encapsulated with curly braces ‘{ }’
2. If you’re using Google spreadsheets, export it as an Excel file. You’ll have to open it in Excel and save it as an older file format, because the next step doesn’t like .xlsx.
Believe it or not, this was my first ever THATCamp experience. Seems hard to imagine since I have worked at CHNM since before the inception of THATCamp. Ah, well, the stars finally aligned, and was able to attend this year. And it was great.
I attended three workshops on Friday, and a couple of sessions on Saturday. Here are some thoughts…
Digital Data Mining with Weka: This was a neat crash course on what data mining is and is not, and one free tool to help do some of that. It was more of a “here’s what’s out there, how does it apply to the humanities” than a hands on, hands dirty, do some real work type of work shop. But it was good in that it opened up the possibility to do some data mining in the future. Since they were relatively small, here my notes:
What is data mining?
examples:
recommend ads, products to users based on purchases
finding patterns in large amounts of text (writing algorithms to find those patterns)
Goal of data mining is to predict what users/people will do based on data from other users/people
Data mining Tasks: classification, clustering, association rule discovery, sequential pattern discovery, regression, deviation detection
Goal is to predict the classification (or whatever) of future data, based on the current data that you analyze.
Cross validation (when done correctly you get true results, when not done correctly you get false results)
have multiple sets of data, one for training and the other for testing. Build the algorithm on the training data, then run it on the test. Then cycle through each testing data set and have it act as a training set. Do this way because you know the results for each, so you can tell if your algorithm is correct. When it’s good then you can use it on future data where you don’t know the result.
Interesting Things You Can Do With Git: This one was highly anticipated. I have been wanting/needing to learn git for a while now. For being in the IT field, having written some code, and even having a GitHub account with code on it, I’m ashamed to say I still don’t know how to use git effectively. There is not much you can do in 1.5 hours, and this was more a theoretical “here are some ideas”, than a “here is how to do it” approach.
The session on using blogs as assignments was maybe a bit premature for me. The session was really good, great ideas, tips, etc. But me teaching is still too far away for me to have put the mental effort in to following along much. I spent most of the time trying to find a good twitter client, but in the end just stuck with Adium.
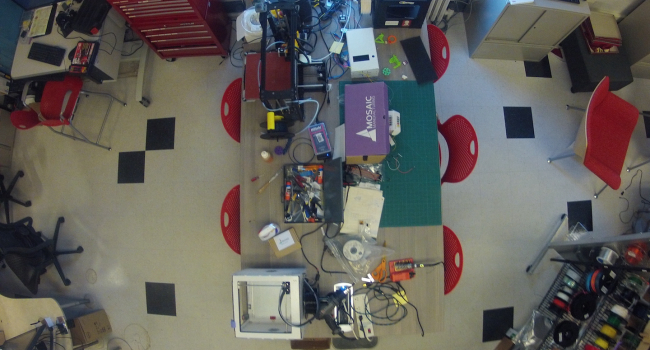
Then I took some time to enjoy the hacker space. I decided it was time, and this was the perfect place to set up a transcription tool for my dissertation archive. So sitting at the very table where it is coded, I installed the Scripto plugin for Omeka. That’s a bit of a misnomer, since it is really a wrapper that lets Omeka and a Wikimedia install play nicely together. I went ahead and transcribed one of the documents in the archive as well. The archive is just in the testing phase, but here it is anyways: http://nazitunnels.org/archive
Nazi Tunnels Archive
The final event of THATCamp for me was one last session proposed by a fellow “camper”. She wanted help learning about the shell/terminal/command line. So I volunteered to help out with that. It ended up that there were about eight people that wanted help learning the command line, and four of us that knew what we were doing. So it ended up being a great ratio of help needed to those who could offer it. We started with the very basics, didn’t get much past a few commands (ls, cd, rm, nano, grep, cat), but we went slow enough that everybody who was trying to follow along was able to, and they all left with a clearer understanding of what the shell is for, and why it is useful. The proposer found a great tutorial/book for learning the command line that I’ll have to go through as well. You can always learn something new.
What was also great about that session, since it was basically ran by those who needed the help, I saw how those who struggle with these concepts learn them, so I will hopefully be better able to teach them to others in the future.
UPDATE: I forgot to mention the many cool sites and projects mentioned during Saturday morning’s Dork Shorts. Here’s a list of the ones I took notice of.
Scrivener is awesome software for writing, that I’ve mentioned before, but I had yet to really test out the integration with Zotero (my citation manager of choice). So now that I have finally started on my dissertation writing in earnest (and not grant writing), I needed to make sure that footnotes are usable in my work flow. So this is a quick write up of the tools I will use in writing my dissertation, and how I will use them.
The Tools
LibreOffice: Free and Open Source document software. Who knows how long I will have access to free Microsoft Word? LibreOffice (the fork of OpenOffice) will always be free and freely available. The steps will be basically the same if you are using Microsoft Word, just substitute that program for LibreOffice when it comes to it.
Zotero: I’m certainly biased, but Zotero is the greatest citation management software evar! Also free and open source. I’m using the stand alone version, but you can use the Firefox extension as well. Should work the same.
Scrivener: The greatest writing software I’ve seen. So good I even paid for it. I don’t usually do that with software (as you can see, I like free and open source).
The Process
Here I will try to outline the process I found that will save footnotes from existing documents into Scrivener, and Scrivener created footnotes into exported documents. From there, it’s easy to create Zotero connected footnotes.
1. Copy existing documents with footnotes into Scrivener
Copy from LibreOffice
The first issue to run across is to put your existing documents into scrivener. I wrote a paper for Hist 811 that is basically the bulk of Chapter 1 and Chapter 2 of the dissertation. It’s needs some finessing in order to fit in the dissertation. It would be a shame to lose the footnotes, which is what happens if you just use Scrivener’s import file process. This is an easy fix. Just copy the text from your document and paste it into a Scrivener text area.
Then with your Scrivener project open, create a new text area, or select an existing one, which ever, and paste it in. Nothing special there.
2. Create new footnotes in Scrivener
See how Scrivener makes a footnote!
What is special, though is what Scrivener does with that footnote. See there, footnote number 20, right after the quote about the cocktail of causes and rearmament being one of the ingredients? Now in Scrivener we have the word “ingredient” highlighted and underlined, and on the right side of the Scrivener window, there is a new footnote with all of the content of the original footnote. Sweet!
Easy as Format->Footnote, or use the shorcut keys Ctrl-Cmd-8
That’s all well and good. What if we want to edit the text a little bit, add some good stuff and add another footnote in there? What do we do? Well, Scrivener has a way to add a footnote. Just highlight some text (the footnote will be inserted after the last word), and go to the Format menu and select Footnote. Or you can use the fancy shortcut keys, for faster typing and footnote inserting, Ctrl-Cmd-8 (⌃⌘8).
Look, Ma! A new footnote!
Now you have a new, blank, footnote area to put a footnote reverence in.
Select the reference in Zotero and drag it into the footnote box in Scrivener.
Zotero makes it easy to put the reference in that new empty footnote with drag and drop citations. Just pull up your Zotero (either from Firefox, or if you have the standalone version). Select the reference you want, and drag it into the empty footnote section.
3. Moving from Scrivener to a document, and keeping your footnotes!
So, ideally, you would be able to export your text document, and all of these lovely footnotes you have made in Scrivener, using Zotero, would just magically work in a Word or LibreOffice document. It doesn’t, yet (or ever?). So here is how to get your footnotes into a document, and then get those footnotes to be Zotero enabled.
Srivener->File->Export->Files
First, you export your Scrivener document to RTF format.
Select RTF format
Select the plain RTF format, and the first check box for only the selected files (although, you could un check this if you want to do all of your files at once. No other check boxes are needed. Then just hit the Export button.
Open it up with your favorite document program, LibreOffice or Word.
Next, you will want to open your new RTF document in LibreOffice (or Word if you’re using that program).
All my citations are in the house!
You will notice that all of your footnotes are in this file. Yeah! Sometimes the text had odd font sizes and styles. So a quick ‘Select All’ and change it to default style and Times New Roman, 12 pt should fix that right up. Now here is the labor intensive part. For each footnote, we’re going to have to recreate it so that it is handled by Zotero. Then we’ll delete the original footnote. It would be nice of Scrivener could export the footnotes in a way that Zotero could detect them, but alas it is not to be.
Now you add a citation through the zotero buttons to make a zotero-aware citation.
All my citations are in the house!
Insert a Zotero citation using the Zotero buttons in your document program’s menu bar.
I prefer the Zotero classic view.
The new citation find view is pretty slick, though.
You can add pages with a coma, space, number.
Now you have two citations.
With two citations in the document, you’ll need to delete the one that was not made by zotero.
Just make sure you delete the non-zotero aware citation. The Zotero citation is usually highlighted.
Now you can save the document as a different file format: odt, doc, docx
Now save the document as an ODT document. If it is saved as anything else, it will not be Zotero aware.
Take your pick of file types.
Save as the correct file format if you want Zotero to be able to edit them again.
One alternative method is to create footnotes in Scrivener using the format {Author, Year, Page#}. Then export as an RTF document as before. Then, in Zotero, use the ‘RTF Scan’ tool in the Preferences menu. Zotero will see all of the citations and replace them nicely with formatted citations (using Ibid. and short notation for repeat books, and such). Zotero will not be aware of these citations at all, so if you need them to be Zotero aware, you might as well use the steps outlined above. If you do not expect to update citations or the text once done in Scrivener, then this may be the easiest way to go.
Now I can happily transfer existing documents into Scrivener and save the footnotes!
I recently finished writing and rewriting and writing again the essays for several scholarship applications. It is probably a good thing, but that was the most time and effort I have ever spent writing three pages of text. I went through several revisions of each essay, had the wonderful Fulbright advisers at George Mason read and reread the essays, and even went to the vastly underused (by me anyways) campus writing center.
Roughing it out
My personal essay started out as being a little too personal, as in informal. At the writing center, I also realized that the opening paragraph was too negative. I wanted to show how as a child I deeply disliked school. In first and second grades, in order to avoid going to school I would often hide in the backyard or somewhere in the house, and generally make a big stink every morning. One time my mom drove me to school (two blocks away) and when we got there I jumped out of the car and ran off into the neighborhood for an hour or so. The rest of elementary school through high school was better; I did not put up as much of a stink, but I still did not like school. I was convinced that I would never have anything to do with school again once I graduated from high school. That’s how my essay started out, a general idea of what I wanted to write about. Like a big block of stone that I hacked away at.
Adding Detail
I wanted to convey all of that in a couple of sentences, all to point to the irony that I am now pursuing the highest degree one can attain in school, and that I am still in school 16 years later, with another three years to go (I did have three years off in there, though). But the gal at the writing center was right. It was a bit too negative. Instead I focused on my strengths as an historian and my technical skills. This worked out much better, since this is one of the major focuses of the dissertation. Through this constant revision and insight from others my project started to take shape.
Finishing
One of the other really neat things about spending so much effort on an essay (especially one about my dissertation research) is that I was really able to focus my arguments and tighten up my thoughts on what I hope to accomplish. Through this process of constant revision I realized three things that I wanted to focus on in my dissertation: the story of the underground dispersal projects; how the projects are memorialized or not, and what that says about Vergangenheitsbewältigung; and an argument for the change in what is considered scholarship in the historical profession. Going through the constant revisions has changed my focus in some small ways from my original proposal in the dissertation prospectus, but that is to be expected. I feel that I now have a much more polished and obtainable goal.


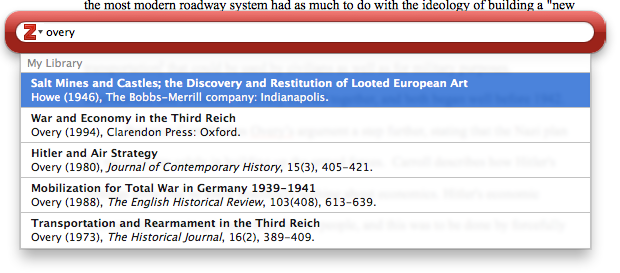
 Zotero
 Scrivener