JS Pagination

Sometimes the seemingly long way round is actually the quickest way. I recently had a project at work that returned a bunch of results from a Solr database. The results are processed by Javascript and written to the page. The original page I was recreating had paginated results (10 results to a page). I thought it would be too much work to get that written into the page, and wanted to just let the JavaScript write all the results to the page. Unfortunately, this meant some queries took up to a full 30 seconds to load! That’s an eternity for the web!

After playing with the settings and different ways of writing the results to the page I finally decided to just implement pagination. I thought it would take forever. It took a few hours…

The trick is to complete the process in two steps.

Step 1) create a function that returns an array of page numbers based on the number of results, the desired number of results per page, and the current page being viewed.

Step 2) create a function that turns the array from the previous function into a bunch of links.

Here is the result:

See the Pen JS Pagination by Ammon Shepherd (@ammonshepherd) on CodePen.

The GitHub repo is here: https://github.com/ammonshepherd/js-pagination

There are two functions, pagination() and buildPagination().

pagination()

pagination() returns an array of page numbers between one (1) and a given end number, returning a maximum of 10 numbers, with missing ranges replaced with elipses (which are included in the maximum return count). A ‘current page’ is supplied, and the current page number is surrounded by the two sequential numbers before and after.

The number of numbers to return is determined by the total number of results to expect divided by the number of results to display per page. This is further affected by the current page displayed. Possible outcomes of the function could look like so:

[1, 2, 3, 4, 5, 6, 7, '...', 44, 45]        // 1-7 is the current page
[1, 2, 3, '...', 7, 8, 9, 10, 11, 12]       // 2 is the current page
[1, 2, '...', 10, 11, 12, '...', 44, 45]    // 8-39 is the current page
[1, 2, '...', 33, 34, 35, 36, 37, 38, 39]   // 33-39 is the current page

The function takes three parameters:

  • total_results (Required: The total number of results to expect, the end number.)
  • start_number (Required: The value/start number of the page currently displayed.)
  • results_page (Optional: The number of results to show for each page. Defaults to 10.)

The function returns an array containing the range numbers that can be turned into links..

This code is modified from this FreeCodeCamp article.

buildPagination()

buildPagination() takes in a number (the total number of results returned from what ever search query you ran), and builds the HTML for the page numbers and links using the pagination() function.

Usage

To use these functions, call the buildPagination() function on page load, and put a script tag in the HTML page where it should be used. It should go at the bottom of the HTML page. In the code below, "200" is where you can put the total number of results returned from the search query.

<html>
<head>
<head>
<body onload="buildPagination(200);">
...
<script src="pagination.js" type="text/javascript"></script>
</body>
</html>

You can change three variables in the pagination.js file (located at the top of the file):

  • RESULTS_PER_PAGE = how many results per page you want to show. The default is ten (10).
  • SEARCH_RESULTS = the ID of the HTML element to use for displaying the search results. This is only used to display text when zero is passed to the buildPagination() function. You should probably have something in place to deal with zero results from a search query before you use this function.
  • PAGINATE = the ID of the HTML element to use for displaying the pagination HTML.

You can also call the buildPagination() function from a JavaScript file and feed the total number of results in dynamically.
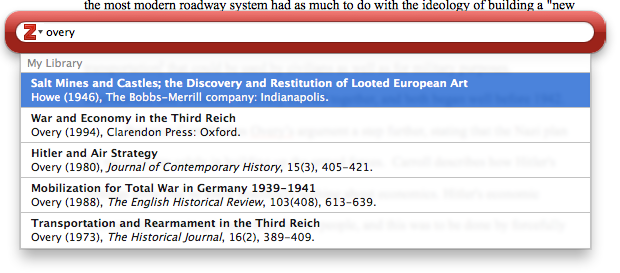
Make the BEST of each day!

We’ve been introducing this idea of setting BEST goals to our kids, and they want a way to track it. So I whipped up this sheet to track two months of BEST goals.

Just write your goals on the right side of the calendar. Remember,

B = brain

E = exercise

S = spiritual

T = talent

Then track each day by writing in a B, E, S, or T if you worked on that goal. Simple, easy, progress!

History Lab: rethinking the Western Civ course

So, I finally get to teach a college course this semester. Way excited! But I refuse to do the normal lecture format. Seriously, we are still stuck on that teaching method after all the research and scholarship about the best ways to teach? (These all came up as results for searching in Google Scholar with the terms “how students learn” and “scholarship of teaching and learning”, which returned over 3.7 million results.)

Screen Shot 2013-09-06 at 12.38.57 PM
over 600,000 results for “scholarship of teaching and learning” on Google Scholar

Screen Shot 2013-09-06 at 12.07.19 PM
Over 3 million hits for “how students learn” on Google Scholar. You’d think we would know how students learn by now…

I still believe the “learning pyramid” has merit despite it’s obvious over-generalizations and fabricated percentages. Lecturing has it’s place, but not in my class room. If anything, I want to be less boring. 🙂

Apparently false learning pyramid, created by me.

So, I got to thinking, what format do I want to use for my Monday-Wednesday-Friday, History 100 Western Civilization class? I landed on a discussion based lecture format for Monday and Wednesday, and what I’m calling a History Lab for Friday. The sciences have this same format. Lecture on two days a week, then go to a lab where you practice what was preached. I figured we could do the same thing with critical thinking skills taught by the humanities. Monday and Wednesday will be a bit of me talking about the time period, with a healthy dose of questions and comments from the students based on the reading they have done. Then on Friday we have a History Lab where we critically examine a primary document from the time period we are learning about. I’m open to other ideas on what to do during the History Lab. I’m excited to see if any students offer suggestions.

Popsicle sticks!
Popsicle sticks!

Today was our first History Lab, and it went very well, I think. I will get the students opinion on Monday, to make this exercise an all around learning experience. For today’s History Lab I divided the students into groups of five (any more than that gets a bit unmanageable). They each picked a popsicle stick I had in a cup at the front of the desk. There were five popsicle sticks with the same color, but a different “filter” written on each of the five sticks. The filters are the biases, or lenses through which to look at history. They included race, gender, science/technology, social class, art, religion, and politics/government. After the students organize into groups, I give them a primary source document to read together, then discuss the document based on the filter that they have. After enough time to allow individual groups to discuss, we discuss altogether as a class. To track participation, attendance and provide accountability, each group had to write a summary of their discussion on the back of the paper, including their names and which filter they had, to be turned in at the end of class.

This seemed to work out pretty well, and the students had great comments. We looked at “The Spartan Creed”, a poem written by Tyrtaeus in the 7th Century B.C. (unfortunately no reliable source found, just this post in a forum). The most noticeable thing about this document is how heavily male centric it is. Granted, it’s a man writing about war, but there is absolutely no mention of a female. It can be implied by the use of the word “children”, but no fighting for the protection of wife and family, just city and children. Here are some of the comments the students made on their papers for a few of the filters.

2013-09-06 10.23.17
Directions are an absolute necessity for group work to function well.

Gender: Men are dominant, only men are warriors. No reference to women. The society was very male dominated. Women had no role in the Spartan military, so the code is less relevant to them. Females are not even mentioned in the creed, so men are obviously the dominant gender. Among the men, they are expected to be strong, courageous, honorable, every trait that makes them a mighty soldier, a protector of their city-state.

Art: War is their art, the structure of their army, how they fought, etc. It doesn’t specifically say anything about art, but the way this is written is a form of art and the way the author makes out a man to be is like a piece of art.

Religion: War was treated as a religion. Soldiers were treated as gods when they returned. In death, a Spartan man becomes immortal as his memory is honored as if he is a god. To understand this one must know that in his life he was worshiped for being a good fighter and so that is carried over in a glorious death. Religion and personal values seem to all be related to war; gods are mentioned but the creed is centered around the personal honor of a warrior.

I was pleased with the results. All of the students were engaged in the group work and came up with something intelligent to write about. The beauty of this model is that each student has a focused purpose to look at a historical document, and then is held accountable for sharing something.

Do you have ideas for what we can do in our History Lab? Leave a comment below, and I’ll give it a try!

[Post image from Wikimedia Commons: Glass containers, experimental magnifiers and chemical or alchemy paraphernalia in the Lavoisier Lab 1775 by Jorge Royan. http://commons.wikimedia.org/wiki/File:Munich_-_Deutsches_Museum_-_07-9631.jpg]

3D printing in the field of history

I was asked to lead a discussion on the current status of 3D printing in the humanities, particularly the field of history with a great group of fellow PhD students here at GMU during one of their classes.

Here is what we came up with.

First of all, 3D printing (in general, but specifically for history) can be summarized by the following formula.

3D printing for history now = HTML for history in the early 1990's

2013-08-27 14.01.13
A replica of the Antikythera Machine, a 1 BCE clockwork device discovered on a shipwreck near Greece in the early 1900’s.

There is much that can be done, but using a 3D printer for historical research, study, learning, etc, is still very much in a nascent stage. So the question are, what can be done with 3D printing and how does it help us learn about history? We came up with a few ideas.

First, what can we print with a 3D printer? The limits are just about endless, as long as then are condensed to a 5-inch x 11-inch x 12-inch box.

The bigger question is what do 3D printed objects help us learn about history? Here we had some good ideas. Printing buildings to scale, along with figurines, can help us determine the scale of real life objects. Determining scale can help us analyze why some things are larger than others, for instance monuments. Why would the Lincoln monument be larger than the Jefferson, and what does that say about our views (or the creators views) about the subject? Life size objects can show true size that are often distorted or masked when never seen in person, like the Mona Lisa, for example, which is remarkably small.

Preserving rare, fragile, or expensive artifacts has obvious benefits in that it keeps things from getting lost, broken or stolen. 3D historical prints also put physical objects in the hands of students, especially those who might never have the opportunity to handle a real civil war cannonball, a Roman sword, a model of the Antikythera Mechanism, or a scale model of the Titanic. A physical object also offers the additional learning opportunity of tactile feedback over images in a book or on screen.

2013-08-27 14.01.01
Chopstick holder.

3D printing also offers the opportunity to create inventions that may never have made it into production, such as those from old patents. We even got to look at one, a chop-stick holder from 1967.

Using a 3D printer and associated hardware and software in a history classroom provides yet another opportunity to combine multiple disciplines in an educational atmosphere. Everybody benefits when science, engineering, math, technology and the humanities combine (as was noted about a high school class that built a trebuchet).

We also talked about the ramifications of 3D printing on the future. Interestingly, similar issues that have voiced throughout history to the introduction of new technology, were also raised during the discussion. What happens when we move production of items back to the individual and away from factories? How do we cope with the replacement of humans by technology?

At present, the cost to own a printer in your home is still a bit much, but definitely within reach. Three different printers range from $800 (the do-it-yourself RepRap) to $2500 (Makerbot Replicator 2), with a middle priced option by Cubify at $1500. Filament, the plastic line used to create objects, costs around $50 a spool.

Items printed:

http://www.thingiverse.com/thing:22849 – chopstick holder

http://www.thingiverse.com/thing:32413 – Antikythera machine

Have an idea how 3D printers can be used in education? Add a comment below.

Research Trip!

Not quite the same feeling and fun as a road trip, but fun enough.
Yeah, archive work! Yeah, Germany! Yeah, yeah archive work in Germany! So I just spent the last two weeks in Germany (by myself, not so yeah) doing some archival research for the dissertation. Here are some thoughts on the trip.

1. Internet!

Starbucks
The Starbucks with Internet… saved my bacon.

Make sure you have a good internet connection where you will stay. I booked a decent hotel with Internet included, and free breakfast. The only problem is, the connection to the Internet is spotty at best. I have to get a new user/pass combination to connect to the Internet every 24 hours, too. It’s so frustrating to want to communicate, but not be able to. Especially when you’re trying to get in touch with family back home. So, do some research and hope you get lucky. Also, it is important to know any quirks about the Internet in the country you go to, if going out side of the USA. In Germany, they use 13 channels for their routers, in the USA we only use 11. So if your place of stay uses channel 12 or 13, you’re almost out of luck. You can pick up a relatively cheap USB wireless adapter in the country that should get you all of their available channels. But you will most likely have to find some place with Internet to download software. Enter in the great Internet hubs scattered throughout the world: Starbucks and McDonalds! Even BurgerKing has Internet available. Find out where they are and use them.


2. This is only a test.

weinachtsmarkt
Getting ready for Christmas!

Don’t get your hopes up too high for your first trip. I kind of went on this trip with the attitude that it would be a test run of a later real trip. This was possible because I know that I’m coming back in a few months. If you don’t know if you’ll ever go back, then you need to do a lot of background research and contacting before hand. I had scheduled to go to the archive Tuesday through Friday the first week and Monday through Thursday the second week. The first day ended up being a get settled day; exchanging money, finding my way around, finding the Starbucks for Internet, etc. It often felt like I was wasting time, but if you know you are going to go back, then it is time well spent to get your bearings and figure things out. I lived in Germany for two years, but that was a life time ago (like 15 years ago). So I am a bit rusty on speaking German, and German customs, and such. Luckily that mostly all came back easily.

3. Talk to me.

Divided
A house divided… will make a good restaurant.

Talk with your contacts before leaving home. Or email them. Let them know exactly what you want to do, what you want to research, where you are going to look, etc. They can save you lots of time. I had one contact at the University of Freiburg, Professor Ulricht Herbert. I met with him twice, and he gave me sound advice. I should have emailed him more often before hand, but nothing really beats face to face contact anyway. My one contact here has turned into two or three. He also helped me realize I am trying to do too much in my dissertation. As it stands, its really a life’s work project. Going through the sources helped me understand that too. There is just way too much for me to be able to grasp it in two years time (my goal). Instead, I’m going to scale back and only cover one tunnel project, and cover that in depth. The reason there is no all encompassing history about the underground projects from World War II is because it was a huge project. Basically the whole of the German economy was turned to focus on these projects towards the end of the War. There is just too much to understand, too many documents to go through, and too much to grasp before this history can be written. That’s why nobody has done it, yet. It would take lots of financing and lots of time. Dr. Herbert suggested four years of work, but only after I had perfect understanding of German, have read all that has been written on the subject so far, and had an intimate grasp of Germany in World War II. That ain’t gonna happen in two years when I have a full-time job, a family, and no financial support. Perhaps that will be my ongoing project as a professor…


4. I’ll make a note of that…

Schemmer
Hotel Schemmer. Home away from home.

Figure out a good note taking routine. I have several hundred documents digitized from another archive already, and figured out a good naming scheme for them. I have a spread sheet for taking notes on each file, and for later import into Omeka for an online archive. This time around was a little different. The Bundesarchiv-Militärarchiv in Freiburg had lots of documents for me to go through. Whereas before it was one collection/folder in one archive, I now had many collections/folders in one archive. So I had to figure out something a little different. I also didn’t have enough money to make digital copies of any of the records I found. It turned out that I didn’t need to make any, but that should be budgeted and planned for as well. There were a handful of documents that I wanted copies of, so I just transcribed them into a word processing document. I thought about making them plain text documents, but ran into a few formatting issues. I chose to make them LibreOffice (OpenOffice) Text documents, because there will always be a program that can open those, and that program is free. Of course, any program nowadays can open Microsoft Word documents, too, and there is no fancy formatting, so that would work fine too. One of my greatest struggles so far is keeping the documents in place chronologically. So my naming scheme for the files takes care of that. Start the name of the file with the year, then month number, then day number (YYYY-MM-DD), and the documents sort themselves! The file viewer (File Explorer for Windows or Finder for Macs) will usually sort by alphabet, so there’s nothing to it. Another thing I did was to go through the documents as quickly as I could. If It looked like it was helpful, I jotted notes about it, or quickly transcribed it. I will be able to go through the notes and transcriptions later to make sense out of them. That leads into the next point.

5. Plan it right.

Trolly
Trolly going through the tunnel.

Leave a day on either end for miscellaneous things. I unintentionally had a whole day with nothing to do. I was finished with the archives on Wednesday, and didn’t need to leave until Friday. That left me with the whole day on Thursday to tie things up and get ready to leave. I did some laundry, packed my bags and wrote this. It’s also a good time to go through the notes to make sure you don’t forget anything.

6. Enjoy!

The final tip is to just enjoy the time. If you’re in a foreign country, take a day to go see the sights. I had a weekend where the archive was not even open, so I spent the day walking around the awesome Altstadt (the oldest part of town, buildings from the 1400’s!). If you have funding for your trip, just think, who else gets paid to go look at old documents. Man, history is great! 🙂

Scrivener and Zotero

Scrivener is awesome software for writing, that I’ve mentioned before, but I had yet to really test out the integration with Zotero (my citation manager of choice). So now that I have finally started on my dissertation writing in earnest (and not grant writing), I needed to make sure that footnotes are usable in my work flow. So this is a quick write up of the tools I will use in writing my dissertation, and how I will use them.

The Tools

LibreOffice: Free and Open Source document software. Who knows how long I will have access to free Microsoft Word? LibreOffice (the fork of OpenOffice) will always be free and freely available. The steps will be basically the same if you are using Microsoft Word, just substitute that program for LibreOffice when it comes to it.


Zotero: I’m certainly biased, but Zotero is the greatest citation management software evar! Also free and open source. I’m using the stand alone version, but you can use the Firefox extension as well. Should work the same.


Scrivener: The greatest writing software I’ve seen. So good I even paid for it. I don’t usually do that with software (as you can see, I like free and open source).


The Process

Here I will try to outline the process I found that will save footnotes from existing documents into Scrivener, and Scrivener created footnotes into exported documents. From there, it’s easy to create Zotero connected footnotes.

1. Copy existing documents with footnotes into Scrivener

Copy from LibreOffice

The first issue to run across is to put your existing documents into scrivener. I wrote a paper for Hist 811 that is basically the bulk of Chapter 1 and Chapter 2 of the dissertation. It’s needs some finessing in order to fit in the dissertation. It would be a shame to lose the footnotes, which is what happens if you just use Scrivener’s import file process. This is an easy fix. Just copy the text from your document and paste it into a Scrivener text area.

Then with your Scrivener project open, create a new text area, or select an existing one, which ever, and paste it in. Nothing special there.


2. Create new footnotes in Scrivener

Scrivener makes a Footnote
See how Scrivener makes a footnote!

What is special, though is what Scrivener does with that footnote. See there, footnote number 20, right after the quote about the cocktail of causes and rearmament being one of the ingredients? Now in Scrivener we have the word “ingredient” highlighted and underlined, and on the right side of the Scrivener window, there is a new footnote with all of the content of the original footnote. Sweet!


Easy as Format->Footnote, or use the shorcut keys Ctrl-Cmd-8

That’s all well and good. What if we want to edit the text a little bit, add some good stuff and add another footnote in there? What do we do? Well, Scrivener has a way to add a footnote. Just highlight some text (the footnote will be inserted after the last word), and go to the Format menu and select Footnote. Or you can use the fancy shortcut keys, for faster typing and footnote inserting, Ctrl-Cmd-8 (⌃⌘8).


Look, Ma! A new footnote!

Now you have a new, blank, footnote area to put a footnote reverence in.


Select the reference in Zotero and drag it into the footnote box in Scrivener.

Zotero makes it easy to put the reference in that new empty footnote with drag and drop citations. Just pull up your Zotero (either from Firefox, or if you have the standalone version). Select the reference you want, and drag it into the empty footnote section.


3. Moving from Scrivener to a document, and keeping your footnotes!

So, ideally, you would be able to export your text document, and all of these lovely footnotes you have made in Scrivener, using Zotero, would just magically work in a Word or LibreOffice document. It doesn’t, yet (or ever?). So here is how to get your footnotes into a document, and then get those footnotes to be Zotero enabled.

Srivener->File->Export->Files

First, you export your Scrivener document to RTF format.


Select RTF format

Select the plain RTF format, and the first check box for only the selected files (although, you could un check this if you want to do all of your files at once. No other check boxes are needed. Then just hit the Export button.


Open it up with your favorite document program, LibreOffice or Word.

Next, you will want to open your new RTF document in LibreOffice (or Word if you’re using that program).


All my citations are in the house!

You will notice that all of your footnotes are in this file. Yeah! Sometimes the text had odd font sizes and styles. So a quick ‘Select All’ and change it to default style and Times New Roman, 12 pt should fix that right up. Now here is the labor intensive part. For each footnote, we’re going to have to recreate it so that it is handled by Zotero. Then we’ll delete the original footnote. It would be nice of Scrivener could export the footnotes in a way that Zotero could detect them, but alas it is not to be.


Now you add a citation through the zotero buttons to make a zotero-aware citation.


All my citations are in the house!

Insert a Zotero citation using the Zotero buttons in your document program’s menu bar.


I prefer the Zotero classic view.


The new citation find view is pretty slick, though.


You can add pages with a coma, space, number.


Now you have two citations.


With two citations in the document, you’ll need to delete the one that was not made by zotero.


Just make sure you delete the non-zotero aware citation. The Zotero citation is usually highlighted.


Now you can save the document as a different file format: odt, doc, docx

Now save the document as an ODT document. If it is saved as anything else, it will not be Zotero aware.


Take your pick of file types.


Save as the correct file format if you want Zotero to be able to edit them again.


One alternative method is to create footnotes in Scrivener using the format {Author, Year, Page#}. Then export as an RTF document as before. Then, in Zotero, use the ‘RTF Scan’ tool in the Preferences menu. Zotero will see all of the citations and replace them nicely with formatted citations (using Ibid. and short notation for repeat books, and such). Zotero will not be aware of these citations at all, so if you need them to be Zotero aware, you might as well use the steps outlined above. If you do not expect to update citations or the text once done in Scrivener, then this may be the easiest way to go.

Now I can happily transfer existing documents into Scrivener and save the footnotes!

Writing is like carving in stone

Cross posted at NaziTunnels.org.

Like a block of stone

MAY 3. 2007: THE STONE IS WAITING

I recently finished writing and rewriting and writing again the essays for several scholarship applications. It is probably a good thing, but that was the most time and effort I have ever spent writing three pages of text. I went through several revisions of each essay, had the wonderful Fulbright advisers at George Mason read and reread the essays, and even went to the vastly underused (by me anyways) campus writing center.

Roughing it out

MAY 16. 2007 : DAY 14

My personal essay started out as being a little too personal, as in informal. At the writing center, I also realized that the opening paragraph was too negative. I wanted to show how as a child I deeply disliked school. In first and second grades, in order to avoid going to school I would often hide in the backyard or somewhere in the house, and generally make a big stink every morning. One time my mom drove me to school (two blocks away) and when we got there I jumped out of the car and ran off into the neighborhood for an hour or so. The rest of elementary school through high school was better; I did not put up as much of a stink, but I still did not like school. I was convinced that I would never have anything to do with school again once I graduated from high school. That’s how my essay started out, a general idea of what I wanted to write about. Like a big block of stone that I hacked away at.

Adding Detail

MAY 22. 2007: DAY 20

I wanted to convey all of that in a couple of sentences, all to point to the irony that I am now pursuing the highest degree one can attain in school, and that I am still in school 16 years later, with another three years to go (I did have three years off in there, though). But the gal at the writing center was right. It was a bit too negative. Instead I focused on my strengths as an historian and my technical skills. This worked out much better, since this is one of the major focuses of the dissertation. Through this constant revision and insight from others my project started to take shape.

Finishing
FINISHED AND ON ITS PLACE

One of the other really neat things about spending so much effort on an essay (especially one about my dissertation research) is that I was really able to focus my arguments and tighten up my thoughts on what I hope to accomplish. Through this process of constant revision I realized three things that I wanted to focus on in my dissertation: the story of the underground dispersal projects; how the projects are memorialized or not, and what that says about Vergangenheitsbewältigung; and an argument for the change in what is considered scholarship in the historical profession. Going through the constant revisions has changed my focus in some small ways from my original proposal in the dissertation prospectus, but that is to be expected. I feel that I now have a much more polished and obtainable goal.

All images courtesy of Akbar Simonse, who photographed Mark Rietmeijer sculpture. http://www.flickr.com/photos/simeon_barkas/sets/72157600224554402/

Writing Proposals

This post is cross-posted at my dissertation site.

I spent the day researching grants and reading about how to properly put together a proposal. I also spent a bit of time plotting out my todo list for this semester, creating a checklist of tasks and when they are due. I made the list in my Google Calendar, so it’s not available to be embedded on this site. I’ll have to work on finding a replacement or something.

One of the places I’ll be applying to for a research grant is the Social Science Research Council (http://www.ssrc.org). They happen to have a short paper on how to best write a proposal for their competitions, and being no dummy, I know I can apply these tips to all the proposals I write. So here are some tips from their paper, “On the Art of Writing Proposals.”

Purpose of Proposals is to Persuade

The main thing to realize when writing a proposal, is that you are trying to persuade the approval committee that your project is better than all the others. The trick is to do it in as short a space as possible&mdash;in the first paragraph, or at least the first page&mdash;while including all of the points the readers are looking for. In the end you want the readers to associate you with your project (Billy’s the guy researching blind Algerian water cave fish with telepathic properties), rather than other mundane tidbits (Jane is the gal from New York City, right?). It truly is an art.

What do they want?!

All scholarly projects require three basic merits: “conceptual innovation, methodological rigor, and rich, substantive content.” Additionally, the readers are going to be asking three questions that the proposal needs to answer:

  • What are we going to learn?
  • Why do we need to know?
  • How do you prove it?

And this all needs to be done initially very clearly, succinctly, and as forcefully as possible in the shortest amount of text.

Let me be clear about this…

It’s important to keep in mind that the individuals in the approval committee come from varying disciplines. Therefore, the proposal needs to be clear, free of the jargon typical of your discipline, all the while explaining the boundary pushing or unique way your project approaches your field. Keep the focus of the proposal on the ideas and leave the technical aspects to an appendix. Make the first page explain as clearly as possible what the topic is about, and what the readers&mdash;essentially, what the granting committee&mdash;is going to learn from this.

So What!

This is the crux of the whole matter. Why in the world does anybody need to know about this? What’s the point? Who cares? Why?! This is sometimes the hardest part to figure out. I know it is for me. I continually mull this point over. Do I really have a convincing and compelling reason. It seems for the time being, for me, that my biggest compelling reason, my “so what?” is because it hasn’t been researched before. While that may be a valid reason, be careful. Others may conclude that there is adequate justification for there to be no scholarship in the first place. There are other aspects that make a research topic important and valid. “Turning points, crucial breakthroughs, central personages, fundamental institutions, and similar appeals to significance of of the object of research are sometimes effective, if argued rather than merely asserted.

Apply the topic to current political, economic or social debates. How is your research not only timely but currently urgent, such that it provides a new way to view current issues, or turn the direction of current understanding?

Also try to be fresh and appealing in your approach. Promote the apparent contradictions, extrapolate on puzzles, and catch the readers off guard with surprises. Take the less traveled path. If current trends lean towards one area of research, but your topic can gyrate towards a new and fresh approach, take it!

Oh Yeah? Prove it!

It is important for the proposal committee to know the methodology of your approach. Do not just tell them what you will discover, but how you intend to discover it. What types of sources, what means of debate, what technology will be employed? But don’t just list out your tasks and how you’ll do them, argue why this is the best course of action to achieve the results you intend to acquire. Because some readers may be from interdisciplinary fields, take the time to explain “what parts of your methodology are standard, and which are innovative.” Some ideas to cover:

  • Activities you plan to undertake to collect information
  • Techniques you will use to analyze the data
  • Tests of validity you will apply
  • Specify the archives, sources, and respondents

Finally, proposals should describe the end product. Will the grant help to complete a dissertation chapter, a book, a digital project? Be specific as to what the proposed outcome of this supported project will be.

End with the Beginning in mind…

And begin with the ending in mind, of course. It takes a long time to write a decent proposal. Start early. Give yourself several weeks, or months if possible. Write a first draft and set it aside for a day. Then revise and set aside again. Ask others to take a look at it. Revise it again. Make sure your opening paragraph is succinct, to the point, and effective.

The closing of your proposal should reference the beginning. If you mentioned a story or a specific and compelling reason for the research, reference it again. The effect is to try and tie it all up in a neat little package.

Now, get back to work!

Well, that all sounds really good. Now if I can just apply it to my proposals!

ABD

I have now achieved a major milestone in my academic career. I passed the oral exam in October, and the dissertation prospectus and presentation in December. With that I am now advanced to candidacy, meaning all that I have left to do is the dissertation research and writing! To go along with this announcement is the launching of the website that I will be doing in connection with my dissertation.

On the first day of this year (2011), I was visiting some museums in D.C. when I noticed the piece of the Berlin Wall in the Reagan Building with some very appropriate graffiti for me!

Veterans Day Interest Spikes

Google has some interesting additions to their search results. You can now see ‘Related Searches’, a ‘Wonder wheel’, and a ‘Timeline’. I think the timeline may have been there for a while. It was for Google News, at least.

Anyhow, while checking the RSS feeds today, I noticed the Google doodle for today is about Veterans Day. I clicked the ‘Timeline’ to see what it had to offer. You first see a timeline with the number of web pages referencing the search result for a particular time. What first caught my eye were two large spikes in the timeline corresponding to 1919 and 1954. Second was a much larger result after 1984, and an increasingly greater result through 2009, with a drastic drop in 2010 (probably because it’s today and people are still posting about it).

Anyhow, using this timeline from Google allows to ask three questions and dig into the history of Veterans Day. The answers can be pulled from the links provided by clicking on the timeline for the year of interest.

1. Why the spike at 1918-1919? Well, as it turns out this was the first time Veterans Day occurred. It was set apart as a national holiday on November 11, 1918, to mark the end of World War I, which ended on that date. It was originally named Armistice Day.

2. Why the spike at 1954? In 1953 the town of Emporia, Kansas named their yearly parade the “Veterans’ Day Parade” in honor of all the veterans in their town. A bill introduced by that state’s congressman led to renaming the national holiday to Veterans’ Day!

3. Why the increased interest in 1984? This one was a surprise. On November 11, 1984, the Vietnam Veterans Memorial was dedicated and accepted by President Ronald Reagan as a United States memorial. There’s even a link to a newspaper article.

Each year also shows an interesting little bump in May, which corresponds with Memorial Day in that month.

There’s no data in for November 2010, so it will be interesting to see if the trend continues and there are more pages for Veterans’ Day in 2010 than there was in 2009.

Do you see any other bumps or bulges in the timeline? What happened there to spark interest in Veterans’ Day?