Movie control in Processing

This is a quick post to show how to control movie playback with Processing.

/**
 * Loop. 
 * 
 * Shows how to load and play a QuickTime movie file.  
 *
 */

import processing.video.*;

Movie movie;

void setup() {
  size(560, 406);
  background(0);
  // Load and play the video in a loop
  movie = new Movie(this, "tac.mov");
  movie.loop();
}


void draw() {
  image(movie, 0, 0, width, height);

  if (mousePressed == true) {
    movie.play();
    movie.read();
  } else {
    movie.stop();
    fill(0);
    rect(0, 0, width, height);
  }
  
}
Code language: Java (java)

There’s the code. It’s the basic default code to show a movie. But what if you want some event (mouse press, input from Arduino, etc) to control if and when the movie plays.

Not so intuitive, and hence this post.

The trick is to use the play() and read() methods in the if…else statement. In the code above. If the mouse button is pressed, then the movie will play from the beginning.

And if you want the video to disappear after the video is played, then after the movie stops, cover the draw window with a rectangle (filled with black, in this example).

Docker Development Environment for Everyone

One of the biggest challenges when collaborating with others in developing software and websites is setting up the development environment. The good ol “it works on my machine…” problem.

Well, this is no panacea for development, but it does a good job of setting up a basic environment pretty quickly.

You’re in for a special treat, because I’m going to show you not one (1), but two (2) different development environments; one for PHP, MySQL, Apache and phpMyAdmin, and one for Python (Flask) and PostgreSQL with pgAdmin. Each of these in a Docker container for ease of use.

Pre-requisites

For any of this to work, make sure you have Docker Desktop installed and running.

We’ll be using a terminal application for running some commands, so you’ll need some familiarity with that too.

Git is used to copy the files from the GitHub repo, but you can also download them as a zip file.

PMAMP

We’ll tackle the PhpMyadmin Apache Mysql Php (PMAMP) environment first.

After setting this up, we’ll have a place to put PHP code, a running Apache web server, a MySQL server and a running instance of phpMyAdmin.

The quickest way to get this going is to download the files from this GitHub repo https://github.com/ammonshepherd/pmamp

git clone https://github.com/ammonshepherd/pmamp.git

Change into that directory.

cd pmamp

And start the Docker containers

docker-compose up -d

You can view the website at http://lvh.me. lvh.me is just a nice service that points back to your local machine (127.0.0.1 or localhost). It makes it look like you are using a real domain name.

You can view phpMyAdmin at http://pma.lvh.me.

You can even use a real domain name. Just edit the docker-compose.yml file. There is a line like this:  

- "traefik.http.routers.php-apache.rule=Host('lvh.me', 'pmamp.lvh.me', 'example.com')"

Just add your domain to the list (or remove the other ones). Each entry must use the backtick, rather than the single quotes. WordPress mangles the backticks, so I am using single quotes here.

Now you just need to let your computer know to redirect all traffic to that domain name to itself.

You’ll need to edit the /etc/hosts file (Linux or Mac), or c:\windows\system32\drivers\etc\hosts (Windows). Now you can develop for any domain name right on your computer as if it were using the actual domain name.

Put all of your website files in the ‘www’ folder and you’re ready to develop!

Check the README at https://github.com/ammonshepherd/pmamp for more details on how it works and things to change.

To stop the services (turn off Apache, MySQL and phpAdmin) run

docker-compose down

in the same directory where the docker-compose.yml file lives.

pFp

The set up for Python (using a Flask app) and PostgreSQL is exactly the same process.

Grab the files from https://github.com/ammonshepherd/pfp.

git clone https://github.com/ammonshepherd/pfp.git

cd pfp

docker-compose up -d

You now have a running Flask app at http://lvh.me, or http://pfp.lvh.me and a running pgAdmin application at http://pga.lvh.me.

The same trick for custom domain names applies here too.

And also check out the README for more details: https://github.com/ammonshepherd/pfp

Follow the same commands above to shutdown the Python, PostgreSQL and pgAdmin containers.

What is ‘tput sgr0’ doin in my Bash prompt?

I have a new work computer, so this time around, I’m doing everything from scratch, because that’s the best way to learn.

In playing with my Bash prompt, I used this site to generate the prompt: http://bashrcgenerator.com/

Another one that is great is here: http://ezprompt.net/

The prompt that is generated uses a command to clear the text color that I hadn’t seen before: tput sgr0

My prompt (which I put in the ~/.bash_profile file) is:

#PROMPT
# To enter an emoji, while in insert mode type Ctrl-v, then enter the UTF8 code
# for the emoji, ex. U26A1 (note, use capital letters), then type ESC key. You
# can get a list of UTF8 emoji codes here: http://graphemica.com/
export PS1="\[\033[38;5;39m\]\u\[$(tput sgr0)\]\[\033[38;5;15m\]@\[$(tput sgr0)\]\[\033[38;5;229m\]\h\[$(tput sgr0)\]\[\033[38;5;15m\] [\[$(tput sgr0)\]\[\033[38;5;76m\]\w\[$(tput sgr0)\]\[\033[38;5;15m\]]\n\[$(tput sgr0)\]\[\033[38;5;215m\]⚡\[$(tput sgr0)\] "

So, of course, I spent the next 40 minutes trying to figure out all I could about that command, and more specifically, what ‘sgr’ meant.

I first scoured Google search results. Mostly just information about tput. Then I took to the manual pages: man tput was helpful in learning about what tput does. That led to man terminfo and finally to man ncurses. None of those man pages define ‘sgr’, but ‘ncurses’ did give a better clue by stating that “The  ncurses  library can exploit the capabilities of terminals which implement the ISO-6429 SGR 39 and SGR 49 controls”

So a Google search of ‘ISO-6429 SGR 39’ turns up an old 1990’s ECMA standardization for “Control Functions and Coded Character Sets”, Standard ECMA-48, https://www.ecma-international.org/publications/files/ECMA-ST/Ecma-048.pdf

(More on ECMA history here: https://www.ecma-international.org/memento/history.htm) [sidenote: ECMA may sound familiar. ECMAScript. Wait isn’t that Javascript? See here: https://medium.freecodecamp.org/whats-the-difference-between-javascript-and-ecmascript-cba48c73a2b5]

And there we go! Page 75 of the PDF (page 61 internally numbered), section 8.3.117!

SGR – SELECT GRAPHIC RENDITION

And the 0 means = “default rendition (implementation-defined), cancels the effect of any preceding occurrence of SGR in the data stream regardless of the setting of the GRAPHIC RENDITION COMBINATION MODE (GRCM)”

To make things a little more readable, I made the color codes into variables:

#PROMPT
# To enter an emoji, while in insert mode type Ctrl-v, then enter the UTF8 code
# for the emoji, ex. U26A1 (note, use capital letters), then type ESC key. You
# can get a list of UTF8 emoji codes here: http://graphemica.com/
BLUE='\[\033[38;5;39m\]'
PALE_YELLOW='\[\033[38;5;229m\]'
RESET='\[$(tput sgr0)\]'
GREEN='\[\033[38;5;76m\]'
export PS1="${BLUE}\u${RESET}@${PALE_YELLOW}\h${RESET} [${GREEN}\w${RESET}]\n⚡${RESET} "

And there we go. Much too much time learning stuff! And my prompt looks like this:


And all of that to figure out what ‘sgr’ means.

Wikijs port bindings

It took me too long to figure this out, and the documentation wasn’t as clear as it should be. This is how the port bindings map out when using docker-compose with wikijs:

config.yml -> host = docker-compose.yml -> left side of : in the ports section of the wikijs image

config.yml -> ports = docker-compose.yml -> right side of : in the ports section of the wikijs image

Here’s an image to make it more clear.

Quick WP upgrading with WPCLI

This is the easiest way to upgrade WordPress. You’ll execute these commands on the server itself.

Requirements

  • ssh access to your server
  • wp-cli command installed (instructions for installing wp-cli at http://wp-cli.org/)

Install/Upgrade WP CLI

  • wp-cli should be upgraded each time a WordPress installation is upgraded.
wp cli update

Upgrade WP

Prep work

Change into the WP directory

cd /path/to/wordpress/installation/

Make a list of active plugins

wp plugin list --status=active --format=csv --fields=name | tail -n +2 > ../active-plugins.txt

Update all plugins

wp plugin update --all

Deactivate all of the plugins

wp plugin deactivate --all

Upgrade WordPress

wp core update

Reactivate all of the previously active plugins.

cat ../active-plugins.txt | xargs wp plugin activate

Check the site in various browsers (make sure cache has been cleared).

Grab all of the domain names in Apache host file

Quick script I whipped up today to grab all of the domain names on a server.

#!/bin/bash

if [ -e alldomains ]
then
  rm alldomains
fi

alldomains=( $(find /etc/httpd/conf.vhosts/ -name *.conf) )

for domain in ${alldomains[*]}
do
  cat $domain | egrep "ServerName|ServerAlias" | egrep -v "#" | sed -e 's|ServerName||' -e 's|ServerAlias||' -e 's|www.||' -e 's|:80||' | tr -s ' ' '\n' | tr -d ' ' | sed -e '/^\s*$/d' >> alldomains
done

sort alldomains | uniq | sort -o alldomains


This gets all of the domains from ServerName and ServerAlias lines, takes out all of the white space and empty lines, and creates a file with just a list of the unique domain names.

This accounts for subdomains that use ‘www’ or have port :80 on the end.

For instance, www.somedomain.com and somedomain.com are the same, so the script takes out the ‘www.’ which leaves to copies of somedomain.com, which it then deletes one of them in the final output to the file. The same for ‘:80’.


Upgrading Omeka and Neatline

A first project at my new job at the Scholar’s Lab at UVA was to update some old Omeka/Neatline sites.

slab-logo-rgb-350px

I wrote a script to take care of the process now and in the future.

https://github.com/mossiso/onus

I perhaps went a little overboard and made it pretty robust. I was going to take the opportunity to learn some ruby, but ended up writing it in Bash. One thing I learned is that Bash does not handle comparing floating point numbers. And that was a bit part of the requirement.

I’ll run through how to use the script as well as go through some of the logic found in the script.

Running the Script

Rather than repeat everything on the github page, just take a look there for steps on how to set up and run the script.

Basically, you just run the script on the command line, it prompts for the path to the omeka install (or you can give it after the command), and automatically upgrades Omeka and Neatline to then next higher version number.

./onus.sh /path/to/omeka/install

You can add some flags/options to the command to upgrade Omeka and Neatline to a specific version, or exclude the upgrading and just make a backup copy of the database and files into a zip file.

About the Script

The purpose of the script is to upgrade Omeka and Neatline. One big problem arose when upgrading sites that were previous to 2.0.0.

Omeka and Neatline both go through some significant database (and code) changes from 1.5.x to 2.x.x. The biggest seemed to be that the upgrade script for Neatline didn’t “take” and needed to be done manually. Here are the steps to do that by hand (the script will take care of this if you use it).

Upgrading Omeka and Neatline from 1.5.x to 2.x.x

The first step is always to make a backup copy of the database and files. That way if anything goes awry, you can easily put things back together.

  1. To back up the database, simply take a MySQL dump.
    mysqldump -uuser -ppassword databasename > databasename.sql

    Do this in the main directory of Omeka. Then make a zip file of the entire Omeka directory.

    zip -r omeka-backup.zip /path/to/omeka/
  2. Next, deactivate any plugins you have installed, including Neatline and NeatlineMaps. One of the big changes with 2.x.x version is that NeatlineMaps is rolled into Neatline.
  3. Grab a 2.0.x version of OmekaEither do this with github
    git clone https://github.com/omeka/Omeka NewOmeka

    or with a zip file

    wget http://omeka.org/files/omeka-2.0.4.zipunzip omeka-2.0.4.zip
  4. Add the 2.0.0 version of Neatline plugin into the NewOmeka/plugins directory, along with any other plugins you may need. NeatlineText, NeatlineSimilie and NeatlineWaypoints may be needed if you used that functionality in the previous version.
  5. Copy the db.ini file from the old installation to the NewOmeka/ directory.
  6. Now load the admin page for NewOmeka/ in the browser: http://domain/NewOMeka/admin/. Upgrade the database and login to upgrade and reactivate the Neatline plugin and other plugins as needed.
  7. You may notice things go smoothly, except the existing Neatline exhibits may not transfer. To get them into the new database tables, add the following two lines at line 80 in the NewOmeka/plugins/Neatline/migrations/2.0.0/Neatline_Migration_200.php file:
    $fc = Zend_Registry::get("bootstrap")->getPluginResource("FrontController")->getFrontController();
    $fc->getRouter()->addDefaultRoutes();
  8. Run the following database command to allow the background process to run:
    mysql -uuser -ppassword database --execute="UPDATE prefix_processes SET status='starting' WHERE id=1;"


  9. Finally, run the following php command to get the processes started.
    /path/to/bin/php /path/to/NewOmeka/application/scripts/background.php -p 1


Some Script Logic

Initially, I used the script to upgrade both Omeka and Neatline to the next higher version, going through every single minor version incrementally. When upgrading from Omeka 1.5.1 and Neatline 1.0.0 to the latest versions (2.2.2 for Omeka and 2.3.0 for Neatline), I had to run the script over 20 times!

That was way too intensive, so next I added some logic to just skip to the next major release. That dropped the times needed to run the script down to four. But I could do better than that! I added in some command line options/flags that allow you to upgrade to any Omeka or Neatline version you specify. Now you can upgrade from Omeka 1.5.x and Neatline 1.x.x directly to Omeka 2.0.4 and Neatline 2.0.0, then right to Omeka 2.2.2 and Neatline 2.3.0. Two steps!

Bash and floating points

As mentioned above, Bash does not work with floating points, so I had to create a function to deal with that. Dealing with version numbers, especially with minor version numbers kind of requires the need to compare floating point numbers…

In the script I use two different functions:

# Compare two floating point numbers.
#
# Usage:
# result=$( compare_floats number1 number 2 )
# if $result ; then
# echo 'number1 is greater'
# else
# echo 'number2 is greater'
# fi
#
# result : the string 'true' or 'false'
# number1 : the first number to compare
# number2 : the second number to compare
function compare_floats() {
    echo | awk -v n1=$1 -v n2=$2 '{if (n1<n2) printf ("false"); else printf ("true");}'
}

This function basically compares two numbers. It outputs true if the first number is greater than the second number, and false if the first number is less than the second number. Another way to think about it would be, is the second number less than the first number?

# Pass the current version first, then the array
# the function echoes the version just greater than the current version,
# i.e., the next version to upgrade to.
#
# Usage:
# variable=$( get_next_version $num array[@] )
#
# variable : the next version greater than $num
# $num : the current version
# array[@] : an array of all possible versions
function get_next_version() {
    num=$1
    declare -a ARRAY=("${!2}")
    for i in ${ARRAY[@]}
    do
        if awk -v n1=$num -v n2=$i 'BEGIN{ if (n1<n2) exit 0; exit 1}'; then
            echo $i
            break
        else
            continue
        fi
    done
}

For this function, you pass the current version and an array of possible version numbers. The function will compare the number you pass it, compare it with the array, and echo the next highest number.

Both functions use the same awk command, but in a little different format. They test wether one number is greater than the other, and return ‘true’ or ‘false’.

Setting up a Hosting Environment, Part 5: Apache and PHP

Figuring out the possibilities for Apache and PHP reminds me of a Dr. Seuss book, “Fox in Sox”. It’s a favorite of mine. I love reading it to the kids. In it, Mr. Fox tries to get Mr. Knox to say all kinds of ridiculous (in meaning and hard to say) tongue twisters. At one point Mr. Knox exclaims:
“I can’t blab such blibber blubber!
My tongue isn’t make of rubber.”

That’s what my brain felt like after trying to figure all of the options for Apache and PHP. To combat my rubber brain, I created this flow-chart to help me keep track of the options, the pros and cons for each, and the path I finally chose.

First off, a list of requirements and goals:

  1. Chroot each vhost to it’s own directory, and have Apache and PHP run on that vhost’s server account
  2. Speed, run Apache and PHP at their most effective and efficient levels
  3. Utilize an opcode cache, APC, to speed up PHP pages
  4. Use trusted repositories to make installation and upgrading easier

Here’s what I eventually figured out about Apache and PHP:

ApachePHP
Click on the image to see a larger view

These sites were helpful for the initial set up of PHP as CGI with mod_fcgi and Apache in chroot (mod_fcgi sends one request to each PHP process regardless if PHP children are available to handle more, and no sharing of APC opcode cache across PHP processes):

This site was helpful for setting up PHP as CGI with mod_fastcgi and Apache in chroot (mod_fastcgi sends multiple requests to a PHP process, so the process can send them to children processes, and having one PHP process for each site allows for APC opcode cache to be usable.)

These sites helped me learn about php-fpm and how it is not quite ready for what I have in mind:

I ended up going with Apache’s mod_fastcgi for using PHP as a CGI, and NOT using PHP-FPM, while running Apache in threaded mode with apache.worker enabled.

To get this set up is pretty easy. I already had Apache and PHP installed and running (with PHP as CGI using mod_fcgi), so here are the steps I used to convert it to run mod_fastcgi and apache.worker. I’m running CentOS 6.3.

Install the RPMForge repo for installing mod_fastcgi.

  • Get latest from http://repoforge.org/use/ : rpm -Uvh http://pkgs.repoforge.org/rpmforge-release/rpmforge-release-0.5.2-2.el6.rf.x86_64.rpm
  • yum --enablerepo=rpmforge install mod_fastcgi

Edit the /etc/httpd/conf/httpd.conf file

  • ServerTokens Prod
  • KeepAlive On
  • Edit the worker section. I still need to do some testing to figure out the best configuration
    <IfModule worker.c>
        StartServers         8
        MaxClients         300
        MinSpareThreads     25
        MaxSpareThreads     75
        ThreadsPerChild     25
        MaxRequestsPerChild  0
    </IfModule>
  • If there, make sure to comment out, or delete the lines for mod_php: LoadModule php5_module modules/libphp5.so
  • this line also: AddType application/x-httpd-php .php
  • The last line should be: Include conf/virtual_hosts.conf


Create a /etc/httpd/conf/virtual_hosts.conf file

Each virtual host needs to have an entry similar to this in the httpd.conf file, or I like to create a separate virtual_host.conf and include that in the main httpd.conf.

# Name-based virtual hosts
#

# Default
NameVirtualHost *:80

# Begin domain-name.com section
<VirtualHost *:80>
    DocumentRoot /var/domain-name/home/html/
    ServerName domain-name.com
    ServerAlias www.domain-name.com

    # Rewrite domain name to not use the 'www'
    RewriteEngine On
    RewriteCond %{HTTP_HOST}    !^domain-name\.com$ [NC]
    RewriteRule ^/(.*)  http://domain-name.com/$1 [R=301]

    # Specify where the error logs go for each domain
    ErrorLog /var/logs/httpd/current/domain-name.com-error_log
    CustomLog /var/logs/httpd/current/domain-name.com-access_log combined

    <IfModule mod_fastcgi.c>
        SuexecUserGroup domain-name domain-name
        ScriptAlias /cgi-bin/ "/var/www/cgi-bin/domain-name/"
        <Directory "/var/domain-name/home/html">
            Options -Indexes FollowSymLinks +ExecCGI
            AddHandler php5-fastcgi .php
            Action php5-fastcgi /cgi-bin/php-fastcgi
            Order allow,deny
            Allow from all
        </Directory>
    </IfModule>
</VirtualHost>
# End domain-name.com section

Things to note:

  • The line with SuexecUserGroup should have the user/group for the project.

Create the php-fastcgi file

Add a /var/www/cgi-bin/projectname/php-fastcgi file for each project. This allows php to run as FastCGI, and use suEXEC. The php-fastcgi file needs to be under suexec’s default directory path /var/www/cgi-bin/.

  • #!/bin/bash
    #  Set PHPRC to the path for the php.ini file. Change this to
    #  /var/projectname/home/ to let projects have their own php.ini file
    PHPRC=/var/domain-name/home/
    export PHPRC
    export PHP_FCGI_MAX_REQUESTS=5000
    export PHP_FCGI_CHILDREN=5
    exec /usr/bin/php-cgi

Things to note:

  • The directory and file created above must be have user/group of the project (the same as the user/group of the /var/projectname/ directory)
  • The directory and file must be executable and writable by the owner ONLY.
  • If you get Apache Internal Server errors, check /var/log/httpd/suexec.log
  • For each site, you can specify how much RAM the APC module can use. For large, busy sites, you set this higher. Not setting this defaults to 64MB, which is a bit more than needed for the average WP site. Change the last line in the /var/www/cgi-bin/projectname/php-fastcgi file:
    • exec /usr/bin/php-cgi -d apc.shm_size=128M

Change php.conf

Comment out everything in the /etc/httpd/conf.d/php.conf file so php is not loaded as a module when Apache starts.

Apache multi-threaded

Edit the /etc/sysconfig/httpd file to allow Apache to use multi-threaded mode (httpd.worker) which handles basic HTML files much nicer (less RAM). Uncomment the line with HTTPD=/usr/sbin/httpd.worker

Config Check

Check the Apache configuration files to see if there are any errors.

  • service httpd configtest

If all good, restart Apache

  • service httpd restart This will stop the running httpd service, and then start it again. Use this command after installing or removing a dynamically loaded module such as PHP. OR
  • service httpd reload This will cause the running httpd service to reload the configuration file. Note that any requests being currently processed will be interrupted, which may cause a client browser to display an error message or render a partial page. OR
  • service httpd graceful This will cause the running httpd service to reload the configuration file. Note that any requests being currently processed will use the old configuration.

Install APC

  • pecl install apc

Set up log rotation for Apache

  • Add a file /etc/logrotate.d/httpd.monti
  • /var/logs/httpd/*log {
        daily
        rotate 365
        compress
        missingok
        notifempty
        copytruncate
        olddir /var/logs/httpd/archives/
        sharedscripts
        postrotate
            /bin/kill -HUP `cat /var/run/httpd/httpd.pid 2>/dev/null` 2> /dev/null || true
        endscript
    }

Atop – Apache Top, for keeping tabs on the web servers

When I first became a systems administrator of a large web server, I wanted to know what the current traffic to all of the virtual hosts (vhosts) looked like. I wanted to see which domains were getting the most traffic and where that traffic was coming from. So began my long search for a sufficient tool. There are many out there (apache-top, Apachetop, wtop, htop, IPTraf, etc). But they didn’t do all of the things I wanted. Basically they were just command line versions of the output of Apache mod_status, or they did complex log analysis.

I wanted more. The ability to search, or show only a certain domain name, see a list of IP address and how many connections from that IP address (to detect botnet attacks), and more.

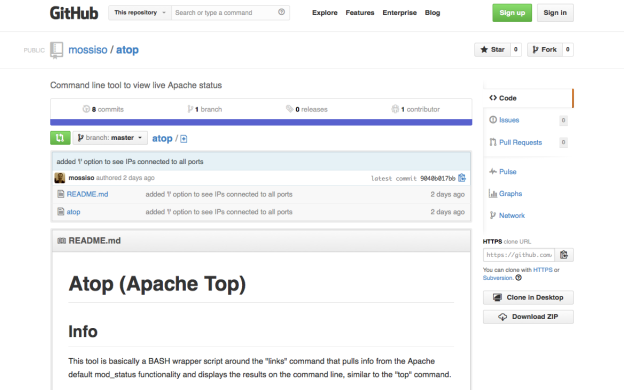
So in true sys admin fashion, I built the tool myself. It is sufficiently stable and usable enough to warrant a blog post and hopefully engender some usage by others, which hopefully will encourage ideas and improvements from the community. Go ahead and grab a copy from the github repo, https://github.com/mossiso/atop

My idea is not much different than some of the tools I linked to. I’m basically writing a wrapper around the Apache mod_status output, but this tool has the ability to do more. So here’s a little walk through of what this tool does.

Requirements

  • Apache with mod_status: This tool is built around the Apache mod_status output, so that obviously has to be installed and set up. The ExtendedStatus option has to be enabled in the httpd.conf file.
  • links: This is a command line based web browser of sorts. Using the -dump flag, it just spits out the page to the command line.
  • netstat: This is used for one of the options to display all of the IPs connected to the webserver (via port 80).


This tool is just a BASH script, so once you download the “atop” file, just plop it anywhere in your home directory on your web server, change the permissions so it is executable

[code lang=”bash”]chmod 700 atop[/code]

and run it

[code lang=”bash”]./atop[/code]

There are now several options you can sort the results by:

==============================================================
a = sort all threads by time
c = sort by CPU, no GCRK_
i = list IPs connected to port 80 (uses Apache Server Status)
k = sort by K (Keep alives)
l = list IPs connected to all ports (uses netstat)
n = list IPs connected to port 80 (uses netstat)
o = sort open connections by CPU
p = sort only POST threads by time
r = raw apache status output (good with limit of at least 50)
s = search for a term, returns raw Apache Server Status results
w = sort by inactive workers
q = quit

To see the list of options while the command is running, just type any key on the keyboard.

Getting the BASH script to be responsive to the keyboard was tricky, and took me the longest time to figure out. For a while I could get the results to be displayed and refresh every N seconds, I could even get it to do the sort options, but only if I started the script with that option. So I was super excited to figure out the logic to get the script to respond to input.

The trick lies in setting the output commands in an infinite while loop. At the end of the loop it does a regular bash prompt using “read”. Normally this waits for a response, but the timeout feature allows you to set that to one second, which then goes through the while loop again. If a key is pressed, it breaks the while loop and prints the options message. When an option is selected it goes through that while loop.

Features

Some of the sort options I use most often are POST (p), CPU (c), IPs according to Apache (i), and IPs according to the server (n). I walk through those one by one.

POST

POST-listing

This is probably the most helpful of the options. Usually, when a website is getting hammered, it’s because it is getting comment spam or login attempts. These all require POST requests. If you see a large number of POST requests for a single vhost, then look at the IP addresses sending the requests; you can bet if all the requests are from the same IP, that it should be blocked.

CPU

CPU-list

This is a pretty good overview of what Apache traffic your server is handling. It shows GET and POST requests and sorts them with the most heavy CPU usage requests on the bottom. It filters out open processes with no connections, and a few other things like closing connections.

IPs (Apache)

IP-Apache-list

This one is great, too. It shows the IP addresses that are connected to Apache, and sorts them by how many connections are being made. The IPs with the most connections are at the bottom. If you see an IP address with over 10 connections for a few minutes, you can bet they are up to no good. Double check with the POST option to see if they are spamming.

IPs (Netstat)

IP-Netstat-list

This option gets all traffic to port 80 using netstat. It filters out local traffic (and GMU traffic, but you can edit that out), and then does the sorting and organizing by how many IP addresses are connecting. This gives a little more detail than the other IP option.

If you find any bugs in the script or have a great idea for other options, feel free to fork or submit patches, or report bugs on the github repo.

The Mouse, the Screen, and the Vim

A tale many years in the making…

I have been lacking two things for so long, now that I can do it, I wonder if I will ever remember to use it!

The Problem

I use a MacBook Pro with OS X Mavericks. I log into my Linux servers with SSH. I use GNU screen to allow me to save sessions, detach, and come back later without closing running programs and what not. BUT, I can’t use the mouse scrolling for the terminal output or to scroll through files opened with Vim.

The Solution

I finally found the pieces missing to make this possible. All with a couple of lines of code and a new SIMBL bundle.

To get the scroll working in screen, just add this line to your .screenrc


defscrollback 5000
termcapinfo * ti@:te@


It’s not perfect. If you have multiple windows in a screen session, then the history buffers get all meshed together. But I usually just need to see info from a command output that is longer than the screen window, and this will let me see it. Finally! Thanks Slapitjack! See here for an explanation of the code.

To get the scroll back in Vim, whether using screen or not. You first need to install SIMBL. The version for Snow Leopard works with Mavericks. Then grab a copy of MouseTerm. The installer didn’t work, but you just need to copy the MouseTerm.bundle to /Library/Application Support/SIMBL/Plugins folder (or ~/Library/Application Support/SIMBL/Plugins if needed for just your user account). Restart your Terminal and you’re good to go.

Viola! Vim and scrolling, GNU screen and scrolling! Live as it was meant to be…