3D printing in the field of history

I was asked to lead a discussion on the current status of 3D printing in the humanities, particularly the field of history with a great group of fellow PhD students here at GMU during one of their classes.

Here is what we came up with.

First of all, 3D printing (in general, but specifically for history) can be summarized by the following formula.

3D printing for history now = HTML for history in the early 1990's
2013-08-27 14.01.13
A replica of the Antikythera Machine, a 1 BCE clockwork device discovered on a shipwreck near Greece in the early 1900’s.

There is much that can be done, but using a 3D printer for historical research, study, learning, etc, is still very much in a nascent stage. So the question are, what can be done with 3D printing and how does it help us learn about history? We came up with a few ideas.

First, what can we print with a 3D printer? The limits are just about endless, as long as then are condensed to a 5-inch x 11-inch x 12-inch box.

The bigger question is what do 3D printed objects help us learn about history? Here we had some good ideas. Printing buildings to scale, along with figurines, can help us determine the scale of real life objects. Determining scale can help us analyze why some things are larger than others, for instance monuments. Why would the Lincoln monument be larger than the Jefferson, and what does that say about our views (or the creators views) about the subject? Life size objects can show true size that are often distorted or masked when never seen in person, like the Mona Lisa, for example, which is remarkably small.

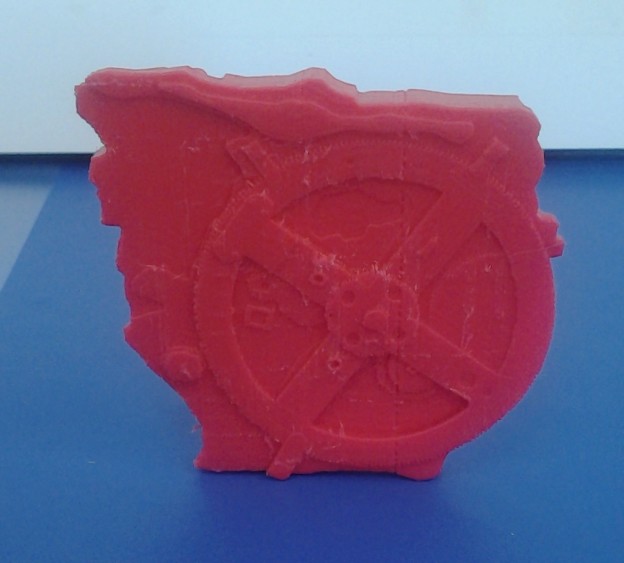
Preserving rare, fragile, or expensive artifacts has obvious benefits in that it keeps things from getting lost, broken or stolen. 3D historical prints also put physical objects in the hands of students, especially those who might never have the opportunity to handle a real civil war cannonball, a Roman sword, a model of the Antikythera Mechanism, or a scale model of the Titanic. A physical object also offers the additional learning opportunity of tactile feedback over images in a book or on screen.

2013-08-27 14.01.01
Chopstick holder.

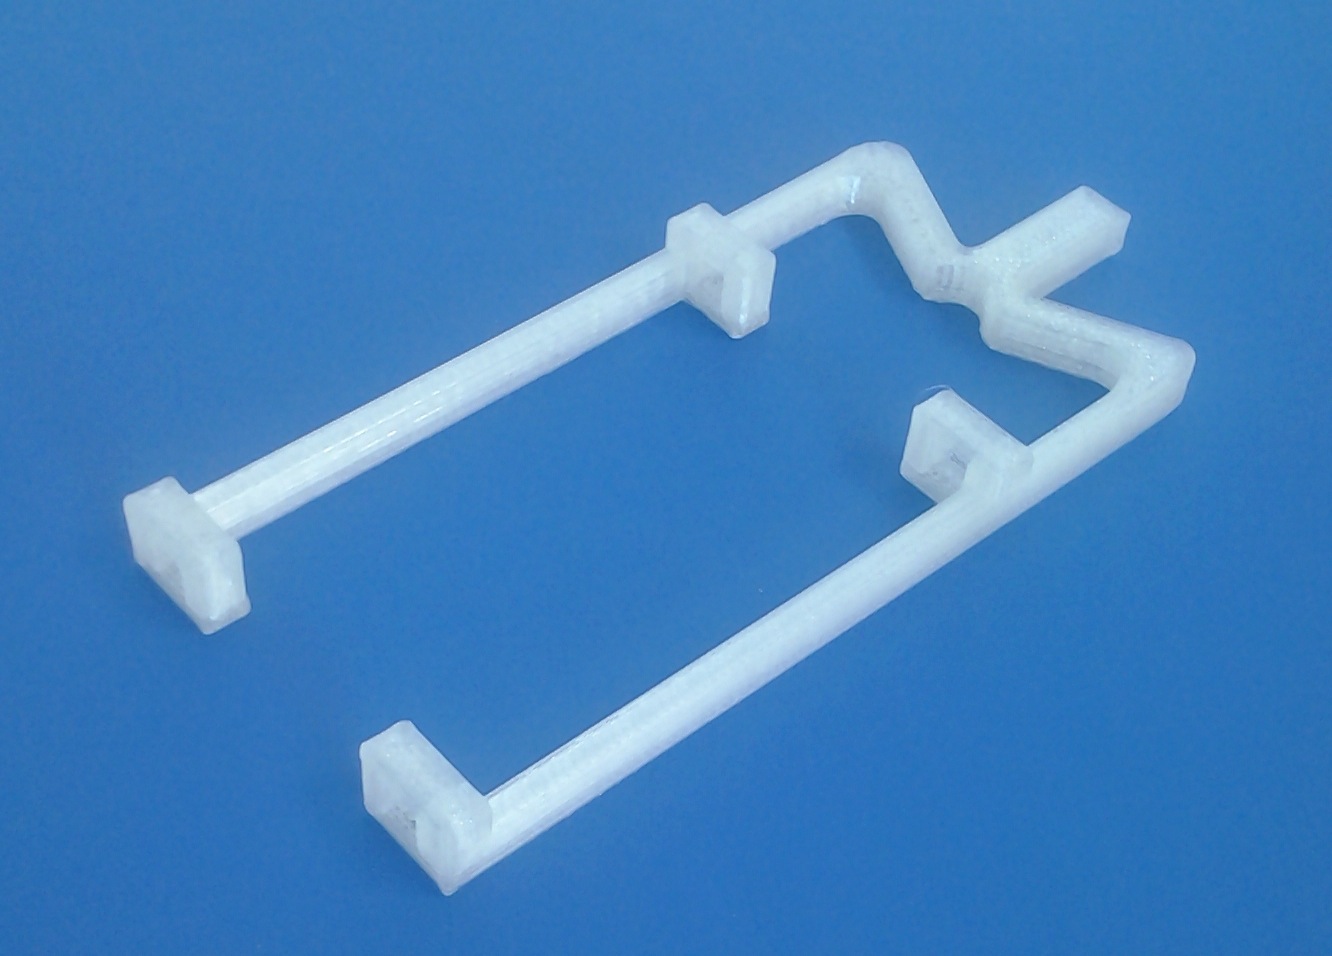
3D printing also offers the opportunity to create inventions that may never have made it into production, such as those from old patents. We even got to look at one, a chop-stick holder from 1967.

Using a 3D printer and associated hardware and software in a history classroom provides yet another opportunity to combine multiple disciplines in an educational atmosphere. Everybody benefits when science, engineering, math, technology and the humanities combine (as was noted about a high school class that built a trebuchet).

We also talked about the ramifications of 3D printing on the future. Interestingly, similar issues that have voiced throughout history to the introduction of new technology, were also raised during the discussion. What happens when we move production of items back to the individual and away from factories? How do we cope with the replacement of humans by technology?

At present, the cost to own a printer in your home is still a bit much, but definitely within reach. Three different printers range from $800 (the do-it-yourself RepRap) to $2500 (Makerbot Replicator 2), with a middle priced option by Cubify at $1500. Filament, the plastic line used to create objects, costs around $50 a spool.

Items printed:

http://www.thingiverse.com/thing:22849 – chopstick holder

http://www.thingiverse.com/thing:32413 – Antikythera machine

Have an idea how 3D printers can be used in education? Add a comment below.

OSSEC, Suhosin, and WordPress

I had a problem show up on some of our servers. Visiting sites would work fine, but as soon as you log in to a WordPress site, then your IP was blocked at the firewall level. It took a bit of hunting around the OSSEC logs to figure out the cause, and then finally tipped off to a local rule to combat the blockage. I outline the process of figuring out what was wrong, and how to fix it below.

DENIED!

gareth-davies-logo3So initially, this was quite confusing. All of a sudden people would have their IP blocked. I checked the different sites, and seemed to have no problem. Then when I logged in to the back end, BAM, blocked as well. We have Shorewall running, so doing:

shorewall show dynamic

Showed all of the IPs that Shorewall had blocked. This could also be done by using iptables

iptables -nL --line-numbers

Sure enough, my IP had been blocked. I unblocked my IP with:

shorewall allow ip.ad.dr.es

Or could also do

iptables -D INPUT 2

where INPUT is the position or section of the firewall chain, and “2” is the line number containing my IP address.

Then I checked with other web applications on that server. Where they also causing an issue? I logged in to an Omeka install. No problems.

FOUND IT!

ossec_logoOK. I know OSSEC is to blame some how. It’s an awesome HIDS (Host Intrusion Detection Software) that actively responds to issues on the server based on scanning through the system logs and various rules.

OSSEC keeps itself chroot’ed to /var/ossec/, so all of the ossec logs are located in /var/ossec/logs/.

I first looked in the /var/ossec/logs/active-responses.log. Sure enough, a couple of lines like this show my IP being completely blocked to the server.

Fri Jun 14 06:50:47 EDT 2013 /var/ossec/active-response/bin/host-deny.sh add - XXX.XX.XX.XX 1371207047.5913585 20101
Fri Jun 14 06:50:47 EDT 2013 /var/ossec/active-response/bin/firewall-drop.sh add - XXX.XX.XX.XX 1371207047.5913585 20101

So, there we are. OSSEC blocking the IP for some reason. Now why is it blocking the IP?

Taking a look in the /var/ossec/logs/alerts/alerts.log file to see why it thinks it needs to block the IP…

** Alert 1371206381.5698606: - ids,
2013 Jun 14 06:39:41 (server1) 127.0.0.1->/var/log/messages
Rule: 20101 (level 6) -> 'IDS event.'
Src IP: XXX.XX.XX.XX
Jun 14 06:39:40 server1 suhosin[18563]: ALERT - script tried to increase memory_limit to 268435456 bytes which is above the allowed value (attacker 'XXX.XX.XX.XX', file '/var/html/wp-admin/admin.php', line 109)

There were other lines in there with my IP, but nothing would/should have caused blocking, like a WordPress login event, or an SSH login event. Also, the error above is categorized as an IDS event with level 6, which by default OSSEC rules means it gets blocked.

HOW TO FIX IT!

As a quick fix, I changed the “suhosin.memory_limit” option in /etc/php.d/suhosin.ini to 256M, and the “memory_limit” in /etc/php.ini to 256M so that no error would be generated.

Now came the hard part of finding out how to fix it for real. OSSEC is a pretty big beast to tackle, so I turned to my friendly web search engine to help out.

To fix the issue, I would need to write a decoder or new rule to ignore the suhosin rule causing the problem. OSSEC has descent documentation to get you started, but fortunately the blog linked above had the solution already. https://www.atomicorp.com/forum/viewtopic.php?f=3&t=5612

From user ‘faris’ in the forum linked above:

Add the following lines the the /var/ossec/etc/rules.d/local_rules.xml file.

<group name="local,ids,">
  <!-- First Time Suhosin event rule -->
  <rule id="101006" level="14">
    <if_sid>20100</if_sid>
    <decoded_as>suhosin</decoded_as>
    <description>First Time Suhosin Event</description>
  </rule>
  <!-- Generic Suhosin event rule -->
  <rule id="101007" level="12">
    <if_sid>20101</if_sid>
    <decoded_as>suhosin</decoded_as>
    <description>Suhosin Event</description>
  </rule>
  <!-- Specific Suhosin event rule -->
  <rule id="101008" level="5">
    <if_sid>101006,101007</if_sid>
    <match>script tried to increase memory</match>
    <description>Suhosin Memory Increase Event</description>
  </rule>
</group>

What these new rules do is change the level of the default rules that were tagged/decoded as being suhosin errors. In the first rule, if the default error is 20100, and is decoded (or tagged, or matches) as suhosin, then set the level to 14 instead of the default 8.

The second rule detects if the default error 20101 is decoded as coming from suhosin and sets the level to 12 instead of the default 6.

The third new rule looks at any error tagged as suhosin and if the error has the matching text in it, then it sets the error level to 5 (below the limit for firing an active response).

So, just add that group of rules to the local_rules.xml file and restart the OSSEC service. BA-DA-BING! no more blocking the IP when logging in to WordPress.

Four Steps to a Personal Website

There are four basic steps to creating a personal website.

1. Content

You may want to start out with a cool design, or fun idea on how to interact with visitors, or what have you. But really, the most important thing a website has going for it is the content. Design is a close second (but we’ll talk about that last), because people tend to shy away from “ugly” sites. But they won’t even go in the first place if the content isn’t relevant.

You’ll need to ask yourself a few questions to get an idea of what kind of website you need. The answers will even help define the design, and determine the platform, or website technology, that you use.

  • What information do you want to share?
  • Why do you want to make a website?
  • Do you want conversations to take place on your website?
  • Do you want a blog, a simple website with information about you or a topic, or something else?

2. Domain Name

All computers on the Internet or World Wide Web have a unique number associated with them, called an IP (Internet Protocol) Address. Kind of like a Social Security Number. In order to get data from a server (a computer that “serves” content, either data, websites, videos, pictures, etc), you would need to type in the specific number into your web browser. IP Addresses are in the format XXX.XXX.XXX.XXX. If you connect to the Internet at home, you might see your laptop get an IP Address like 192.168.1.20.

Since humans remember letters and words better than numbers, there is a system set up to translate words into the IP Address for a server. It is kind of like the old fashioned telephone directory. You can remember the telephone number to a person’s house, or look up the person in the phone directory to get their number. This also allows for multiple names to be pointed at one IP Address, like multiple people living in one  house, sharing a phone number.

This set of characters or words is called a domain name. A domain name allows for an almost unlimited number of unique identifiers to point to a limited number of IP Addresses. The domain name plays an important role in search engine rankings. If this is your personal site, try to get your name, or part of it, as the domain name. It can be all you need for “brand” identification.

Shop around before you buy a domain name. There are plenty of options out there, just do a search for domain registrar. Often a hosting provider will sell domain names as well. As of this writing, you should be able to get a domain name for around $10-$11 a year. Make sure the registrar includes DNS management.

.org, .net, .com, .info, .us, … What type of domain name should you buy? There are 19 top level domains (TLDs the very last part of a domain name, the part followed by the last period), and over 250 country code top-level domains (.us, .me, .de, .uk, etc.) That depends on a few things, the most important being, which one is available. Generally, .com and .org are the most sought after. Here is a list of the top-level domains and their intended purposes (from Wikipedia).

.com commercial This is an open TLD; any person or entity is permitted to register. Though originally intended for use by for-profit business entities, for a number of reasons it became the “main” TLD for domain names and is currently used by all types of entities including nonprofits, schools and private individuals. Domain name registrations may be challenged if the holder cannot prove an outside relation justifying reservation of the name, to prevent “squatting“.
.info information This is an open TLD; any person or entity is permitted to register.
.name individuals, by name This is an open TLD; any person or entity is permitted to register; however, registrations may be challenged later if they are not by individuals (or the owners of fictional characters) in accordance with the domain’s charter.
.net network This is an open TLD; any person or entity is permitted to register. Originally intended for use by domains pointing to a distributed network of computers, or “umbrella” sites that act as the portal to a set of smaller websites.
.org organization This is an open TLD; any person or entity is permitted to register. Originally intended for use by non-profit organizations, and still primarily used by some.

Country code top-level domains can be used as well, often to create clever domain names (called domain hacks) like del.icio.us, bit.ly, instagr.am, pep.si, and redd.it.


source, creative commons search on flickr.com

3. Hosting

A hosting provider is the company that owns the servers where your website lives. There are many free options. Look for a hosting provider that offers “easy” installations of common software like WordPress, Drupal, etc.

Paid options:

You can find a hosting provider from anywhere between $5/month to $100/month.

source: creative commons search on flickr.com

4. Design

Independent on the platform you choose, there are usually thousands of free themes available for easy download and install. When you pick a platform, look on their site for places to find free themes.

Designing a website takes lots of work to make it look nice. The better the design, the more resources are needed (be they time, or money).

Setting up a Hosting Environment, Part 3: RedHat Cluster and GFS2

Previous posts in this series:

Part 1: Setting up the servers

Part 2: Connecting the Array

RedHat Cluster and GFS2 Setup

Set date/time to be accurate and within a few minutes of each other.

  • Install the ntp program and update to current time.
    • yum install ntp
    • ntpdate time.nist.gov
  • Set time servers and start ntpd
    • service ntpd start
    • Edit the /etc/ntp.conf file to use the following servers:
    • server 0.pool.ntp.org
      server 1.pool.ntp.org
      server 2.pool.ntp.org
      server 3.pool.ntp.org
  • Restart ntpd
    • service ntpd restart
    • chkconfig ntpd on

Cluster setup

RedHat Cluster must be set up before the GFS2 File systems can be created and mounted.

  • Instal the necessary programs
    • yum install openais cman rgmanager lvm2-cluster gfs2-utils ccs
    • Create a /etc/cluster/cluster.conf REMEMBER: Always increment the “config_version” parameter in the cluster tag!
      • <?xml version=“1.0”?>
            <cluster config_version=“24” name=“web-production”>
                <cman expected_votes=“1” two_node=“1”/>
                <fence_daemon clean_start=“1” post_fail_delay=“6” post_join_delay=“3”/>
                <totem rrp_mode=“none” secauth=“off”/>
                <clusternodes>
                    <clusternode name=“bill” nodeid="1">
                        <fence>
                            <method name="ipmi">
                                <device action=“reboot” name=“ipmi_bill”/>
                            </method>
                        </fence>
                    </clusternode>
                    <clusternode name=“ted” nodeid="2">
                        <fence>
                            <method name="ipmi">
                                <device action=“reboot” name=“ipmi_ted”/>
                            </method>
                        </fence>
                    </clusternode>
                </clusternodes>
                <fencedevices>
                    <fencedevice agent=“fence_ipmilan” ipaddr=“billsp” login=“root” name=“ipmi_bill” passwd=“PASSWORD-HERE”/>
                    <fencedevice agent=“fence_ipmilan” ipaddr=“tedsp” login=“root” name=“ipmi_ted” passwd=“PASSWORD-HERE”/>
                </fencedevices>
                <rm log_level="5">
                    <resources>
                        <clusterfs device=“/dev/mapper/StorageTek2530-sites” fstype=“gfs2” mountpoint=“/sites” name=“sites”/>
                        <clusterfs device=“/dev/mapper/StorageTek2530-databases” fstype=“gfs2” mountpoint=“/databases” name=“databases”/>
                        <clusterfs device=“/dev/mapper/StorageTek2530-logs” fstype=“gfs2” mountpoint=“/logs” name=“logs”/>
                    </resources>
                    <failoverdomains>
                        <failoverdomain name=“bill-only” nofailback=“1” ordered=“0” restricted="1">
                            <failoverdomainnode name=“bill”/>
                        </failoverdomain>
                        <failoverdomain name=“ted-only” nofailback=“1” ordered=“0” restricted="1">
                            <failoverdomainnode name=“ted”/>
                        </failoverdomain>
                    </failoverdomains>
                </rm>
            </cluster>
    • We’ll be adding more to this later, but this will work for now.
    • Validate the config file
      • ccs_config_validate
    • Set a password for the ricci user
      • passwd ricci
    • Start ricci, and set to start on boot
      • service ricci start
      • chkconfig ricci on
    • Start modclusterd and set to start on boot
      • service modclusterd start
      • chkconfig modclusterd on
    • Sync the cluster.conf file to other node
      • ccs -f /etc/cluster/cluster.conf -h ted --setconf
    • Start cman on both servers at the same time
      • service cman start
    • Set cman to start on boot
      • chkconfig cman on
  • Check the tutorial on testing the fencing

Create GFS2 partitions

Create a partition on the new scsi device /dev/mapper/mpatha using parted. NOTE: This part only needs to be done once on one server

  • parted /dev/mapper/mpatha
  • mklabel gpt
  • mkpart primary 1 -1
  • set 1 lvm on
  • quit
  • Now you can see a partition for the storage array.
    • parted -l

Edit the /etc/lvm/lvm.conf file and set the value for locking_type = 3 to allow for cluster locking.

In order to enable the LVM volumes you are creating in a cluster, the cluster infrastructure must be running and the cluster must be quorate.

  • service clvmd start
  • chkconfig clvmd on
  • chkconfig gfs2 on

Create LVM partitions on the raw drive available from the StorageTek. NOTE: This part only needs to be done once on one server.

  • pvcreate /dev/mapper/mpatha1
  • vgcreate -c y StorageTek2530 /dev/mapper/mpatha1

Now create the different partitions for the system: sites, databases, logs, home, root

  • lvcreate --name sites --size 350GB StorageTek2530
  • lvcreate --name databases --size 100GB StorageTek2530
  • lvcreate --name logs --size 50GB StorageTek2530
  • lvcreate --name root --size 50GB StorageTek2530

Make a temporary directory /root-b and copy everything from root’s home directory to there, because it will be erased when we make the GFS2 file system.

Copy /root/.ssh/known_hosts to /etc/ssh/root_known_hosts so the file is different for both servers.

Before doing the home directory, we have to remove it from the local LVM.

  • unmount /home
  • lvremove bill_local/home and on ted lvremove ted_local/home
  • Remove the line from /etc/fstab referring to the /home directory on the local LVM
  • Then add the clustered LV.
    • lvcreate --name home --size 50GB StorageTek2530

Create GFS2 files systems on the LVM partitions created on the StorageTek. Make sure they are unmounted, first. NOTE: This part only needs to be done once on one server.

  • mkfs.gfs2 -p lock_dlm -j 2 -t web-production:sites /dev/mapper/StorageTek2530-sites
  • mkfs.gfs2 -p lock_dlm -j 2 -t web-production:databases /dev/mapper/StorageTek2530-databases
  • mkfs.gfs2 -p lock_dlm -j 2 -t web-production:logs /dev/mapper/StorageTek2530-logs
  • mkfs.gfs2 -p lock_dlm -j 2 -t web-production:root /dev/mapper/StorageTek2530-root
  • mkfs.gfs2 -p lock_dlm -j 2 -t web-production:home /dev/mapper/StorageTek2530-home

Mount the GFS2 partitions

  • NOTE: GFS2 file systems that have been mounted manually rather than automatically through an entry in the fstab file will not be known to the system when file systems are unmounted at system shutdown. As a result, the GFS2 script will not unmount the GFS2 file system. After the GFS2 shutdown script is run, the standard shutdown process kills off all remaining user processes, including the cluster infrastructure, and tries to unmount the file system. This unmount will fail without the cluster infrastructure and the system will hang.
  • To prevent the system from hanging when the GFS2 file systems are unmounted, you should do one of the following:
    • Always use an entry in the fstab file to mount the GFS2 file system.
    • If a GFS2 file system has been mounted manually with the mount command, be sure to unmount the file system manually with the umount command before rebooting or shutting down the system.
  • If your file system hangs while it is being unmounted during system shutdown under these circumstances, perform a hardware reboot. It is unlikely that any data will be lost since the file system is synced earlier in the shutdown process.

Make the appropriate folders on each node (/home is already there).

  • mkdir /sites /logs /databases

Make sure the appropriate lines are in /etc/fstab

#GFS2 partitions shared in the cluster
/dev/mapper/StorageTek2530-root        /root        gfs2   defaults,acl    0 0
/dev/mapper/StorageTek2530-home        /home        gfs2   defaults,acl    0 0
/dev/mapper/StorageTek2530-databases      /databases      gfs2   defaults,acl    0 0
/dev/mapper/StorageTek2530-logs        /logs        gfs2   defaults,acl    0 0
/dev/mapper/StorageTek2530-sites    /sites    gfs2   defaults,acl    0 0

Once the GFS2 partitions are set up and in /etc/fstab, rgmanager can be started. This will mount the GFS2 partions.

  • service rgmanager start
  • chkconfig rgmanager on

Starting Cluster Software

To start the cluster software on a node, type the following commands in this order:

  • service cman start
  • service clvmd start
  • service gfs2 start
  • service rgmanager start

Stopping Cluster Software

To stop the cluster software on a node, type the following commands in this order:

  • service ossec-hids stop
    • (ossec monitors the apache log files, so the /logs partition will not be unmounted unless ossec is stopped first.)
  • service rgmanager stop
  • service gfs2 stop
  • umount -at gfs2
  • service clvmd stop
  • service cman stop

Cluster tips

If a service shows as ‘failed’ when checking on services with clustat

  • Disable the service first: clusvcadm -d service-name
  • Then re-enable it: clusvcadm -e service-name

Have Shorewall start sooner in the boot process.

  • It was necessary to move shorewall up in the boot process, otherwise cman had no open connection to detect the other nodes.
  • Edit the /etc/init.d/shorewall and change the line near the top from # chkconfig: - 28 90 to
    • # chkconfig: - 18 90
  • Then use chkconfig to turn off shorewall and then back on.
    • chkconfig shorewall off
    • chkconfig shorewall on

If at first you don’t succeed

…copy somebody’s code. Or at least your own from the past that works.

I finally got the map to work for my Exhibit exhibit. See.


First I copied the tutorial here. When that was working, I carefully copied it to the file I wanted it to be in and… nothing. Still broken.

So next I commented out all extraneous stuff, and finally got it to work. Now came the fun part of tracking down what code was making my awesome map look like nothing. I narrowed it down to something within the <header> tag. So line by line I uncommented and tested until I tracked the issue down to the bootstrap.css file I was using.

Then came the same process within the bootstrap.css file. It was easily 1000 lines long, so a line by line process wasn’t going to work. Instead I commented out the first have of the file. Bing, the map displayed, so it was somewhere within that first 500 lines. Then I commented out the first 250 lines. Bing again. I kept dividing the culprits in half until I narrowed it down to styles for the img tag. Commented those out and I was in business.

Through that grueling process I lost the images of the documents on the first page. Now I have to figure out how to get those back, apply some styling and we’re all set.

Unfortunately I wasn’t ever able to get it to pull in the data from a spreadsheet, so the JSON file will have to do. The process for making a JSON file from a spreadsheet is simple:

1. Make the spreadsheet file so that the headers are encapsulated with curly braces ‘{ }’

2. If you’re using Google spreadsheets, export it as an Excel file. You’ll have to open it in Excel and save it as an older file format, because the next step doesn’t like .xlsx.

3. Next, use Similie’s Babel tool to convert the spreadsheet to JSON.

4. Select “Excel” as the “from format” and “Exhibit JSON” as the “to format” and then browse to find the xls file you just made.

5. Click the “Upload and Convert” button.

6. The next screen is all of your spreadsheet data output into a nice JSON format.

7. Now you can use this JSON file for any number of things. But it’s especially nice to use it in an Exhibit to display your data.

This is cross posted at the class blog http://www.fredgibbs.net/clio3workspace/blog/if-at-first-you-dont-succeed/

When your OS updates break your CAM

As I’m sure many people have run into this before, and from personal experience, found nothing roaming the Interwebs on how to fix it, and seeings how I just fixed it, I’ll write up a little how to fix it post.


The set up:

Two SunFire X2100 M2 servers connected to a StorageTek 2530 via iscsi. The two nodes are running CentOS 6.2 with RedHat cluster software. I have a server running Nagios for monitoring and it checks for failed disks on the StorageTek by running a script on either node that returns the number of “optimal” and “failed” disks.


Two nodes connected to an array via iscsi (Ethernet)

The problem:

Updating system software is important. Keeping packages up to date protects from security vulnerabilities. Unfortunately, sometimes it breaks things. In this case, updating the suggested packages broke my set up, making it so that the Sun Storage CAM (Common Array Manager) software did not work anymore.

I first became alerted to this when Nagios sent me errors from the script checking the StorageTek disks. I checked the command that runs in the script to see what was up, and it returned several errors. Here they are for future googlers:

sscs list -i 192.168.128.101 device

returned “Command failed due to an exception. null” and

sscs list -a arrayname host

returned “arrayname : The resource was not found.”

Not particularly helpful messages.

Fortunately the nodes could still mount the array partitions, which allowed them to continue running as web and mysql servers. I just couldn’t run management commands on the array.

Since some of the required software for CAM was updated, I supposed that was causing the issue. The required software is listed below:

  • libXtst-1.0.99.2-3.el6.i686.rpm and its dependent rpm (InstallShield requirement)
  • libselinux-2.0.94-2.el6.i686.rpm
  • audit-libs-2.0.4-1.el6.i686.rpm
  • cracklib-2.8.16-2.el6.i686.rpm
  • db4-4.7.25-16.el6.i686.rpm
  • pam-1.1.1-4.el6.i686.rpm
  • libstdc++-4.4.4-13.el6.i686.rpm
  • zlib-1.2.3-25.el6.i686.rpm
  • ksh-20100621-2.el6.x86_64.rpm


The solution:

I couldn’t figure out on my own exactly what was wrong, so I contacted Oracle support, and they finally tipped me off to the solution. Completely remove the CAM software and reinstall it. Those steps are outlined below:

  • Go to the CAM software folder in /var/opt/CommonArrayManager/Host_Software_6.9.0.16/bin/and run
./uninstall -f
  • Here is a good spot to run yum update and restart the server if needed.
  • Change directories to where you have the CAM software install CD. There should be a folder called components in there. Change into that directory and install the jdk available there:
rpm -Uvh jdk-6u20-linux-i586.rpm
  • Next run the RunMe.bin file in the CAM Software CD folder.
./RunMe.bin -c
  • Install the RAID Proxy Agent package located in the Add_On/RaidArrayProxy directory of the latest CAM software distribution.
rpm -ivh SMruntime.xx.xx.xx.xx-xxxx.rpm
rpm -ivh SMagent-LINUX-xx.xx.xx.xx-xxxx.rpm
  • Register the array with the host/node. This process can take several minutes.
sscs register -d storage-system

One additional issue I ran into, was that some update or other process shutdown the NIC connecting the node to the array. I had to make sure that was running before I ran the register -d storage-system command above.

Making Multiple MySQL Instances on One Server

I’m trying this new idea for backing up our production MySQL servers. I have a backup server that basically runs rdiff-backup in the morning across several servers, but then does nothing for the rest of the day. It’s a pretty decent machine, so I’d like to utilize some resources. Replicating a MySQL server is a good way to ensure High Availability in case of a failure. The backup server acts as a slave to the master (production) server. Basically, the slave is an exact copy of the master. They are two separate instances of MySQL server running on two physical servers. Whatever queries run on the master are sent to the slave so it can do the same. This way they are kept completely in sync. You could also have the slave take over for the master, should the master server happen to fail.

The slave is an ever updating duplicate of the master.

The only problem I face with this set up, though, is that I have multiple production servers out there. So this only works if this backup server could be a slave for multiple machines.

No slave can serve two masters.

This is not possible, though, because, of course, no slave can serve two masters. Fortunately, a server can have multiple instances of MySQL running on it! So, in a sense, we have a server with multiple MySQL instances, to which a master can replicate. More about that set up in an upcoming post.

The slave has multiple instances of MySQL running.

A how to on this blog, shows how this can be done. I’ll replicate the process below.

STEPS TO MULTIPLE MYSQL MADNESS

On the slave server

Step 1. Install MySQL

We’ll be working with CentOS 5.8, but this could really apply for any OS. First we’ll need to install MySQL like normal.

yum install mysql mysql-server

There are plenty of good tutorials out there on how to install the specific version of MySQL you want on the specific OS you’re running.

Step 2. Set up the data area.

You’ll need to have a different folder for each of the MySQL instances, say /dbases/master-a/, /dbases/master-b/, and /dbases/master-c/.

mkdir -p /dbases/{master-a,master-b,master-c}

Step 3. Copy the default my.cnf file

This is the default MySQL config file, it may be named differently on other OSes.

cp /etc/my.cnf /etc/master-a.cnf; cp /etc/my.cnf /etc/master-b.cnf; cp /etc/my.cnf /etc/master-c.cnf

Step 4. Edit the new MySQL config files.

For each new config file, you’ll need to specify some unique variables.

[mysqld]
port=3307
datadir=/dbases/master-a
socket=/dbases/master-a/mysql.sock
user=mysql
server_id=3307
log-bin=/dbases/master/mysql-bin.log

# Disabling symbolic-links is recommended to prevent assorted security risks;
# to do so, uncomment this line:
symbolic-links=0

[mysqld_safe]
log-error=/dbases/master-a/mysqld.log
pid-file=/dbases/master-a/mysqld.pid

The port option sets this MySQL instance on a different port than the default 3306. The datadir, socket, log-bin, log-error, and pid-file options make sure the necessary files are not using the default files.

Step 5. Create new init scripts.

The init script allows the server to start and stop the service at boot time, and allows for easy start up and shutdown (on CentOS/RedHat, at least – with an easy service mysqld start).

cp /etc/init.d/mysqld /etc/init.d/mysqld-master-a

Just do one for now. We’ll copy the new one to create the others, then just do a quick search and replace in those files to change the master-a to master-b and master-c.

Step 6. Edit the init script

#!/bin/bash
#
# mysqld        This shell script takes care of starting and stopping
#               the MySQL subsystem (mysqld).
#
# chkconfig: - 64 36
# description:  MySQL database server.
# processname: mysqld
# config: /etc/master-a.cnf
# pidfile: /dbases/master-a/mysqld.pid

# Source function library.
. /etc/rc.d/init.d/functions

# Source networking configuration.
. /etc/sysconfig/network

prog="MySQL"

# extract value of a MySQL option from config files
# Usage: get_mysql_option SECTION VARNAME DEFAULT
# result is returned in $result
# We use my_print_defaults which prints all options from multiple files,
# with the more specific ones later; hence take the last match.
get_mysql_option(){
        result=/usr/bin/my_print_defaults "$1" | sed -n "s/^--$2=//p" | tail -n 1
        if [ -z "$result" ]; then
            # not found, use default
            result="$3"
        fi
}

get_mysql_option mysqld datadir "/dbases/master-a"
datadir="/dbases/master-a"
get_mysql_option mysqld socket "/dbases/master-a/mysql.sock"
socketfile="/dbases/master-a/mysql.sock"
get_mysql_option mysqld_safe log-error "/dbases/master-a/mysqld.log"
errlogfile="/dbases/master-a/mysqld.log"
get_mysql_option mysqld_safe pid-file "/dbases/master-a/mysqld.pid"
mypidfile="/dbases/master-a/mysqld.pid"

defaultfile="/etc/master-a.cnf"

start(){
        touch "$errlogfile"
        chown mysql:mysql "$errlogfile"
        chmod 0640 "$errlogfile"
        [ -x /sbin/restorecon ] && /sbin/restorecon "$errlogfile"
        if [ ! -d "$datadir/mysql" ] ; then
            action $"Initializing MySQL database: " /usr/bin/mysql_install_db --datadir="$datadir" --user=mysql
            ret=$?
            chown -R mysql:mysql "$datadir"
            if [ $ret -ne 0 ] ; then
                return $ret
            fi
        fi
        chown mysql:mysql "$datadir"
        chmod 0755 "$datadir"
        # Pass all the options determined above, to ensure consistent behavior.
        # In many cases mysqld_safe would arrive at the same conclusions anyway
        # but we need to be sure.
        /usr/bin/mysqld_safe  --defaults-file="$defaultfile" --datadir="$datadir" --socket="$socketfile" \
                --log-error="$errlogfile" --pid-file="$mypidfile" \
                --user=mysql >/dev/null 2>&1 &
        ret=$?
        # Spin for a maximum of N seconds waiting for the server to come up.
        # Rather than assuming we know a valid username, accept an "access
        # denied" response as meaning the server is functioning.        
        if [ $ret -eq 0 ]; then
            STARTTIMEOUT=30
            while [ $STARTTIMEOUT -gt 0 ]; do
                RESPONSE=/usr/bin/mysqladmin --socket="$socketfile" --user=UNKNOWN_MYSQL_USER ping 2>&1 && break
                echo "$RESPONSE" | grep -q "Access denied for user" && break
                sleep 1
                let STARTTIMEOUT=${STARTTIMEOUT}-1
            done
            if [ $STARTTIMEOUT -eq 0 ]; then
                    echo "Timeout error occurred trying to start MySQL Daemon."
                    action $"Starting $prog: " /bin/false
                    ret=1
            else
                    action $"Starting $prog: " /bin/true
            fi
        else
            action $"Starting $prog: " /bin/false
        fi
        [ $ret -eq 0 ] && touch /dbases/master-a/mysqld
        return $ret
}

stop(){ 
        MYSQLPID=cat "$mypidfile"  2>/dev/null 
        if [ -n "$MYSQLPID" ]; then
            /bin/kill "$MYSQLPID" >/dev/null 2>&1
            ret=$?
            if [ $ret -eq 0 ]; then
                STOPTIMEOUT=60
                while [ $STOPTIMEOUT -gt 0 ]; do
                    /bin/kill -0 "$MYSQLPID" >/dev/null 2>&1 || break
                    sleep 1
                    let STOPTIMEOUT=${STOPTIMEOUT}-1
                done
                if [ $STOPTIMEOUT -eq 0 ]; then
                    echo "Timeout error occurred trying to stop MySQL Daemon."
                    ret=1
                    action $"Stopping $prog: " /bin/false
                else
                    rm -f /dbases/master-a/mysqld
                    rm -f "$socketfile"
                    action $"Stopping $prog: " /bin/true
                fi
            else
                action $"Stopping $prog: " /bin/false
            fi
        else
            ret=1
            action $"Stopping $prog: " /bin/false
        fi
        return $ret
}

restart(){
    stop
    start
}

condrestart(){
    [ -e /dbases/master-a/mysqld ] && restart || :
}

# See how we were called.
case "$1" in
  start)
    start
    ;;
  stop)
    stop
    ;;
  status)
    status mysqld
    ;;
  restart)
    restart
    ;;
  condrestart)
    condrestart
    ;;
  *)
    echo $"Usage: $0 {start|stop|status|condrestart|restart}"
    exit 1
esac

exit $?

Step 7. Start each MySQL instance.

Now you can start each instance with the handy service command.

service mysqld-master-a start

Step 8. Connect to MySQL instances.

Now, to connect to each MySQL instance, you’ll need to specify the port and/or socket file.

mysql -P3307 --socket="/dbases/mysql-master-a/mysql.sock"

Backing up MySQL with Replication and Incremental Files – Part 1

I’m trying this new idea for backing up our production MySQL servers. I have a backup server that basically runs rdiff-backup in the morning across several servers, but then does nothing for the rest of the day. It’s a pretty decent machine, so I’d like to utilize some resources. Databases are a tough cookie to backup. You can’t just copy the data files and then expect to copy them back over and have them just work. Especially if your databases have a mixture of InnoDB and MyISAM tables. In order to do a clean and accurate database backup, you need to stop the MySQL server, then copy the files, then restart MySQL.

If you have a live production MySQL server, stopping it to make a backup is not really an option. Fortunately there are a few options. Before you decide on which option to choose, here is a list of things to keep in mind when choosing a backup solution (from the MySQL gurus at Percona):

WHAT TO LOOK FOR

http://www.mysqlperformanceblog.com/2009/03/03/10-things-you-need-to-know-about-backup-solutions-for-mysql/

  1. Does the backup require shutting down MySQL? If not, what is the impact on the running server? Blocking, I/O load, cache pollution, etc?
  2. What technique is used for the backup? Is it mysqldump or a custom product that does something similar? Is it a filesystem copy?
  3. Does the backup system understand that you cannot back up InnoDB by simply copying its files?
  4. Does the backup use FLUSH TABLES, LOCK TABLES, or FLUSH TABLES WITH READ LOCK? These all interrupt processing.
  5. What other effects are there on MySQL? I’ve seen systems that do a RESET MASTER, which immediately breaks replication. Are there any FLUSH commands at all, like FLUSH LOGS?
  6. How does the system guarantee that you can perform point-in-time recovery?
  7. How does the system guarantee consistency with the binary log, InnoDB logs, and replication?
  8. Can you use the system to set up new MySQL replication slaves? How?
  9. Does the system verify that the backup is restorable, e.g. does it run InnoDB recovery before declaring success?
  10. Does anyone stand behind it with support, and guarantee working, recoverable backups? How strong is the legal guarantee of this and how much insurance do they have?


BACKUP PROGRAMS

There are a few MySQL backup products out there as well. I have used the first two on this list.

  • AutoMySQLBackup script (handy for making a rotating incremental backup of your MySQL databases).
  • Percona XtraBackup (nice way to ensure InnoDB and MyISAM tables are backed up properly, also does it incrementally)
  • Zmanda (seems to be similar to Percona’s set up)

There’s probably a gazillion more out there. Google’s your friend in finding things you need.

HOW TO DO IT

How to get a copy of the master to the slave?

There are several options. You could use a script above, or create a slave of the database (basically an exact copy of the production MySQL server – all changes that occur in the master are sent to the slave), or some combination. I’ll use a combination. I’ll replicate the production server onto the backup server, then run the incremental backups from there. This first part will walk through the process of setting up MySQL replication.

To give proper credit, here are several other how to’s I found helpful.

On the master server

Step 1. Edit the my.cnf file to include at least the following (if needed) lines. Note: you will have to restart MySQL for these changes to take affect.

[mysqld]
server_id=1
innodb_flush_log_at_trx_commit=1
log_bin=mysql-bin.log
sync_binlog=1

Step 2. Make a MySQL user for the slave to use.

In a MySQL session on the terminal, type in the command:

GRANT REPLICATION SLAVE ON *.* TO 'rep_user'@'localhost' IDENTIFIED BY 'passwordhere';

Step 3. Open a terminal session and log in to a MySQL prompt. Type the following command and hit enter.

FLUSH TABLES WITH READ LOCK

Note: This will lock your database so that no changes can be made from any web applications or other programs. This session should remain open, and the database locked for the next few steps.

Step 4. After the FLUSH TABLES command finishes, run the following command and press enter.

SHOW MASTER STATUS

Record the information under “File Name” and “Position”.

Step 5.  Make a copy of the database files.

5.1 LVM Snapshot:

In another terminal session, run the following command to make an LVM snapshot of the database.

lvcreate -L10G -s -n mysql-backup /dev/mapper/dbases

This creates a snapshot of the database files very quickly. We can use the snapshot later to copy the data to the backup server without interfering with the original database files.

After this command finishes, you can unlock the database as shown in the next step. Then you can mount the new LVM partition and copy the files to the backup server.

mkdir -p /mnt/mysql-backup
mount -o nouuid /dev/mapper/mysql-backup /mnt/mysql-backup
rsync -avz -e "ssh -c blowfish" /mnt/mysql-backup user@remote.host:/backup/location

5.2 RSYNC:

If you don’t have your database files on an LVM partition, you can just copy the files to the backup server now using rsync, scp or what have you. This will take significantly longer (depending on the size of your database), leaving the database in a locked state.

rsync -avz -e "ssh -c blowfish" /dbases/mysql user@remote.host:/backup/location

5.3 MySQL Dump:

You could also take a mysqldump of the database and copy that SQL file to the other server.

mysqldump -uuser -p --all-databases > mysql-backup.sql
scp mysql-backup.sql user@remote.host:/backup/location

Step 6. Once the lvcreate command has finished, you can unlock the database.

UNLOCK TABLES

Step 7. If you haven’t already, copy the copy of the database files to the backup server.

On the slave server

Step 1. Edit the my.cnf file to include at least the following (if needed) lines. Note: you will have to restart MySQL for these changes to take affect.

[mysqld]
server_id=2

Step 2. Start MySQL and run the following commands in a mysql session to start the MySQL slave.

CHANGE MASTER TO
MASTER_HOST = "master.server.com",
MASTER_USER = "rep_user",
MASTER_PASSWORD = "passwordhere",
MASTER_LOG_FILE = "mysql-bin.log",
MASTER_LOG_POS = 2341234;

The MASTER_HOST is the domain name or IP address of the master server. MASTER_USER, MASTER_PASSWORD were created on the master server in Step 2. MASTER_LOG_FILE and MASTER_LOG_POS were gathered in Step 4.Then, finally, to start the slave, issue the following command in mysql.

START SLAVE;

THATCamp 2012

Believe it or not, this was my first ever THATCamp experience. Seems hard to imagine since I have worked at CHNM since before the inception of THATCamp.  Ah, well, the stars finally aligned, and was able to attend this year. And it was great.


I attended three workshops on Friday, and a couple of sessions on Saturday. Here are some thoughts…

Digital Data Mining with Weka: This was a neat crash course on what data mining is and is not, and one free tool to help do some of that. It was more of a “here’s what’s out there, how does it apply to the humanities” than a hands on, hands dirty, do some real work type of work shop. But it was good in that it opened up the possibility to do some data mining in the future. Since they were relatively small, here my notes:

What is data mining?

examples:

  • recommend ads, products to users based on purchases
  • finding patterns in large amounts of text (writing algorithms to find those patterns)

Goal of data mining is to predict what users/people will do based on data from other users/people

Data mining Tasks: classification, clustering, association rule discovery, sequential pattern discovery, regression, deviation detection

Goal is to predict the classification (or whatever) of future data, based on the current data that you analyze.

Cross validation (when done correctly you get true results, when not done correctly you get false results)

have multiple sets of data, one for training and the other for testing. Build the algorithm on the training data, then run it on the test. Then cycle through each testing data set and have it act as a training set. Do this way because you know the results for each, so you can tell if your algorithm is correct. When it’s good then you can use it on future data where you don’t know the result.

Interesting Things You Can Do With Git: This one was highly anticipated. I have been wanting/needing to learn git for a while now. For being in the IT field, having written some code, and even having a GitHub account with code on it, I’m ashamed to say I still don’t know how to use git effectively. There is not much you can do in 1.5 hours, and this was more a theoretical “here are some ideas”, than a “here is how to do it” approach.

The session on using blogs as assignments was maybe a bit premature for me. The session was really good, great ideas, tips, etc. But me teaching is still too far away for me to have put the mental effort in to following along much. I spent most of the time trying to find a good twitter client, but in the end just stuck with Adium.

Then I took some time to enjoy the hacker space. I decided it was time, and this was the perfect place to set up a transcription tool for my dissertation archive. So sitting at the very table where it is coded, I installed the Scripto plugin for Omeka. That’s a bit of a misnomer, since it is really a wrapper that lets Omeka and a Wikimedia install play nicely together. I went ahead and transcribed one of the documents in the archive as well. The archive is just in the testing phase, but here it is anyways: http://nazitunnels.org/archive

Nazi Tunnels Archive

The final event of THATCamp for me was one last session proposed by a fellow “camper”. She wanted help learning about the shell/terminal/command line. So I volunteered to help out with that. It ended up that there were about eight people that wanted help learning the command line, and four of us that knew what we were doing. So it ended up being a great ratio of help needed to those who could offer it. We started with the very basics, didn’t get much past a few commands (ls, cd, rm, nano, grep, cat), but we went slow enough that everybody who was trying to follow along was able to, and they all left with a clearer understanding of what the shell is for, and why it is useful. The proposer found a great tutorial/book for learning the command line that I’ll have to go through as well. You can always learn something new.

What was also great about that session, since it was basically ran by those who needed the help, I saw how those who struggle with these concepts learn them, so I will hopefully be better able to teach them to others in the future.


UPDATE: I forgot to mention the many cool sites and projects mentioned during Saturday morning’s Dork Shorts. Here’s a list of the ones I took notice of.

http://afripod.aodl.org/
https://github.com/AramZS/twitter-search-shortcode
http://cowriting.trincoll.edu/
http://www.digitalculture.org/2012/06/15/dcw-volume-1-issue-4-lib-report-mlaoa-and-e-lit-pedagogy/
http://luna.folger.edu/luna/servlet/BINDINGS~1~1
http://www.insidehighered.com/blogs/gradhacker
http://hacking.fugitivetexts.net/
http://jitp.commons.gc.cuny.edu/
http://www.neh.gov/
http://penn.museum/
http://www.playthepast.org/
http://anglicanhistory.org/
http://podcast.gradhacker.org/
http://dhcommons.org/
http://ulyssesseen.com/
http://m.thehenryford.org/

Filling in the missing dates with AWStats

Doh!

Sometimes AWStats will miss some days in calculating stats for your site, and that leaves a big hole in your records. Usually, as in my case, it’s because I messed up. I reinstalled some software on our AWStats machine, and forgot to reinstall cron. Cron is the absolutely necessary tool for getting the server to run things on a timed schedule. I didn’t notice this until several days later, leading to a large gap in the stats for April.

What to do?

Fortunately, there is a fix. Unfortunately, it’s a bit labor intensive, and depends on how you rotate your apache logs (if at all, which you should). The AWStats Documentation (see FAQ-COM350 and FAQ-COM360) has some basic steps to fix the issue, outlined below:

  1. Move the AWStats data files for months newer to a temporary directory.
  2. Copy the Apache logs with all of the stats for the month with the missing days to a temporary directory.
  3. Run the AWStats update tool, using AWStat’s logresolvemerge tool and other changed paramaters, to re-create the AWStats data file for that month
  4. Replace the AWStats data files for the following months (undo step 1).

The Devil’s in the Details

Again, depending on how you have Apache logs set up, this can be an intensive process. Here’s how I have Apache set up, and the process I went through to get the missing days back into AWStats.

We have our Apache logs rotate each day for each domain on the server (or sub-directory that is calculated separately). This means I’ll have to do this process about 140 times. Looks like I need to write a script…

Step 1. Move the data files of newer months

AWStats can’t run the update on older months if there are more recent months located in the data directory. So we’ll need to move the more recent month’s stats to a temporary location out of the way. So, if the missing dates are in June, and it is currently August, you’ll need to remove the data files for June, July, and August (they look like this awstatsMMYYYY.domain-name.com.txt where MM is the two digit month and YYYY is the four digit year) to a temporary directory so they are out of the way.

Step 2. Get the Apache logs for the month.

First step is to get all of the logs for each domain for the month. This will work out to about 30 or 31 files (if the month is already past), or however many days have past in the current month. For me, each domain archives the days logs in the following format domain.name.com-access_log-X.gz and domain.name.com-error_log-X.gz where the X is a sequential number. So the first problem is how to get the correct file name without having to look in each file to see if it has the right day? Fortunately for me, nothing touches these files after they are created, so their mtime (the time stamp of when they were last modified) is intact and usable. Now, a quick one-liner to grab all of the files within a certain date range and put their content in a new file.

We’ll use the find command to find the correct files. Before we construct that command, we’ll need to create a couple of files to use for our start and end dates.

touch --date YYYY-MM-DD /tmp/start
touch --date YYYY-MM-DD /tmp/end

Now we can use those files in the actual find command. You may need to create the /tmp/apachelogs/ directory first.

find /path/to/apache/logs/archive/ -name "domain-name.com-*" -newer /tmp/start -not -newer /tmp/end -exec cp '{}' /tmp/apachelogs/ \;

Now unzip those files so they are usable. Move into the /tmp/apachelogs/ directory, and run the gunzip command.

gunzip *log*

If you are doing the current month, then copy in the current apache log for that domain.

cp /path/to/apache/logs/current/domain-name.com* /tmp/apachelogs/

This puts all of the domains log files for the month into a directory that we can use in the AWStats update command

Things to note: You need to make sure that each of the log files you have just copied use the same format. You also need to make sure they only contain data for one month. You can edit the files by hand or throw some fancy sed commands at the files to remove any extraneous data.

Step 3. Run the AWStats logresolvemerge and update tool

Now comes the fun part. We first run the logresolvemerge tool on the log files we created in the previous step to create one single log file for the whole month. While in the <code>/tmp/apachelogs/</code> directory, run:

perl /path/to/logresolvemerger.pl *log* > domain-name.com-YYYY-MM-log

Now, we need to run the AWStats update tool with a few parameters to account for the location of the new log file.

perl /path/to/awstats.pl -update -configdir="/path/to/awstats/configs" -config="domain-name.com" -LogFile="/tmp/apachelogs/domain-name.com-YYYY-MM-log"

Step 4. Move back any remaining files

If you moved any of the AWStats data files (awstatsMMYYYY.domain-name.com.txt like for July and August in our example) now’s the time to move them back where they go.


Yeah, that fixed it!


Phew! The missing dates are back!