Scrivener and Zotero

Scrivener is awesome software for writing, that I’ve mentioned before, but I had yet to really test out the integration with Zotero (my citation manager of choice). So now that I have finally started on my dissertation writing in earnest (and not grant writing), I needed to make sure that footnotes are usable in my work flow. So this is a quick write up of the tools I will use in writing my dissertation, and how I will use them.

The Tools

LibreOffice: Free and Open Source document software. Who knows how long I will have access to free Microsoft Word? LibreOffice (the fork of OpenOffice) will always be free and freely available. The steps will be basically the same if you are using Microsoft Word, just substitute that program for LibreOffice when it comes to it.


Zotero: I’m certainly biased, but Zotero is the greatest citation management software evar! Also free and open source. I’m using the stand alone version, but you can use the Firefox extension as well. Should work the same.


Scrivener: The greatest writing software I’ve seen. So good I even paid for it. I don’t usually do that with software (as you can see, I like free and open source).


The Process

Here I will try to outline the process I found that will save footnotes from existing documents into Scrivener, and Scrivener created footnotes into exported documents. From there, it’s easy to create Zotero connected footnotes.

1. Copy existing documents with footnotes into Scrivener

Copy from LibreOffice

The first issue to run across is to put your existing documents into scrivener. I wrote a paper for Hist 811 that is basically the bulk of Chapter 1 and Chapter 2 of the dissertation. It’s needs some finessing in order to fit in the dissertation. It would be a shame to lose the footnotes, which is what happens if you just use Scrivener’s import file process. This is an easy fix. Just copy the text from your document and paste it into a Scrivener text area.

Then with your Scrivener project open, create a new text area, or select an existing one, which ever, and paste it in. Nothing special there.


2. Create new footnotes in Scrivener

Scrivener makes a Footnote
See how Scrivener makes a footnote!

What is special, though is what Scrivener does with that footnote. See there, footnote number 20, right after the quote about the cocktail of causes and rearmament being one of the ingredients? Now in Scrivener we have the word “ingredient” highlighted and underlined, and on the right side of the Scrivener window, there is a new footnote with all of the content of the original footnote. Sweet!


Easy as Format->Footnote, or use the shorcut keys Ctrl-Cmd-8

That’s all well and good. What if we want to edit the text a little bit, add some good stuff and add another footnote in there? What do we do? Well, Scrivener has a way to add a footnote. Just highlight some text (the footnote will be inserted after the last word), and go to the Format menu and select Footnote. Or you can use the fancy shortcut keys, for faster typing and footnote inserting, Ctrl-Cmd-8 (⌃⌘8).


Look, Ma! A new footnote!

Now you have a new, blank, footnote area to put a footnote reverence in.


Select the reference in Zotero and drag it into the footnote box in Scrivener.

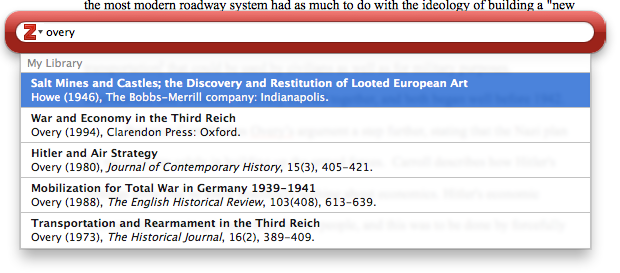
Zotero makes it easy to put the reference in that new empty footnote with drag and drop citations. Just pull up your Zotero (either from Firefox, or if you have the standalone version). Select the reference you want, and drag it into the empty footnote section.


3. Moving from Scrivener to a document, and keeping your footnotes!

So, ideally, you would be able to export your text document, and all of these lovely footnotes you have made in Scrivener, using Zotero, would just magically work in a Word or LibreOffice document. It doesn’t, yet (or ever?). So here is how to get your footnotes into a document, and then get those footnotes to be Zotero enabled.

Srivener->File->Export->Files

First, you export your Scrivener document to RTF format.


Select RTF format

Select the plain RTF format, and the first check box for only the selected files (although, you could un check this if you want to do all of your files at once. No other check boxes are needed. Then just hit the Export button.


Open it up with your favorite document program, LibreOffice or Word.

Next, you will want to open your new RTF document in LibreOffice (or Word if you’re using that program).


All my citations are in the house!

You will notice that all of your footnotes are in this file. Yeah! Sometimes the text had odd font sizes and styles. So a quick ‘Select All’ and change it to default style and Times New Roman, 12 pt should fix that right up. Now here is the labor intensive part. For each footnote, we’re going to have to recreate it so that it is handled by Zotero. Then we’ll delete the original footnote. It would be nice of Scrivener could export the footnotes in a way that Zotero could detect them, but alas it is not to be.


Now you add a citation through the zotero buttons to make a zotero-aware citation.


All my citations are in the house!

Insert a Zotero citation using the Zotero buttons in your document program’s menu bar.


I prefer the Zotero classic view.


The new citation find view is pretty slick, though.


You can add pages with a coma, space, number.


Now you have two citations.


With two citations in the document, you’ll need to delete the one that was not made by zotero.


Just make sure you delete the non-zotero aware citation. The Zotero citation is usually highlighted.


Now you can save the document as a different file format: odt, doc, docx

Now save the document as an ODT document. If it is saved as anything else, it will not be Zotero aware.


Take your pick of file types.


Save as the correct file format if you want Zotero to be able to edit them again.


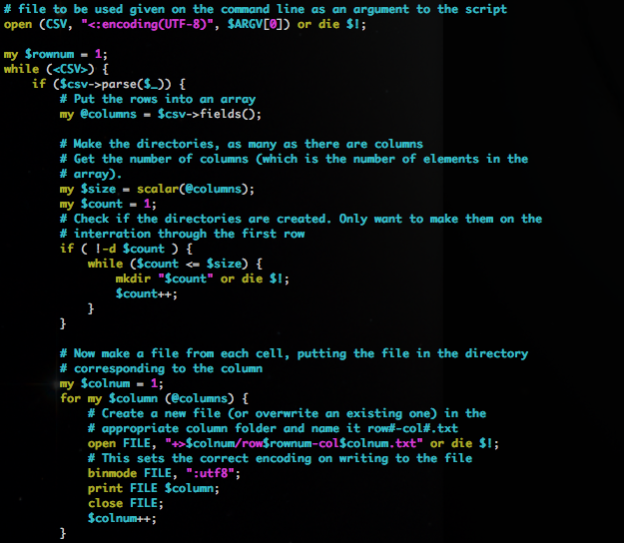
One alternative method is to create footnotes in Scrivener using the format {Author, Year, Page#}. Then export as an RTF document as before. Then, in Zotero, use the ‘RTF Scan’ tool in the Preferences menu. Zotero will see all of the citations and replace them nicely with formatted citations (using Ibid. and short notation for repeat books, and such). Zotero will not be aware of these citations at all, so if you need them to be Zotero aware, you might as well use the steps outlined above. If you do not expect to update citations or the text once done in Scrivener, then this may be the easiest way to go.

Now I can happily transfer existing documents into Scrivener and save the footnotes!

Setting up a Hosting Environment – Part 2: Connecting the Storage Array

[See Part 1: The Servers]

One of the most frustrating parts of this set up was getting the storage array talking to the servers. I finally got it figured out. I’m using a StorageTek 2530 to connect to two SunFire X2100 M2’s via SAS (Serial Attached SCSI) cables. I put in a dual port SAS HBA (Host Bus Adapter) in the X2100 M2’s, but for real redundancy, I should have used two single port HBA’s. The Sun/Oracle documentation is pretty good about how to physically set up the servers and storage array, but are pretty lacking from there on.

StorageTek 2530 Set Up

Replace the parts in squares brackets below with whatever you want.

  • Install the Sun CAM software.
    • Grab the latest version from http://support.oracle.com
      • You’ll need an active support contract and have an account.
      • Go to the ‘Patches and Updates’ tab.
      • Click on the ‘Product or Family (Advanced)’ link
      • In the ‘Product is’ section start typing in ‘Sun Storage Common Array Manager (CAM)’ and select it from the list
      • In the ‘Release is’ section select the most recent version
      • For the last section, select ‘Platform’ and then select ‘Linux x86-64’
      • Click ‘Search’
      • Click the ‘Download’ link for the software.
      • Upload the tar file to the server.
    • Pre-requisite software that needs to be installed.
      • yum install ksh bc /lib/ld-linux.so.2 libgcc.i686 libstdc++.i686 libzip.i686 gettext
    • Once CAM software is downloaded, un-zipped, un-tarred or what have you, change directories to HostSoftwareCD_6.9.0.16/components and install the jdk available there:
      • rpm -Uvh jdk-6u20-linux-i586.rpm
    • Next run the RunMe.bin file in the HostSoftwareCD_6.9.0.16 folder
      • ./RunMe.bin -c
    • Agree to all License Agreement stuffs
    • Select the Typical install.
  • Add the /opt/sun/cam/binfolder to path
    • With root using tcsh add this to .tcshrc
      • setenv PATH ${PATH}:/opt/sun/cam/bin
    • Then do source .tcshrc
  • Make sure there is an IP on the same subnet as the array (192.168.128.xxx)
    • Make a /etc/sysconfig/network-scripts/ifcfg-eth1:1file and put this in there
      • DEVICE=“eth1:1”
        BOOTPROTO=static
        HWADDR=“xx:xx:xx:xx:xx:xx:xx”
        IPADDR=192.168.128.xxx
        NM_CONTROLLED=“no”
        ONBOOT=“yes”
    • Install the RAID Proxy Agent package located in the Add_On/RaidArrayProxy directory of the latest CAM software distribution. (I found this to be optional.)
      • rpm -ivh SMruntime.xx.xx.xx.xx-xxxx.rpm
      • rpm -ivh SMagent-LINUX-xx.xx.xx.xx-xxxx.rpm
  • Register the StorageTek with the host. Process can take several minutes.
    • sscs register -d storage-system
  • Once registered, you can name the array anything you want. Note what the array is named from the previous step.
  • sscs modify -T [Array-Name] array ARRAY1
  • Set up the storage profile, pool, disk, volume, mapping. Use the command line commands below, or set it up via the web interface. NOTE: This part only needs to be done on one of the hosts.
    • If using the web interface, you have to use a windows laptop hooked up to the local network (192.168.128.xxx), or perhaps a server in the same local network that is not running CentOS 6, which has a known issue where the web interface does not work. For the web interface connect to https://localhost:6789 using the laptop or server Administrator/root account information.
    • sscs create -a knox pool [Pool-Name]
    • sscs create -a knox -p [Pool-Name] -n 11 vdisk [Vdisk-Name]
    • sscs create -a knox -p [Pool-Name] -s max -v [Vdisk-Name] volume [Volume-Name]
  • Create the host group and apply to host.
    • sscs create -a knox hostgroup [ApacheHosts]
  • Create hosts and assign to hostgroup
    • sscs create -a knox -g [ApacheHosts] host [Host-Name] and repeat for other hosts.
  • Map volume to host group
    • sscs map -a knox -g ApacheHosts volume Volume-Name
  • The array volume should now be available as /dev/sdb and /dev/sdc because the hosts are connected by two SAS cables each.
  • It took me a while to grasp the meaning for the different terms: pool, volume, volume groups, disks, etc. I drew up a chart with the appropriate commands to create the different aspects.

    To utilize both cables connecting the server to the storage array, the OS needs to use multi-pathing. I had lots of troubles trying to set this up after the OS was installed, so I just let it be done by the installer. Here’s what should happen if you find the OS already installed and need to set up multi-paths.

    • Set up DM-Multipath
      • NOTE: This is taken care of during the OS installation.
      • Multipath allows both SAS connections to the storage array to appear as one connection to the server. This allows for data to pass through even if one cable suddenly stops working, it seamlessly fails to the other path. For example, taken the image above, if the connection between hba1->cntrlr1 goes down, you still have connection hba2->cntrlr2. The OS sees one connection, and just uses whichever path is working.
      • After Multipath is set up, the storage array will be available as a device at /dev/mapper/mpatha. This will be the device to partition, format, and throw LVM on.
      • Install the multipath program and dependents
        • yum install device-mapper-multipath
      • Run mpathconf --enable to create a default /etc/multipath.conffile or create one using the following:
        • #  multipath.conf written by anacondadefaults {
          user_friendly_names yes
          }
          blacklist {
          devnode “^(ram|raw|loop|fd|md|dm-|sr|scd|st)[0-9]*”
          devnode “^hd[a-z]”
          devnode “^dcssblk[0-9]*”
          device {
          vendor “DGC”
          product “LUNZ”
          }
          device {
          vendor “IBM”
          product “S/390.*”
          }
          # don’t count normal SATA devices as multipaths
          device {
          vendor “ATA”
          }
          # don’t count 3ware devices as multipaths
          device {
          vendor “3ware”
          }
          device {
          vendor “AMCC”
          }
          # nor highpoint devices
          device {
          vendor “HPT”
          }
          wwid “3600508e000000000c9c1189277b84b05”
          device {
          vendor TEAC
          product DV-28E-V
          }
          wwid “*”
          }
          blacklist_exceptions {
          wwid “3600a0b80003abca4000007284f33c167”
          }
          multipaths {
          multipath {
          uid 0
          gid 0
          wwid “3600a0b80003abca4000007284f33c167”
          mode 0600
          }
          }
      • Set multipathd to start on boot, and if not on, turn it on
        • chkconfig multipathd on
        • service multipathd start

    Setting up a Hosting Environment: Part 1 – The servers

    I’ve spent a lot of time at work setting up a few servers to be our new production environment. Much of it was accomplished by reading the documentation over and over again. Not much out there on the Net, so I’m hoping this series of posts benefits someone else out there.

    First of all, I’ll cover what set up I would like to achieve and why.

    Hardware

    I’m using two Sun SunFire X2100 M2 connected to a StorageTek 2530 with 4.5TB of drive space. The servers attach to the storage array via SCSI cables for quick data transfer speeds. The array also has the ability to handle iSCSI connections. This will give me a decent base set up, with room to grow.

    Set up

    I’ll put the two servers in a cluster and make the services available over the cluster. They will share the storage using GFS2. In the future, I’ll add a couple of load balancer/proxy machines to farm out the Web traffic, and add a couple more SunFire X2100 M2’s to take that load. One of the main reasons to set up a new configuration with new servers is to provide a clean environment for the many WordPress and Omeka installations we host. We’ve had to hang on to some legacy services to support some older projects, so this will allow us to keep up to date. It will also allow me to set up Apache and PHP to run as a server user, locked down to it’s own directory. That way each of the 100+ sites won’t be able to access any other site’s content. I picked CentOS as the OS because it has cluster and GFS2 options of RedHat, but without the cost.

    Sun X2100 M2 OS Install steps

    1. Boot up with CentOS 6.x Minimal Install CD for x86_64
    2. Select the option to ‘Install or upgrade an existing system’, then hit the Enter key
    3. Skip the media test.
    4. You are now in graphic install mode.
    5. Hit Enter for ‘OK’ for ’English as the language.
    6. Hit Enter for ‘OK’ to US keyboard.
    7. Select the option to do a “Specialized Storage Devices” install
    8. Enter the computer name ‘bill.com’ or ‘ted.com’, etc
    9. Click the button to ‘Configure Network’.
      1. Eth2 seems to be the one associated with port 0 on the servers, so select that one and then ‘Add’
      2. Select ‘Connect Automatically’.
      3. Click the ‘IPv4 Settings’ tab.
      4. Choose ‘Manual’ for the ‘Method’.
      5. Enter the following for the info in ‘Addresses’.
        1. Address: 192.168.1.1
        2. Netmask: 255.255.255.0
        3. Gateway: 192.168.1.1
      6. For ‘DNS servers’, enter 192.168.1.100
      7. Then ‘Apply’
    10. Select ‘Next’ to keep the defaults for time zone and system clock.
    11. Enter a root password
    12. DRIVE PARTITION SETUP
      1. On the ‘Basic Devices’ tab, select the local drive and on the ‘Multipath Devices’ tab, select the storage array, and click ‘Next’.
      2. Select the ‘Fresh Installation’ option for a fresh install, or ‘Upgrade an Existing Installation’ to upgrade. Hit ‘Next’.
      3. Select ‘Create custom layout.’ and ‘Next’
      4. Delete all of the current LVM and other partitions.
      5. Select the free remaining drive for the local drive (should be /dev/sda). Click ‘Create’
      6. BOOT PARTITION
        1. Select ‘Standard Partition’ and click ‘Create’
        2. Set the Mount Point as /boot, the File System Type as ‘ext4’ and the Size (MB) as 500, then click ‘OK’
      7. Select the free space and click ‘Create’
      8. LVM PARTITION(NOTE: The sizes are different based on the size of the hard drives.)
        1. Select ‘LVM Physical Volume’ and click ‘Create’
        2. Select ‘Fill to maximum allowable size’ and click ‘OK’
        3. Select the new LVM partition and click ‘Create’
        4. Select ‘LVM Volume Group’ and click ‘Create’
        5. Set the ‘Volume Group Name’ as ‘Local’  then click the ‘Add’ button
        6. Set the ‘File System Type’ as swap, the ‘Logical Volume Name’ as ‘swap’ and the ‘Size(MB)’ as ‘12288’, then click ‘OK’.
        7. Click the ‘Add’ button again. Set the ‘Mount Point’ to ‘/’, the ‘File System Type’ to ext4, the ‘Logical Volume Name’ to ‘root’, and the ‘Size(MB)’ to ‘51200’. Then click ‘OK’.
        8. Click the ‘Add’ button again. Set the ‘Mount Point’ to ‘/home’, the ‘File System Type’ to ext4, the ‘Logical Volume Name’ to ‘home’, and the ‘Size(MB)’ to ‘500’. Then click ‘OK’.
        9. Click the ‘Add’ button again. Set the ‘Mount Point’ to ‘/var’, the ‘File System Type’ to ext4, the ‘Logical Volume Name’ to ‘var’, and the ‘Size(MB)’ to the remaining space available. Then click ‘OK’.
        10. Click ‘OK’
      9. Click ‘Next’ and ‘Write changes to disk’ to finish the partition creation.
    13. Leave the boot loader settings as is, and click ‘Next’
    14. Select the ‘Minimal’ option and click ‘Next’

    One of the most important things to have with servers is some form of remote management. That way you don’t need to trek down to the data center each time the server hangs while testing (and it happens a lot). For Sun systems, that means setting up the ELOM (Embedded Lights Out Manager).

    Steps to set up the Remote Console (Embedded Lights Out Manager – ELOM) for SunFire X2100 M2

    Set the SP serial port rate to 115200.

    • Log into the web based console, or through ssh via a computer on the same subnet (https://192.168.1.10) The IP is whatever the IP is set for the ELOM device. Check in BIOS for the IP.
      • Go to the Configuration tab, then the Serial Port tab.
      • Change the Baud Rate to 115200.

    Set BIOS

    IPMI Config
       Set LAN Config
       Set PEF Config
         PEF Support ........ [Enabled]
         PEF Action Global
            All of them ..... [Enabled]
         Alert Startup Discover ..... [Disabled]
         Startup Delay .............. [Disabled]
         Event Message For PEF ...... [Disabled]
       BMC Watch Dog Timer Action ... [Disabled]
       External Com Port ............ [BMC]
    Remote Access
       Remote Access ................ [Serial]
       Serial Port Number ........... [Com2]
       Serial Port Mode ............. [115200 8,n,1]
       Flow Control ................. [Hardware]
       Post-Boot Support ............ [Always]
       Terminal Type ................ [VT100]
       VT-UTF8 Combo Key ............ [Enabled]
    • Other options for the Serial Port Mode are 9600, 19200, 38400, and 57600

    Edit Linux Config Files

    Add a /etc/init/serial-ttyS1.conf file

    RedHat in EL 6, and thereby CentOS, moved to Upstart instead of Sysv, so we create a new serial-ttyS1.conf file instead of editing the /etc/inittab file.

    #  This service maintains a getty on /dev/ttyS1.
    stop on runlevel [016]
    
    respawn
    instance $TTY
    exec /sbin/mingetty $TTY

    Change grub.conf

    # grub.conf generated by anaconda
    #
    # Note that you do not have to rerun grub after making changes to this file
    # NOTICE:  You have a /boot partition.  This means that
    #          all kernel and initrd paths are relative to /boot/, eg.
    #          root (hd0,0)
    #          kernel /vmlinuz-version ro root=/dev/Logical/root
    #          initrd /initrd-version.img
    #boot=/dev/sda
    default=0
    timeout=5
    #splashimage=(hd0,0)/grub/splash.xpm.gz
    #hiddenmenu
    serial --unit=0 --speed=115200 --word=8 --parity=no --stop=1
    terminal --timeout=10 serial console
    
    title CentOS Linux (2.6.32-71.29.1.el6.x86_64)
            root (hd0,0)
            kernel /vmlinuz-2.6.32-71.el6.x86_64 ro root=/dev/mapper/Local-root \
    rd_LVM_LV=Local/root rd_LVM_LV=Local/swap rd_NO_LUKS rd_NO_MD rd_NO_DM \
    console=tty1 console=ttyS1,115200n8
              initrd /initramfs-2.6.32-71.29.1.el6.x86_64.img

    Add line to securetty

    console
    vc/1
    vc/2
    vc/3
    vc/4
    vc/5
    vc/6
    vc/7
    vc/8
    vc/9
    vc/10
    vc/11
    tty1
    tty2
    tty3
    tty4
    tty5
    tty6
    tty7
    tty8
    tty9
    tty10
    tty11
    ttyS1

    SUN SP Commands

    Connect to the ELOM by ssh into the IP address.
    ssh root@192.168.xxx.xxx

    • To power on the host, enter the following command:
      • set /SP/SystemInfo/CtrlInfo PowerCtrl=on
    • To power off the host gracefully, enter the following command:
      • set /SP/SystemInfo/CtrlInfo PowerCtrl=gracefuloff
    • To power off the host forcefully, enter the following command:
      • set /SP/SystemInfo/CtrlInfo PowerCtrl=forceoff
    • To reset the host, enter the following command:
      • set /SP/SystemInfo/CtrlInfo PowerCtrl=reset
    • To reboot and enter the BIOS automatically, enter the following command:
      • set /SP/SystemInfo/CtrlInfo BootCtrl=BIOSSetup
    • To change the IP address for the ELOM, enter:
      • set /SP/AgentInfo IpAddress=xxx.xxx.xxx.xxx
    • The default user name is root, and the default password is changeme.
      • set /SP/User/[username] Password=[password]
    • To start a session on the server console, enter this command:
      • start /SP/AgentInfo/console
      • To revert to CLI once the console has been started, press Esc-Shift-9 keys.
    • 
To terminate a server console session started by another user, enter this command:
      • stop /SP/AgentInfo/console

    Next we secure the new servers with some software updates and a firewall.

    Software Updates and installs:

    1. Edit /etc/resolve.conf
    2. nameserver 192.168.1.100
      options single-request-reopen

    3. yum install openssh-clients tcsh ksh bc rpm-build gcc gcc-c++ redhat-rpm-config acl gcc gnupg make vim-enhanced man wget which mlocate bzip2-devel libxml2-devel screen sudo parted gd-devel pam_passwdqc.x86_64 rsync zip xorg-x11-server-utils gettext
    4. disable SELinux. Edit the /etc/sysconfig/selinux file and set SELINUX=disabled.
      • Change takes affect on next reboot.
    5. Add the following lines to the /etc/vimrcfile:
      set autoindent ” auto indent after {
      set smartindent ” same
      set shiftwidth=4 ” number of space characters inserted for indentation
      set expandtab ” inserts spaces instead of tabs
      set tabstop=4 ” number of spaces the tab is.
      set pastetoggle=<C-P> ” Ctrl-P toggles paste mode
    6. Switch root shell to tcsh
      • Edit the /etc/passwdfile to have root use tcshroot:x:0:0:root:/root:/bin/tcsh
      • Edit the .tcshrcfile in root’s home.
        #  .tcshrc#  User specific aliases and functionsalias rm ‘rm -i’
        alias cp ‘cp -i’
        alias mv ‘mv -i’set prompt='[%n@%m %c]# ‘

        setenv PATH ${PATH}:/opt/sun/cam/bin

        #  Make command completion (TAB key) cycle through all possible choices
        #  (The default is to simply display a list of all choices when more than one
        #  match is available.)
        bindkey “^I” complete-word-fwd

      • Logout and back in for it to take affect.
    7. Edit /etc/hosts. Add a line with IP and domain name.
      #  Do not remove the following line, or various programs
      #  that require network functionality will fail.
      127.0.0.1 localhost localhost.localdomain localhost4 localhost4.localdomain4
      ::1 localhost localhost.localdomain localhost6 localhost6.localdomain6#  External IPs
      192.168.1.1 bill.com
      192.168.1.2 ted.com192.168.1.3 domain.com # this needs to be an IP that the cluster server can manage#  Internal IPs
      192.168.1.11 bill.localdomain bill # notice the .localdomain, this is necessary for mysql later
      192.168.1.12 ted.localdomain ted othernode # this is bill’s hosts file. othernode would be on the bill line for ted’s hosts file.
      #  ServicePort IPs
      192.168.1.21 billsp # I like to have a short name to use to connect to the service port (ELOM)
      192.168.1.22 tedsp

      #  Internal Services
      192.168.1.100 http.localdomain httpd.localdomain
      192.168.1.101 mysql.localdomain
      192.168.1.102 memcached.localdomain

    8. Run updatedb to set up the locate database.
    9. Edit password settings to allow for stricter control over passwords. This requires strong passwords or the use of passphrases.
    10. [Optional] Firefox: yum update, and then ayum install firefox xorg-x11-xauth xorg-x11-fonts-Type1There will be more you’ll need too.
      • If you get this error: process 702: D-Bus library appears to be incorrectly set up; failed to read machine uuid: Failed to open "/var/lib/dbus/machine-id": No such file or directory. Then run the following command as root.
        • dbus-uuidgen > /var/lib/dbus/machine-id
    11. Set up ssh keys
      • ssh-keygen
      • Copy the id_rsa.pub file to the other node
      • Copy the contents of id_rsa.pub to cat id_rsa.pub >> ~/.ssh/authorized_keys
      • Double check permission on authorized_keys and id_rsa both set to rw-------
      • You should now be able to log in from bill to ted (and vice versa) without a password.


    Shorewall

    • Yum Install:
      • Get EPEL repository. Visit http://fedoraproject.org/wiki/EPEL to get the URL for the correct rpm. Something like: epel-release-6-5.noarch.rpm.
      • Copy that URL and runrpm -Uvh http://download.fedoraproject.org/pub/epel/6/i386/epel-release-6-5.noarch.rpmon the machine.
      • Edit the /etc/yum.repos.d/epel.repo file and set the first “enabled” line to equal 0. That disables yum from using the EPEL repo by default.
      • Install shorewall with yum.yum --enablerepo=epel install shorewall
    • Enable program to run by editing the /etc/shorewall/shorewall.conf file. Change the STARTUP_ENABLED=NOtoSTARTUP_ENABLED=Yes
    • Edit the shorewall config files.
    • Edit the /etc/shorewall/zonesfile:
      • #
        #  Shorewall version 4 – Zones File
        #
        #  For information about this file, type “man shorewall-zones”
        #
        #  The manpage is also online at
        #  http://www.shorewall.net/manpages/shorewall-zones.html
        #
        ###############################################################################
        #ZONE TYPE OPTIONS IN OUT
        #  OPTIONS OPTIONSnet ipv4 # The big bad Internet
        loc ipv4 # Internal LAN
        fw firewall#LAST LINE – ADD YOUR ENTRIES ABOVE THIS ONE – DO NOT REMOVE#LAST LINE – ADD YOUR ENTRIES ABOVE THIS ONE – DO NOT REMOVE
    • Edit the /etc/shorewall/interfacesfile:
      • #
        #  Shorewall version 4 – Interfaces File
        #
        #  For information about entries in this file, type “man shorewall-interfaces”
        #
        #  The manpage is also online at
        #  http://www.shorewall.net/manpages/shorewall-interfaces.html
        #
        ###############################################################################
        #ZONE INTERFACE BROADCAST OPTIONS
        net eth2
        loc eth1
    • Edit the /etc/shorewall/policyfile:
      • ###############################################################################
        #SOURCE DEST POLICY LOG LIMIT: CONNLIMIT:
        #  LEVEL BURST MASK
        #  To/from internal lan
        fw loc ACCEPT
        loc fw ACCEPT
        #  To/from net
        fw net ACCEPT
        net all DROP info
        #
        #  THE FOLLOWING POLICY MUST BE LAST
        #
        all all REJECT info
        #LAST LINE — DO NOT REMOVE
    • Edit the /etc/shorewall/rulesfile:
      • ######################################################################################
        #ACTION SOURCE DEST PROTO DEST SOURCE ORIGINAL
        #  PORT PORT DEST
        #SECTION ESTABLISHED
        #SECTION RELATED
        SECTION NEWSECTION NEW#  Standard services
        #
        ACCEPT  net      fw      tcp     ssh
        ACCEPT  net      fw      tcp     80,443Ping/ACCEPT      net      fw

        #LAST LINE — ADD YOUR ENTRIES BEFORE THIS ONE — DO NOT REMOVE

    • Edit the /etc/shorewall/routestoppedfile:
      • #
        #  Shorewall version 4 – Routestopped File
        #
        #  For information about entries in this file, type “man shorewall-routestopped”
        #
        #  The manpage is also online at
        #  http://www.shorewall.net/manpages/shorewall-routestopped.html
        #
        #  See http://shorewall.net/starting_and_stopping_shorewall.htm for additional
        #  information.
        #
        ###############################################################################
        #INTERFACE HOST OPTIONS PROTO DEST SOURCE
        PORT PORT
        eth1     –
        eth2     –
    • Set shorewall to start on reboots.chkconfig shorewall on
    • Start shorewall:service shorewall start

    The next part will be connecting the servers to the storage array.

    CentOS 6, iDrac6 and PowerEdge R510

    1. RedHat changed an important part of their system with the upgrade from version 5 to 6. This affects CentOS which is the same thing, but rebranded.

    I was updating one server to use CentOS 6, and ran into this issue of setting up the iDRAC for remote console use. In previous versions, I would add a line to the /etc/inittab file. This is now unused. RedHat is favoring the “Upstart” system developed by and for Ubuntu. It starts services on request, rather than all at once.

    So here is how I set up my Dell PowerEdge R510 with CentOS 6 to use the iDRAC6.

    Info was taken from the RedHat manual, the Dell iDRAC manual, and probably a bunch of other sites that I googled for.

    These steps are by no means comprehensive or detailed. I barely even know what’s going on myself, but it seems to work. It’s kind of cool to see a system boot up in your terminal. It’s like your terminal turns into a monitor connected to the server.

    Setting up the iDrac6

    Edit BIOS

    1. Boot the server.
    2. Press F2 to enter the BIOS setup utility during POST.
    3. Scroll down and select Serial Communication by pressing <Enter>.
    4. Set the Serial Communication screen options as follows:
      • serial communication....On with serial redirection via com2
      • NOTE: You can set serial communication to ‘On with serial redirection via com1’ as long as the serial port address field, serial device2, is set to com1, also.
      • serial port address....Serial device1 = com1, serial device2 = com2
      • external serial connector....Serial device 1
      • failsafe baud rate....57600
      • remote terminal type....vt100/vt220
      • redirection after boot....Enabled
    5. Save the changes and exit.

    Edit iDRAC settings

    1. Turn on or restart your system.
    2. Press <Ctrl><E> when prompted during POST. If your operating system begins to load before you press <Ctrl><E>, allow the system to finish booting, and then restart your system and try again.
    3. Configure the LOM.
    1. Use the arrow keys to select LAN Parameters and press <Enter>. NIC Selection is displayed.
    2. Use the arrow keys to select one of the following NIC modes:
      • Dedicated — Select this option to enable the remote access device to utilize the dedicated network interface available on the iDRAC6 Enterprise. This interface is not shared with the host operating system and routes the management traffic to a separate physical network, enabling it to be separated from the application traffic. This option is available only if an iDRAC6 Enterprise is installed in the system. After you install the iDRAC6 Enterprise card, ensure that you change the NIC Selection to Dedicated. This can be done either through the iDRAC6 Configuration Utility, the iDRAC6 Web Interface, or through RACADM.
    • Configure the network controller LAN parameters to use DHCP or a Static IP address source.
    1. Using the down-arrow key, select LAN Parameters, and press <Enter>.
    2. Using the up-arrow and down-arrow keys, select IP Address Source.
    3. Using the right-arrow and left-arrow keys, select DHCP, Auto Config or Static.
    4. If you selected Static, configure the Ethernet IP Address, Subnet Mask, and Default Gateway settings.
    5. Press <Esc>.
    • Press <Esc>.
    • Select Save Changes and Exit.

    Set up Linux OS (to do after OS is installed)

    • Configuring Linux for Serial Console Redirection During Boot
    • The following steps are specific to the Linux GRand Unified Bootloader (GRUB). Similar changes would be necessary if you use a different boot loader.
    • NOTE: When you configure the client VT100 emulation window, set the window or application that is displaying the redirected console to 25 rows x 80 columns to ensure proper text display; otherwise, some text screens may be garbled.
    1. Make a copy of the /boot/grub/grub.conffile as follows:cp /boot/grub/grub.conf /boot/grub/grub.conf.orig
    2. Edit the /boot/grub/grub.conf file as follows:
    1. Locate the General Setting sections in the file and add the following two new lines:serial --unit=0 --speed=57600terminal --timeout=10 serial console
    2. Append two options to the kernel line:kernel ............. console=ttyS1,57600 console=tty1
    3. If the /etc/grub.conf contains a splashimage directive, comment it out.Sample File: /boot/grub/grub.conf
      #  grub.conf generated by anaconda
      #
      #  Note that you do not have to rerun grub after making changes to this file
      #  NOTICE: You have a /boot partition. This means that
      #  all kernel and initrd paths are relative to /boot/, eg.
      #  root (hd0,0)
      #  kernel /vmlinuz-version ro root=/dev/Logical1/LogVol00
      #  initrd /initrd-version.img
      #boot=/dev/sda
      default=0
      timeout=5
      #splashimage=(hd0,0)/grub/splash.xpm.gz
      #hiddenmenu
      serial –unit=1 –speed=57600
      terminal –timeout=5 console serialtitle CentOS (2.6.18-164.11.1.el5) SOL Redirection
      root (hd0,0)
      kernel /vmlinuz-2.6.18-164.11.1.el5 ro root=/dev/Logical1/LogVol00 console=tty1 console=ttyS1,57600
      initrd /initrd-2.6.18-164.11.1.el5.img
      title CentOS (2.6.18-164.el5)
      root (hd0,0)
      kernel /vmlinuz-2.6.18-164.el5 ro root=/dev/Logical1/LogVol00
      initrd /initrd-2.6.18-164.el5.img

    Enabling Login to the Console After Boot

    1. Create a new /etc/init/serial-ttyS1.conffile.Sample File: /etc/inittab
      #  This service maintains a getty on /dev/ttyS1.start on stopped rc RUNLEVEL=[2345]
      stop on starting runlevel [016]respawn
      exec /sbin/agetty -h -L 57600 ttyS1 vt102

    Edit the file /etc/securetty

    1. Make a copy of the /etc/securettyfile as follows:cp /etc/securetty /etc/securetty.orig
    2. Edit the file /etc/securettyas follows:Add a new line with the name of the serial tty for COM2:ttyS1Sample File: /etc/securetty
      vc/1
      vc/2
      vc/3
      vc/4
      vc/5
      vc/6
      vc/7
      vc/8
      vc/9
      vc/10
      vc/11
      tty1
      tty2
      tty3
      tty4
      tty5
      tty6
      tty7
      tty8
      tty9
      tty10
      tty11
      *ttyS1*

    Redirect the video output over ssh connections

    Starting a Text Console Through SSH (Remote Access, SOL)

    To connect to the managed system text console, open an iDRAC6 command prompt (displayed through an SSH session):

    ssh root@xxx.xxx.xxx.xxx

    and type:

    console com2

    Only one console com2 client is supported at a time. The console -h com2 command displays the contents of the serial history buffer before waiting for input from the keyboard or new characters from the serial port.

    To exit the console type these three keys: <Ctrl ><Shift >\

    The default (and maximum) size of the history buffer is 8192 characters. You can set this number to a smaller value using the command:

    racadm config -g cfgSerial -o cfgSerialHistorySize < number >

    Making SMF static

    We have a few legacy forums powered by the good software SMF (SimpleMachines Forum). Like many of the WordPress installs, it’s a pain and a security risk to keep these up-to-date when they are no longer needed as content creation platforms. So, once again I need to convert a web app into static HTML pages. This process proved a bit harder than converting WordPress to static HTML.

    Step 1: Upgrade

    The first thing to do is update to the latest version. This ensures that if you need to turn this back into a dynamic site, it should hopefully be compatible with whatever the latest version is at that time.

    Step 2: Make it public

    Next, we’ll need to make it public to guests, so that wget has access to the pages.

    Go to the Admin->Features and Options page and check the “Allow guests to browse the forum” box, then click save. Now we have to change the permissions on each board separately. Or with a bit of MySQL magic, we can change them all at once using the CONCAT operator. Open of phpMyAdmin, or something else of your choice. Before we mess with the data, make a copy of the table, just in case we totally hose it.

    Browse to the ‘boards’ table, and then to the SQL tab. We’re going to enter an SQL command that will pre-pend (that’s append but onto the front rather than the end) some data.

    UPDATE boards SET member_groups=CONCAT('-1,', member_groups) WHERE 1


    This will add a -1, to the beginning of each field, which makes the board viewable by guests. No need to log in, which means wget can scrape the pages and turn them into HTML.

    Step 3: Edit Theme files

    Now we get to play around with the theme files to get rid of forum specific items that we won’t need, like links to member info, the login, help, and search links, and anything else that we don’t want.

    Here are some items to delete or alter, and the files I found them in for our home-made theme based off of an old default theme.

    index.template.php

    • Add a title
    • Get rid of date stamp
    • Get rid of the main menu (Home, Help, Search, Login, etc)

    BoardIndex.template.php

    • Search for [‘member’][‘link’] and change it to [‘member’][‘name’] This will take out all links to member profile pages.

    Display.template.php

    • Search for [‘member’][‘link’] and change it to [‘member’][‘name’] This will take out all links to member profile pages.
    • Get rid of the drop down menu to select pages.

    MessageIndex.template.php

    • Search for [‘member’][‘link’] and change it to [‘member’][‘name’] This will take out all links to member profile pages.
    • Delete the ‘Jump to’ drop-down box and the icons explaining post/board types

    Step 4: Fix the URLs

    As it stands, SMF has some pretty ugly URLs. There are a couple of mods that I could never get to work. But editing a file and adding an .htaccess file seems to do the trick.

    Open the Sources/QueryString.php file and look for the line like this:

    $scripturl = $boardurl . '/index.php';

    and get rid of the /index.php

    Now create a .htaccess file in the root of the forum (in the same folder as the Settings.php file). It should look similar to this:

    RewriteEngine On
    RewriteBase /7tah/forum/
    RewriteCond %{REQUEST_FILENAME} !-f
    RewriteCond %{REQUEST_FILENAME} !-d
    RewriteRule . /7tah/forum/index.php [L]


    Step 5: Wget it

    Now we run wget on the command line to grab the pages.

    wget --mirror -P static-forum -nH -np -p -k -E --cut-dirs=2 http://domain.com/path/forum/

    All of the static HTML files will now be located in a directory called static-forum.

    Step 6: Fix filenames

    Some filenames will be a bit broken. Specifically the style.css has an extra “?fin11” in the html files where the file is called. Also, it get’s name that way. So fix that by changing the name of the file to just style.css (it’s in your Theme directory). Then run this one-line command to search and replace throughout all of the static html files (run the command when you are in the static-forum directory.

    find . -name '*.html' -type f -exec perl -pi -e 's/style.css%3Ffin11/style.css/g' {} \;


    This will look for all of the references to the style.css%3Ffin11 file and change them to style.css. Then the pretty colors and formatting will work. Just for clarification, the %3F is code for a question mark. It shows up as such in the HTML source when viewing from a browser, but is displayed as such in the actual code.

    Don’t forget to change the the actual name of the css file to style.css.

    Step 7: Protect it

    Depending on  your needs, you may want to password protect your new static forum with an htaccess account. The good peoples at Dynamic Drive have an helpful tool for making the two files necessary to make this happen. Just plug in your desired user name, password, and location of the htpasswd file, and then it’s copy and paste into those files on the server.

    I change the last line of the htaccess file to require user username so that it works only with the given user, not any valid. But since it only pulls from the specified htpasswd file, it’s kind of pointless.

    Step 8: Backup the old

    It’s a good idea to make a backup of the database and site files before getting rid of them. I just make a mysqldump of the database, throw it in the forum folder, and then make a tar or zip file of that and put the file in the new static forum folder for safe keeping.

    Step 9: That’s it.

    Sit back and relax. Your forum is interactive no longer.

    Python, Trac, virtualenv and CentOS

    I’ve just spent too much time figuring this out. I’ve had to piece it together from many other sites.

    I need to set up Trac .12 on CentOS 5, but want to do that without interfering with the current setup of Trac and Subversion on the system.

    So in comes virtualenv. This allows you to create a virtual environment for python. Like a separate install. The beauty is, once this is set up you can install different versions of python packages (like Trac and Subversion) that don’t have to interact with each other.

    To install virtualenv was pretty simple. With root permissions do

    easy_install virtualenv

    Now, as your normal user, you can install a virtual environment.

    virtualenv --no-site-packages foo

    This will create a new folder called foo with a virtual environment for python. It won’t reference any of the other installed python packages (like the old Trac version).

    Now upgrade the Genshi package with

    easy_install --upgrade Genshi

    Then, to install Trac do

    easy_install Trac==0.12

    That’s the part that always hung me up. I would just do easy_install Trac  which would cough up this ugly error:

    Searching for trac
    Reading http://pypi.python.org/simple/trac/
    Reading http://trac.edgewall.org/
    Reading http://trac.edgewall.org/wiki/TracDownload
    Reading http://trac.edgewall.com/
    Reading http://projects.edgewall.com/trac
    Reading http://projects.edgewall.com/trac/wiki/TracDownload
    Best match: Trac 0.12.2
    Downloading ftp://ftp.edgewall.com/pub/trac/Trac-0.12.2.zip
    Processing Trac-0.12.2.zip
    Running setup.py -q bdist_egg --dist-dir trac-dir/trac/egg-dist-tmp-JmdQXW
    Traceback (most recent call last):
    File "/home/ammon/foo/bin/easy_install", line 7, in ?
    sys.exit(
    File "/home/ammon/foo/lib/python2.4/site-packages/setuptools-0.6c12dev_r88795-py2.4.egg/setuptools/command/easy_install.py", line 1712, in main
    with_ei_usage(lambda:
    File "/home/ammon/foo/lib/python2.4/site-packages/setuptools-0.6c12dev_r88795-py2.4.egg/setuptools/command/easy_install.py", line 1700, in with_ei_u
    sage
    return f()
    File "/home/ammon/foo/lib/python2.4/site-packages/setuptools-0.6c12dev_r88795-py2.4.egg/setuptools/command/easy_install.py", line 1716, in <lambda>
    distclass=DistributionWithoutHelpCommands, **kw
    File "/usr/lib64/python2.4/distutils/core.py", line 149, in setup
    dist.run_commands()
    File "/usr/lib64/python2.4/distutils/dist.py", line 946, in run_commands
    self.run_command(cmd)
    File "/usr/lib64/python2.4/distutils/dist.py", line 966, in run_command
    cmd_obj.run()
    File "/home/ammon/foo/lib/python2.4/site-packages/setuptools-0.6c12dev_r88795-py2.4.egg/setuptools/command/easy_install.py", line 211, in run
    self.easy_install(spec, not self.no_deps)
    File "/home/ammon/foo/lib/python2.4/site-packages/setuptools-0.6c12dev_r88795-py2.4.egg/setuptools/command/easy_install.py", line 446, in easy_insta
    ll
    return self.install_item(spec, dist.location, tmpdir, deps)
    File "/home/ammon/foo/lib/python2.4/site-packages/setuptools-0.6c12dev_r88795-py2.4.egg/setuptools/command/easy_install.py", line 476, in install_it
    em
    dists = self.install_eggs(spec, download, tmpdir)
    File "/home/ammon/foo/lib/python2.4/site-packages/setuptools-0.6c12dev_r88795-py2.4.egg/setuptools/command/easy_install.py", line 655, in install_eg
    gs
    return self.build_and_install(setup_script, setup_base)
    File "/home/ammon/foo/lib/python2.4/site-packages/setuptools-0.6c12dev_r88795-py2.4.egg/setuptools/command/easy_install.py", line 930, in build_and_
    install
    self.run_setup(setup_script, setup_base, args)
    File "/home/ammon/foo/lib/python2.4/site-packages/setuptools-0.6c12dev_r88795-py2.4.egg/setuptools/command/easy_install.py", line 919, in run_setup
    run_setup(setup_script, args)
    File "/home/ammon/foo/lib/python2.4/site-packages/setuptools-0.6c12dev_r88795-py2.4.egg/setuptools/sandbox.py", line 61, in run_setup
    DirectorySandbox(setup_dir).run(
    File "/home/ammon/foo/lib/python2.4/site-packages/setuptools-0.6c12dev_r88795-py2.4.egg/setuptools/sandbox.py", line 105, in run
    return func()
    File "/home/ammon/foo/lib/python2.4/site-packages/setuptools-0.6c12dev_r88795-py2.4.egg/setuptools/sandbox.py", line 64, in <lambda>
    {'__file__':setup_script, '__name__':'__main__'}
    File "setup.py", line 110, in ?
    File "/usr/lib64/python2.4/distutils/core.py", line 110, in setup
    _setup_distribution = dist = klass(attrs)
    File "/home/ammon/foo/lib/python2.4/site-packages/setuptools-0.6c12dev_r88795-py2.4.egg/setuptools/dist.py", line 260, in __init__
    self.fetch_build_eggs(attrs.pop('setup_requires'))
    File "/home/ammon/foo/lib/python2.4/site-packages/setuptools-0.6c12dev_r88795-py2.4.egg/setuptools/dist.py", line 283, in fetch_build_eggs
    for dist in working_set.resolve(
    File "/home/ammon/foo/lib/python2.4/site-packages/setuptools-0.6c12dev_r88795-py2.4.egg/pkg_resources.py", line 569, in resolve
    raise VersionConflict(dist,req) # XXX put more info here
    pkg_resources.VersionConflict: (Genshi 0.6dev (/usr/local/lib/python2.4/site-packages/Genshi-0.6dev-py2.4-linux-x86_64.egg), Requirement.parse('Genshi
    >=0.6'))

    Notice the last line referencing a version conflict with the “old” Genshi at /usr/local/lib/python2.4/site-packages. That’s the system-wide default install. So making explicit that you want to install Trac==0.12 is the way to get it installed in a virtual environment.

    Now I just need to figure out how to configure Trac and Subversion using this virtual environment, and copy over a live older version of each.

    Convert CSV file to directories

    A fellow co-worker had a need to turn a CSV file into a series of directories and files where the columns of the CSV file were the directories, and the contents of the cells for each row were made into a text file and placed in the appropriate folder corresponding to the column. For example given the CSV file with the columns (name,email,number,date), and several rows like this:

    john,j@j.com,89,tuesday

    bertha,b@j.com,2716,monday

    dillan,d@j.com,289,saturday

    xavier,x@j.com,839,wednesday

    The script would create four numbered folders (1, 2, 3, 4), and put a file in each folder corresponding with the row number and column.

    Columns into folders, cells into text files

    So, within folder number one would be four text files named 1-1.txt, 2-1.txt, 3-1.txt, 4-1.txt. Text file 1-1.txt would contain the content “john”. File 3-1.txt would contain the text “dillan”. Within folder number 3 would be four text files named 1-3.txt, 2-3.txt, 3-3.txt, and 4-3.txt.

    Well, anyhow, I hope that explanation makes sense. Here’s the code:

    [code lang=”perl”]
    #!/usr/bin/perl
    use strict;
    use warnings;
    use Text::CSV::Encoded;

    my $csv = Text::CSV::Encoded->new();

    # file to be used given on the command line as an argument to the script
    open (CSV, “<:encoding(UTF-8)”, $ARGV[0]) or die $!;

    my $rownum = 1;
    while () {
    if ($csv->parse($_)) {
    # Put the rows into an array
    my @columns = $csv->fields();

    # Make the directories, as many as there are columns
    # Get the number of columns (which is the number of elements in the
    # array).
    my $size = scalar(@columns);
    my $count = 1;
    # Check if the directories are created. Only want to make them on the
    # interration through the first row
    if ( !-d $count ) {
    while ($count <= $size) { mkdir “$count” or die $!; $count++; } } # Now make a file from each cell, putting the file in the directory # corresponding to the column my $colnum = 1; for my $column (@columns) { # Create a new file (or overwrite an existing one) in the # appropriate column folder and name it row#-col#.txt open FILE, “+>$colnum/row$rownum-col$colnum.txt” or die $!;
    # This sets the correct encoding on writing to the file
    binmode FILE, “:utf8”;
    print FILE $column;
    close FILE;
    $colnum++;
    }

    } else {
    my $err = $csv->error_input;
    print “Failed to parse line: $err”;
    }

    $rownum++;
    }
    close CSV;

    [/code]

    The Past in Color

    This weeks installment of history found on the web includes links to a few sites with something special. Color photographs from the early days of color photography. Color somehow brings a photograph to more life, adds more detail, and helps get a better understanding of the time period. Sure you can see the style of clothes, for example, in a black and white, but did you know it was bright green!

    Color images of Russia from 1910

    The first site comes from the Boston Globe. These pictures are from Russia over 100 years ago! Absolutely amazing detail.

    World War II films in color

    Second we have a bunch of color moving pictures from World War II from a blog at salon.com. Color and moving pictures just makes it all the more real.

    Historic Test Films

    The third site is an archive of films from nuclear testing by the U.S. Department of Energy. Crazy the amount of destruction those armaments produced.

    Goddard and a rocket

    Fourth is a link to NASA’s Flickr account. Here is Flickr working with a number of the U.S. Government departments to archive some of their images and provide a more publicly accessible way for these public images to be… accessible. Kind of neat.

    The Past meets the Present

    Finally, the best for last. This site is all in Russian, so not too sure what he’s saying, but Sergey Larenkov has some neat images. They show a juxtaposition of World War II photos with current photos of the same place. It’s a really neat way to see how the damage would look if it were to happen today.

    Many Mechanical Machines

    Back again with another roundup of websites promoting some history. This weeks focus is on the computers and other machines.

    Technologizer has come through in the past year or so with some really fun looks at technology of the past. Here are three:

    15 Classic PC Design Mistakes
    Weird Laptop Designs
    132 Years of the videophone

    It’s amazing how ugly and non-functional computers were in the early stages. They don’t seem to be anything like cars. Old cars, some of them anyways, become classics. They were made to look good. Somehow, I guess, computer manufacturers didn’t think computers would need any style. Sure they were made for businesses, but beige…. for everything? One of Apple’s biggest successes has been to transform the look of personal computers. No matter what you think about Apple as a company and Steve Jobs as a person, at least their stuff has some style (which has it’s own interesting history in that many styles come from old Braun products by Dieter Rams).

    Old Computer Database
    Small Gallery of Old Computers

    Speaking of old computers… The Obsolete Technology Website has a plethora of information, a veritable archive, of old technology. It’s good to see someone is keeping the history of our tech junk. Newscientist also steps in with a small gallery of ancient (read older than 30 years) technology.

    Macintosh Startup Chimes

    Finally, a trip down memory lane with all of the old Macintosh start up sounds at Geekology.

    Multiple PHP Instances With One Apache


    Long-winded Introduction

    It took me a couple of days to figure this out due to lack of decent tutorials and not enough confidence in my Linux skills to build programs from source. I think I have the hang of it now, and write this up with the intent on providing another, or the only, tutorial on setting up CentOS 5 with multiple instances of PHP using one Apache install. That being said, there are a number of good tutorials out there, just none of them explicitly for CentOS and some leave out some details that n00bs like me get confused about.

    PHP4 and PHP5 on SuSE 10.1 – This was by far the most helpful of the tutorials. Even though it was written for SuSE, it works almost straight across for CentOS.

    There is also a great list of instructions in the comments on the php.net site under installing PHP for Apache 2.0 on Unix systems (see http://www.php.net/manual/en/install.unix.apache2.php#90478).

    I found this one after I wrote up this tutorial at http://cuadradevelopment.com. It’s a bit different, but should work as well.

    There are basically two different ways I could have done this. 1- run a single instance of Apache, and run one instance of PHP as a module, and other installs as CGI. 2- run several instances of Apache, each with it’s own instance of PHP as a module. I chose to do the first method for no particular reason. Dreamhost has a post about the good and bad with running PHP as CGI.

    So basically, the steps are: 1. Set up Apache and have PHP install as a module. 2. Configure and make another instance of PHP to run as CGI. 3. Add a virtual host to Apache running under a different port to access the PHP as CGI.
    Continue reading Multiple PHP Instances With One Apache