Docker Development Environment for Everyone

One of the biggest challenges when collaborating with others in developing software and websites is setting up the development environment. The good ol “it works on my machine…” problem.

Well, this is no panacea for development, but it does a good job of setting up a basic environment pretty quickly.

You’re in for a special treat, because I’m going to show you not one (1), but two (2) different development environments; one for PHP, MySQL, Apache and phpMyAdmin, and one for Python (Flask) and PostgreSQL with pgAdmin. Each of these in a Docker container for ease of use.

Pre-requisites

For any of this to work, make sure you have Docker Desktop installed and running.

We’ll be using a terminal application for running some commands, so you’ll need some familiarity with that too.

Git is used to copy the files from the GitHub repo, but you can also download them as a zip file.

PMAMP

We’ll tackle the PhpMyadmin Apache Mysql Php (PMAMP) environment first.

After setting this up, we’ll have a place to put PHP code, a running Apache web server, a MySQL server and a running instance of phpMyAdmin.

The quickest way to get this going is to download the files from this GitHub repo https://github.com/ammonshepherd/pmamp

git clone https://github.com/ammonshepherd/pmamp.git

Change into that directory.

cd pmamp

And start the Docker containers

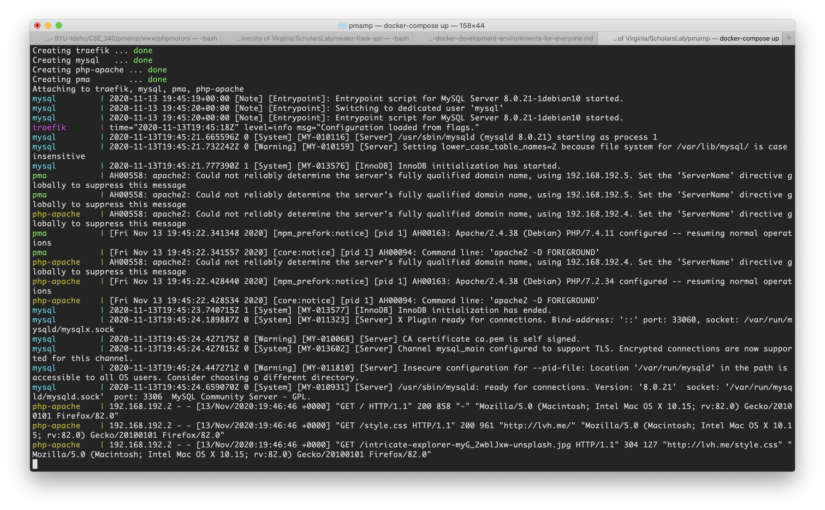
docker-compose up -d

You can view the website at http://lvh.me. lvh.me is just a nice service that points back to your local machine (127.0.0.1 or localhost). It makes it look like you are using a real domain name.

You can view phpMyAdmin at http://pma.lvh.me.

You can even use a real domain name. Just edit the docker-compose.yml file. There is a line like this:  

- "traefik.http.routers.php-apache.rule=Host('lvh.me', 'pmamp.lvh.me', 'example.com')"

Just add your domain to the list (or remove the other ones). Each entry must use the backtick, rather than the single quotes. WordPress mangles the backticks, so I am using single quotes here.

Now you just need to let your computer know to redirect all traffic to that domain name to itself.

You’ll need to edit the /etc/hosts file (Linux or Mac), or c:\windows\system32\drivers\etc\hosts (Windows). Now you can develop for any domain name right on your computer as if it were using the actual domain name.

Put all of your website files in the ‘www’ folder and you’re ready to develop!

Check the README at https://github.com/ammonshepherd/pmamp for more details on how it works and things to change.

To stop the services (turn off Apache, MySQL and phpAdmin) run

docker-compose down

in the same directory where the docker-compose.yml file lives.

pFp

The set up for Python (using a Flask app) and PostgreSQL is exactly the same process.

Grab the files from https://github.com/ammonshepherd/pfp.

git clone https://github.com/ammonshepherd/pfp.git

cd pfp

docker-compose up -d

You now have a running Flask app at http://lvh.me, or http://pfp.lvh.me and a running pgAdmin application at http://pga.lvh.me.

The same trick for custom domain names applies here too.

And also check out the README for more details: https://github.com/ammonshepherd/pfp

Follow the same commands above to shutdown the Python, PostgreSQL and pgAdmin containers.
Quick WP upgrading with WPCLI

This is the easiest way to upgrade WordPress. You’ll execute these commands on the server itself.

Requirements

  • ssh access to your server
  • wp-cli command installed (instructions for installing wp-cli at http://wp-cli.org/)

Install/Upgrade WP CLI

  • wp-cli should be upgraded each time a WordPress installation is upgraded.
wp cli update

Upgrade WP

Prep work

Change into the WP directory

cd /path/to/wordpress/installation/

Make a list of active plugins

wp plugin list --status=active --format=csv --fields=name | tail -n +2 > ../active-plugins.txt

Update all plugins

wp plugin update --all

Deactivate all of the plugins

wp plugin deactivate --all

Upgrade WordPress

wp core update

Reactivate all of the previously active plugins.

cat ../active-plugins.txt | xargs wp plugin activate

Check the site in various browsers (make sure cache has been cleared).

Setting up a Hosting Environment, Part 5: Apache and PHP

Figuring out the possibilities for Apache and PHP reminds me of a Dr. Seuss book, “Fox in Sox”. It’s a favorite of mine. I love reading it to the kids. In it, Mr. Fox tries to get Mr. Knox to say all kinds of ridiculous (in meaning and hard to say) tongue twisters. At one point Mr. Knox exclaims:
“I can’t blab such blibber blubber!
My tongue isn’t make of rubber.”

That’s what my brain felt like after trying to figure all of the options for Apache and PHP. To combat my rubber brain, I created this flow-chart to help me keep track of the options, the pros and cons for each, and the path I finally chose.

First off, a list of requirements and goals:

  1. Chroot each vhost to it’s own directory, and have Apache and PHP run on that vhost’s server account
  2. Speed, run Apache and PHP at their most effective and efficient levels
  3. Utilize an opcode cache, APC, to speed up PHP pages
  4. Use trusted repositories to make installation and upgrading easier

Here’s what I eventually figured out about Apache and PHP:

ApachePHP
Click on the image to see a larger view

These sites were helpful for the initial set up of PHP as CGI with mod_fcgi and Apache in chroot (mod_fcgi sends one request to each PHP process regardless if PHP children are available to handle more, and no sharing of APC opcode cache across PHP processes):

This site was helpful for setting up PHP as CGI with mod_fastcgi and Apache in chroot (mod_fastcgi sends multiple requests to a PHP process, so the process can send them to children processes, and having one PHP process for each site allows for APC opcode cache to be usable.)

These sites helped me learn about php-fpm and how it is not quite ready for what I have in mind:

I ended up going with Apache’s mod_fastcgi for using PHP as a CGI, and NOT using PHP-FPM, while running Apache in threaded mode with apache.worker enabled.

To get this set up is pretty easy. I already had Apache and PHP installed and running (with PHP as CGI using mod_fcgi), so here are the steps I used to convert it to run mod_fastcgi and apache.worker. I’m running CentOS 6.3.

Install the RPMForge repo for installing mod_fastcgi.

  • Get latest from http://repoforge.org/use/ : rpm -Uvh http://pkgs.repoforge.org/rpmforge-release/rpmforge-release-0.5.2-2.el6.rf.x86_64.rpm
  • yum --enablerepo=rpmforge install mod_fastcgi

Edit the /etc/httpd/conf/httpd.conf file

  • ServerTokens Prod
  • KeepAlive On
  • Edit the worker section. I still need to do some testing to figure out the best configuration
    <IfModule worker.c>
        StartServers         8
        MaxClients         300
        MinSpareThreads     25
        MaxSpareThreads     75
        ThreadsPerChild     25
        MaxRequestsPerChild  0
    </IfModule>
  • If there, make sure to comment out, or delete the lines for mod_php: LoadModule php5_module modules/libphp5.so
  • this line also: AddType application/x-httpd-php .php
  • The last line should be: Include conf/virtual_hosts.conf


Create a /etc/httpd/conf/virtual_hosts.conf file

Each virtual host needs to have an entry similar to this in the httpd.conf file, or I like to create a separate virtual_host.conf and include that in the main httpd.conf.

# Name-based virtual hosts
#

# Default
NameVirtualHost *:80

# Begin domain-name.com section
<VirtualHost *:80>
    DocumentRoot /var/domain-name/home/html/
    ServerName domain-name.com
    ServerAlias www.domain-name.com

    # Rewrite domain name to not use the 'www'
    RewriteEngine On
    RewriteCond %{HTTP_HOST}    !^domain-name\.com$ [NC]
    RewriteRule ^/(.*)  http://domain-name.com/$1 [R=301]

    # Specify where the error logs go for each domain
    ErrorLog /var/logs/httpd/current/domain-name.com-error_log
    CustomLog /var/logs/httpd/current/domain-name.com-access_log combined

    <IfModule mod_fastcgi.c>
        SuexecUserGroup domain-name domain-name
        ScriptAlias /cgi-bin/ "/var/www/cgi-bin/domain-name/"
        <Directory "/var/domain-name/home/html">
            Options -Indexes FollowSymLinks +ExecCGI
            AddHandler php5-fastcgi .php
            Action php5-fastcgi /cgi-bin/php-fastcgi
            Order allow,deny
            Allow from all
        </Directory>
    </IfModule>
</VirtualHost>
# End domain-name.com section

Things to note:

  • The line with SuexecUserGroup should have the user/group for the project.

Create the php-fastcgi file

Add a /var/www/cgi-bin/projectname/php-fastcgi file for each project. This allows php to run as FastCGI, and use suEXEC. The php-fastcgi file needs to be under suexec’s default directory path /var/www/cgi-bin/.

  • #!/bin/bash
    #  Set PHPRC to the path for the php.ini file. Change this to
    #  /var/projectname/home/ to let projects have their own php.ini file
    PHPRC=/var/domain-name/home/
    export PHPRC
    export PHP_FCGI_MAX_REQUESTS=5000
    export PHP_FCGI_CHILDREN=5
    exec /usr/bin/php-cgi

Things to note:

  • The directory and file created above must be have user/group of the project (the same as the user/group of the /var/projectname/ directory)
  • The directory and file must be executable and writable by the owner ONLY.
  • If you get Apache Internal Server errors, check /var/log/httpd/suexec.log
  • For each site, you can specify how much RAM the APC module can use. For large, busy sites, you set this higher. Not setting this defaults to 64MB, which is a bit more than needed for the average WP site. Change the last line in the /var/www/cgi-bin/projectname/php-fastcgi file:
    • exec /usr/bin/php-cgi -d apc.shm_size=128M

Change php.conf

Comment out everything in the /etc/httpd/conf.d/php.conf file so php is not loaded as a module when Apache starts.

Apache multi-threaded

Edit the /etc/sysconfig/httpd file to allow Apache to use multi-threaded mode (httpd.worker) which handles basic HTML files much nicer (less RAM). Uncomment the line with HTTPD=/usr/sbin/httpd.worker

Config Check

Check the Apache configuration files to see if there are any errors.

  • service httpd configtest

If all good, restart Apache

  • service httpd restart This will stop the running httpd service, and then start it again. Use this command after installing or removing a dynamically loaded module such as PHP. OR
  • service httpd reload This will cause the running httpd service to reload the configuration file. Note that any requests being currently processed will be interrupted, which may cause a client browser to display an error message or render a partial page. OR
  • service httpd graceful This will cause the running httpd service to reload the configuration file. Note that any requests being currently processed will use the old configuration.

Install APC

  • pecl install apc

Set up log rotation for Apache

  • Add a file /etc/logrotate.d/httpd.monti
  • /var/logs/httpd/*log {
        daily
        rotate 365
        compress
        missingok
        notifempty
        copytruncate
        olddir /var/logs/httpd/archives/
        sharedscripts
        postrotate
            /bin/kill -HUP `cat /var/run/httpd/httpd.pid 2>/dev/null` 2> /dev/null || true
        endscript
    }

3D printing in the field of history

I was asked to lead a discussion on the current status of 3D printing in the humanities, particularly the field of history with a great group of fellow PhD students here at GMU during one of their classes.

Here is what we came up with.

First of all, 3D printing (in general, but specifically for history) can be summarized by the following formula.

3D printing for history now = HTML for history in the early 1990's

2013-08-27 14.01.13
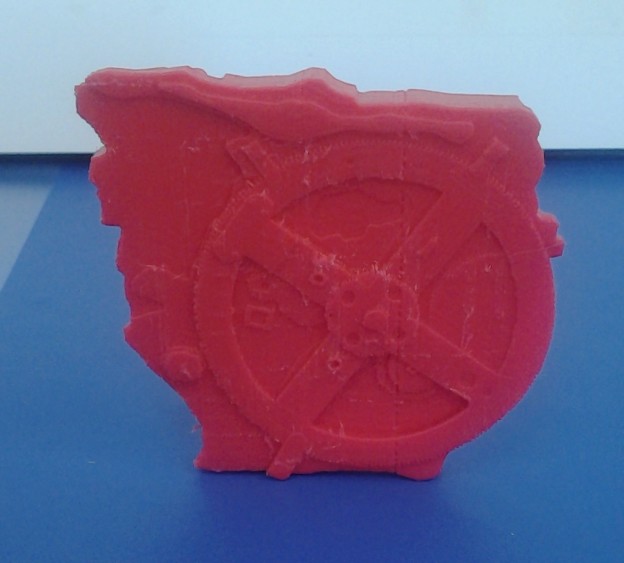
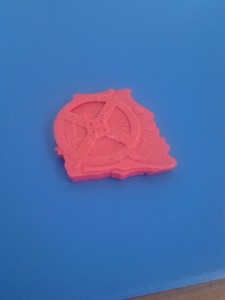
A replica of the Antikythera Machine, a 1 BCE clockwork device discovered on a shipwreck near Greece in the early 1900’s.

There is much that can be done, but using a 3D printer for historical research, study, learning, etc, is still very much in a nascent stage. So the question are, what can be done with 3D printing and how does it help us learn about history? We came up with a few ideas.

First, what can we print with a 3D printer? The limits are just about endless, as long as then are condensed to a 5-inch x 11-inch x 12-inch box.

The bigger question is what do 3D printed objects help us learn about history? Here we had some good ideas. Printing buildings to scale, along with figurines, can help us determine the scale of real life objects. Determining scale can help us analyze why some things are larger than others, for instance monuments. Why would the Lincoln monument be larger than the Jefferson, and what does that say about our views (or the creators views) about the subject? Life size objects can show true size that are often distorted or masked when never seen in person, like the Mona Lisa, for example, which is remarkably small.

Preserving rare, fragile, or expensive artifacts has obvious benefits in that it keeps things from getting lost, broken or stolen. 3D historical prints also put physical objects in the hands of students, especially those who might never have the opportunity to handle a real civil war cannonball, a Roman sword, a model of the Antikythera Mechanism, or a scale model of the Titanic. A physical object also offers the additional learning opportunity of tactile feedback over images in a book or on screen.

2013-08-27 14.01.01
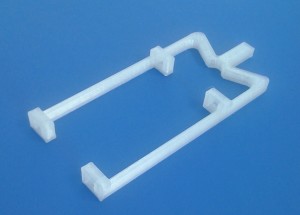
Chopstick holder.

3D printing also offers the opportunity to create inventions that may never have made it into production, such as those from old patents. We even got to look at one, a chop-stick holder from 1967.

Using a 3D printer and associated hardware and software in a history classroom provides yet another opportunity to combine multiple disciplines in an educational atmosphere. Everybody benefits when science, engineering, math, technology and the humanities combine (as was noted about a high school class that built a trebuchet).

We also talked about the ramifications of 3D printing on the future. Interestingly, similar issues that have voiced throughout history to the introduction of new technology, were also raised during the discussion. What happens when we move production of items back to the individual and away from factories? How do we cope with the replacement of humans by technology?

At present, the cost to own a printer in your home is still a bit much, but definitely within reach. Three different printers range from $800 (the do-it-yourself RepRap) to $2500 (Makerbot Replicator 2), with a middle priced option by Cubify at $1500. Filament, the plastic line used to create objects, costs around $50 a spool.

Items printed:

http://www.thingiverse.com/thing:22849 – chopstick holder

http://www.thingiverse.com/thing:32413 – Antikythera machine

Have an idea how 3D printers can be used in education? Add a comment below.

Backing up MySQL with Replication and Incremental Files – Part 1

I’m trying this new idea for backing up our production MySQL servers. I have a backup server that basically runs rdiff-backup in the morning across several servers, but then does nothing for the rest of the day. It’s a pretty decent machine, so I’d like to utilize some resources. Databases are a tough cookie to backup. You can’t just copy the data files and then expect to copy them back over and have them just work. Especially if your databases have a mixture of InnoDB and MyISAM tables. In order to do a clean and accurate database backup, you need to stop the MySQL server, then copy the files, then restart MySQL.

If you have a live production MySQL server, stopping it to make a backup is not really an option. Fortunately there are a few options. Before you decide on which option to choose, here is a list of things to keep in mind when choosing a backup solution (from the MySQL gurus at Percona):

WHAT TO LOOK FOR

http://www.mysqlperformanceblog.com/2009/03/03/10-things-you-need-to-know-about-backup-solutions-for-mysql/

  1. Does the backup require shutting down MySQL? If not, what is the impact on the running server? Blocking, I/O load, cache pollution, etc?
  2. What technique is used for the backup? Is it mysqldump or a custom product that does something similar? Is it a filesystem copy?
  3. Does the backup system understand that you cannot back up InnoDB by simply copying its files?
  4. Does the backup use FLUSH TABLES, LOCK TABLES, or FLUSH TABLES WITH READ LOCK? These all interrupt processing.
  5. What other effects are there on MySQL? I’ve seen systems that do a RESET MASTER, which immediately breaks replication. Are there any FLUSH commands at all, like FLUSH LOGS?
  6. How does the system guarantee that you can perform point-in-time recovery?
  7. How does the system guarantee consistency with the binary log, InnoDB logs, and replication?
  8. Can you use the system to set up new MySQL replication slaves? How?
  9. Does the system verify that the backup is restorable, e.g. does it run InnoDB recovery before declaring success?
  10. Does anyone stand behind it with support, and guarantee working, recoverable backups? How strong is the legal guarantee of this and how much insurance do they have?


BACKUP PROGRAMS

There are a few MySQL backup products out there as well. I have used the first two on this list.

  • AutoMySQLBackup script (handy for making a rotating incremental backup of your MySQL databases).
  • Percona XtraBackup (nice way to ensure InnoDB and MyISAM tables are backed up properly, also does it incrementally)
  • Zmanda (seems to be similar to Percona’s set up)

There’s probably a gazillion more out there. Google’s your friend in finding things you need.

HOW TO DO IT

How to get a copy of the master to the slave?

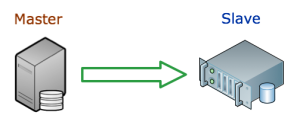
There are several options. You could use a script above, or create a slave of the database (basically an exact copy of the production MySQL server – all changes that occur in the master are sent to the slave), or some combination. I’ll use a combination. I’ll replicate the production server onto the backup server, then run the incremental backups from there. This first part will walk through the process of setting up MySQL replication.

To give proper credit, here are several other how to’s I found helpful.

On the master server

Step 1. Edit the my.cnf file to include at least the following (if needed) lines. Note: you will have to restart MySQL for these changes to take affect.

[mysqld]
server_id=1
innodb_flush_log_at_trx_commit=1
log_bin=mysql-bin.log
sync_binlog=1

Step 2. Make a MySQL user for the slave to use.

In a MySQL session on the terminal, type in the command:

GRANT REPLICATION SLAVE ON *.* TO 'rep_user'@'localhost' IDENTIFIED BY 'passwordhere';

Step 3. Open a terminal session and log in to a MySQL prompt. Type the following command and hit enter.

FLUSH TABLES WITH READ LOCK

Note: This will lock your database so that no changes can be made from any web applications or other programs. This session should remain open, and the database locked for the next few steps.

Step 4. After the FLUSH TABLES command finishes, run the following command and press enter.

SHOW MASTER STATUS

Record the information under “File Name” and “Position”.

Step 5.  Make a copy of the database files.

5.1 LVM Snapshot:

In another terminal session, run the following command to make an LVM snapshot of the database.

lvcreate -L10G -s -n mysql-backup /dev/mapper/dbases

This creates a snapshot of the database files very quickly. We can use the snapshot later to copy the data to the backup server without interfering with the original database files.

After this command finishes, you can unlock the database as shown in the next step. Then you can mount the new LVM partition and copy the files to the backup server.

mkdir -p /mnt/mysql-backup
mount -o nouuid /dev/mapper/mysql-backup /mnt/mysql-backup
rsync -avz -e "ssh -c blowfish" /mnt/mysql-backup user@remote.host:/backup/location

5.2 RSYNC:

If you don’t have your database files on an LVM partition, you can just copy the files to the backup server now using rsync, scp or what have you. This will take significantly longer (depending on the size of your database), leaving the database in a locked state.

rsync -avz -e "ssh -c blowfish" /dbases/mysql user@remote.host:/backup/location

5.3 MySQL Dump:

You could also take a mysqldump of the database and copy that SQL file to the other server.

mysqldump -uuser -p --all-databases > mysql-backup.sql
scp mysql-backup.sql user@remote.host:/backup/location

Step 6. Once the lvcreate command has finished, you can unlock the database.

UNLOCK TABLES

Step 7. If you haven’t already, copy the copy of the database files to the backup server.

On the slave server

Step 1. Edit the my.cnf file to include at least the following (if needed) lines. Note: you will have to restart MySQL for these changes to take affect.

[mysqld]
server_id=2

Step 2. Start MySQL and run the following commands in a mysql session to start the MySQL slave.

CHANGE MASTER TO
MASTER_HOST = "master.server.com",
MASTER_USER = "rep_user",
MASTER_PASSWORD = "passwordhere",
MASTER_LOG_FILE = "mysql-bin.log",
MASTER_LOG_POS = 2341234;

The MASTER_HOST is the domain name or IP address of the master server. MASTER_USER, MASTER_PASSWORD were created on the master server in Step 2. MASTER_LOG_FILE and MASTER_LOG_POS were gathered in Step 4.Then, finally, to start the slave, issue the following command in mysql.

START SLAVE;

Many Mechanical Machines

Back again with another roundup of websites promoting some history. This weeks focus is on the computers and other machines.

Technologizer has come through in the past year or so with some really fun looks at technology of the past. Here are three:

15 Classic PC Design Mistakes

Weird Laptop Designs

132 Years of the videophone

It’s amazing how ugly and non-functional computers were in the early stages. They don’t seem to be anything like cars. Old cars, some of them anyways, become classics. They were made to look good. Somehow, I guess, computer manufacturers didn’t think computers would need any style. Sure they were made for businesses, but beige…. for everything? One of Apple’s biggest successes has been to transform the look of personal computers. No matter what you think about Apple as a company and Steve Jobs as a person, at least their stuff has some style (which has it’s own interesting history in that many styles come from old Braun products by Dieter Rams).

Old Computer Database

Small Gallery of Old Computers

Speaking of old computers… The Obsolete Technology Website has a plethora of information, a veritable archive, of old technology. It’s good to see someone is keeping the history of our tech junk. Newscientist also steps in with a small gallery of ancient (read older than 30 years) technology.

Macintosh Startup Chimes

Finally, a trip down memory lane with all of the old Macintosh start up sounds at Geekology.

40th anniversary of the moon landing

What space junky, almost historian, geek would I be without posting a little bit about some of the best type of history in existence. I refer, of course, to the history of man’s endeavors to explore space. On July 20, 1969, Neil Armstrong and Buzz Aldrin became the first humans to step on a celestial body other than Earth. Michael Collins waited in the Command capsule as the two American astronauts made human history.

So here are a number of resources and articles describing some cool things about space flight.

Apollo missions posterHistoric Spacecraft is an archive of space vehicles and other things space related. They have a lot of photos of vehicles, suits, and such. They also have posters and such for sell, if you’re inclined to have something on your wall. They also have stats and dates for all of the rockets and vehicles listed. A great source for photos for all your space history needs. Also really cool is a list of all completed Space Shuttle missions. Space Shuttle Discovery has flown the most missions, 36, so far (June 2009) with a total of 126 missions. The Space Shuttle Enterprise never made it to space, but you can see it at the Udvar-Hazy National Air and Space Museum in Dulles, VA. I’ve been there a couple of times, and it is extremely awesome.

Apollo 11 interactive guideNext up from Flightglobal is an interactive timeline of sorts, with lots of information about the missions, flights, computers, physics and people who made it possible to put man on the moon. Most amazing about the whole flight, is that everything was based on theory. There was no way to test the actual theoretical physics without flying to the moon and back. “Although the theoretical physics of travelling to the Moon had been laid down before the advent of the Apollo missions, this was the first time a series of manned missions had put the theory into practice.”

apollo 11 softwareSpeaking of computers, Linux.com has a neat write up about the software used to guide the Apollo 11 spacecraft to the moon and back. It’s incredible to think that they were able to do such an amazing thing with technology comparable to today’s calculators. All of the code used punch cards and took hours to see if it was written properly. Jerry Bostick described the process in the Linux.com article:

“We would give instructions to the programs by punching cards,” Bostick said. “You had to wait at least 12 hours to see if it would work right.” The early programming was done in the real-time computing complex in Houston using IBM 7094 computers with 64K of memory. There were no hard disks. All the data was stored on magnetic tape, with each computer having about eight tape drives. Most programs used for the mission were written in Fortran, Bostick said. “After Apollo 1, we upgraded to the biggest and the best equipment that government money could buy, the IBM 360 with an unheard of 1MB of memory. We went all the way from 64K to 1MB.”

lunar lander gamesMoving from space computers to space computer games, the Technologizer has a great piece about a well loved space game, Lunar Lander. This game started out as a text-based game written by a high school student. It became popular and was later turned into countless graphical spin offs. I’m playing one on the iPod Touch a bit too much at the moment. You can see I made the top 20 players for a while!

19th place

museum moonFinally, New Scientist has a number of interesting articles relating to the 40th anniversary of the moon landing. One article addresses with the ethics and issues with the moon being a historic spot. Wherever there is a piece of human debris or footstep, it’s historically valuable. Should all of these sites and artifacts and footprints be protected? What happens when/if tourists are able to visit the moon? Who’s going to be the museum curator and the tourist guides? I’ll take that job!

Another New Scientist article lists several reasons why the moon is still relevant to science, for government, commercial enterprise and the normal guy.

interactive moon mapLastly, New Scientist has a neat interactive map showing the many multi-national places on the moon where humans have left their mark and made exploration.

Blast from the past

What I have for you this week are just a few websites that give us access to the past, an historical artifact that uncovers a mystery, and some new ways to do timelines.

World Digital Library

A great resource, hopefully, for scholars. From their website….

“The World Digital Library (WDL) makes available on the Internet, free of charge and in multilingual format, significant primary materials from countries and cultures around the world.

The principal objectives of the WDL are to:

  • Promote international and intercultural understanding;
  • Expand the volume and variety of cultural content on the Internet;
  • Provide resources for educators, scholars, and general audiences;
  • Build capacity in partner institutions to narrow the digital divide within and between countries.”

cuneform digital library initiative

Related to the WDL, is the CDLI. From their website….

“The Cuneiform Digital Library Initiative (CDLI) represents the efforts of an international group of Assyriologists, museum curators and historians of science to make available through the internet the form and content of cuneiform tablets dating from the beginning of writing, ca. 3350 BC, until the end of the pre-Christian era. We estimate the number of these documents currently kept in public and private collections to exceed 500,000 exemplars, of which now nearly 225,000 have been catalogued in electronic form by the CDLI.”

John Harrison sea clock

And here’s a short read on an interesting historical topic. It seems the history of the longitude will need a small rewrite. What’s most amazing, though, is the skill and craftsmanship of the compass at the heart of this historical debate.  Created over 270 years ago, the original parts show no sign of wear and tear, while replacement parts broke down after 80 years. A remarkable piece of history.

The controversy surrounding this clock comes from recent work to replace broken parts from the initial attempt at restoration. It was originally believed that John Harrison created this clock all by himself. He being originally a carpenter, some scholars are a bit skeptic that he could create the intricate brass work needed to create the piece.  The most recent repairs have lead people to believe Harrison had help, and probably commissioned out certain pieces. Comprising over 2000 pieces, this sea clock is a marvel of itself, regardless of who made it.

Now it’s time for some timelines!

It was a shameless publicity post to slashdot, but the timelines got me thinking of other timelines, especially as I’m creating one of my own using MIT’s Exhibit builder, and have created one for a course. So, here are a few timeline tools mentioned in the article.

simile-timeline SIMILE’s Timeline: easy to use, just point it to a data file (which is the most dificult part)
timeglider TimeGlider: Looks like a flashed based version of SIMILE’s product. A few different features. Here’s one in action, Rosenberg Cold War trials.
googlenews Google’s News timeline: you can do searches on other things as well. Kind of like a modern timeline.
timerimeTimeRime: They’re in this for the money, and it doesn’t look all that great, but I didn’t spend but more than a couple seconds looking around.

Lego History and the Rosetta Stone of the future?

LEGOS

The lego minifig (the little human figure) is celebrating its 30 year birthday today. Yeah Lego! Gizmodo is running a contest for best picture or short film using the minifig. The first and second prizes are the best Lego sets of all time! My brothers and I got these sets as kids. So many memories

Yellow Castle Set

Galaxy Explorer Set

So many, many meomories come flooding back when I see these pictures. Most of the pieces of these sets are still at my parents’ house.  Check out the videos on Gizmodo for a quick history of the world, told by Legos.

ROSETTA STONE

I heard through Slashdot about a project to create the ultimate Rosetta Stone of the future.

Rosetta Front

The disk will contain text inscribed in nickel, making it impervious to water and all but physical destruction. Written in eight languages, the disk contains over 15,000 documents. The only technology needed to view and decode this disk is a magnifying glass… with a magnification of at least 1000x. From the website…

The Disk surface shown here, meant to be a guide to the contents, is etched with a central image of the earth and a message written in eight major world languages: “Languages of the World: This is an archive of over 1,000 human languages assembled in the year 02002 C.E. Magnify 1,000 times to find over 15,000 pages of language documentation.” The text begins at eye-readable scale and spirals down to nano-scale. This tapered ring of languages is intended to maximize the number of people that will be able to read something immediately upon picking up the Disk, as well as implying the directions for using it—‘get a magnifier and there is more.’

Rosetta Top
Rosetta Top

On the reverse side of the disk from the globe graphic are 15,000 microetched pages of language documentation. Since each page is a physical rather than digital image, there is no platform or format dependency. Reading the Disk requires only optical magnification. Each page is .019 inches, or half a millimeter, across. This is about equal in width to 5 human hairs, and can be read with a 500X microscope (individual pages are clearly visible with 100X magnification).

The idea is to replicate this disk as many times as possible and distribute it to as many places as possible to ensure survival of knowledge if modern civilization were to be destroyed. You can put yourself on the waiting list to own one of these disks, for the relatively low price of $25,000.

I like to imagine if the civilization of today were to disapear and the people of the future were to grab hold of this disk, they would be able to learn how the world was at this time. I wonder, though, if the prevalence of information makes such a disk necessary. It’s hard for me to imagine that all of the data in the plethora of different formats (print, digital, textile, etc) will be destroyed. I do, however, wonder how digital media (text, image, video, etc) will be available in the future. We can already see the trouble of getting data from older media formats like laser disk and 5-inch floppy disks. If the data is properly brought forward with technology (ie. nowadays the best storage media is hard drives, particularly external drives attachable via USB or FireWire) it should always be accessible.

THAT podcast

Check out THAT podcast (THAT = The Humanities And Technology). It’s a new video pod cast put on by a couple of co-workers at CHNM. They interview someone in the technical field about software that helps those of us in the humanities.

The first episode includes an interview with Matt Mullenweg, creator of WordPress (the software running this site!) and shows you how to install and configure ScholarPress (a plug-in to WordPress written by Jeremy Boggs).

It’s great stuff, check it out!