History Lab: rethinking the Western Civ course

So, I finally get to teach a college course this semester. Way excited! But I refuse to do the normal lecture format. Seriously, we are still stuck on that teaching method after all the research and scholarship about the best ways to teach? (These all came up as results for searching in Google Scholar with the terms “how students learn” and “scholarship of teaching and learning”, which returned over 3.7 million results.)

Screen Shot 2013-09-06 at 12.38.57 PM
over 600,000 results for “scholarship of teaching and learning” on Google Scholar
Screen Shot 2013-09-06 at 12.07.19 PM
Over 3 million hits for “how students learn” on Google Scholar. You’d think we would know how students learn by now…

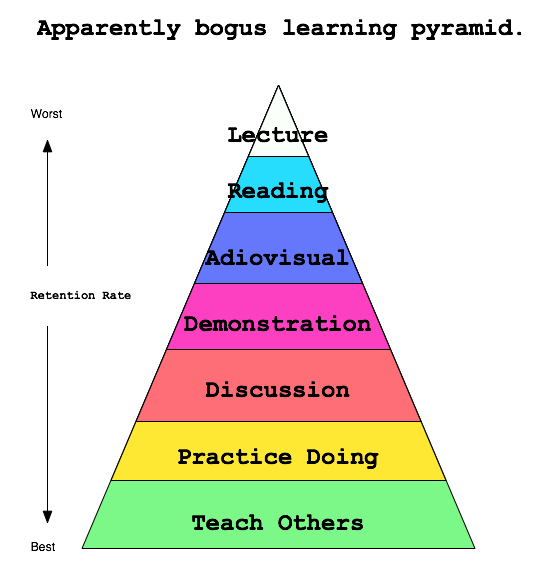
I still believe the “learning pyramid” has merit despite it’s obvious over-generalizations and fabricated percentages. Lecturing has it’s place, but not in my class room. If anything, I want to be less boring. šŸ™‚

Apparently false learning pyramid, created by me.

So, I got to thinking, what format do I want to use for my Monday-Wednesday-Friday, History 100 Western Civilization class? I landed on a discussion based lecture format for Monday and Wednesday, and what I’m calling a History Lab for Friday. The sciences have this same format. Lecture on two days a week, then go to a lab where you practice what was preached. I figured we could do the same thing with critical thinking skills taught by the humanities. Monday and Wednesday will be a bit of me talking about the time period, with a healthy dose of questions and comments from the students based on the reading they have done. Then on Friday we have a History Lab where we critically examine a primary document from the time period we are learning about. I’m open to other ideas on what to do during the History Lab. I’m excited to see if any students offer suggestions.

Popsicle sticks!
Popsicle sticks!

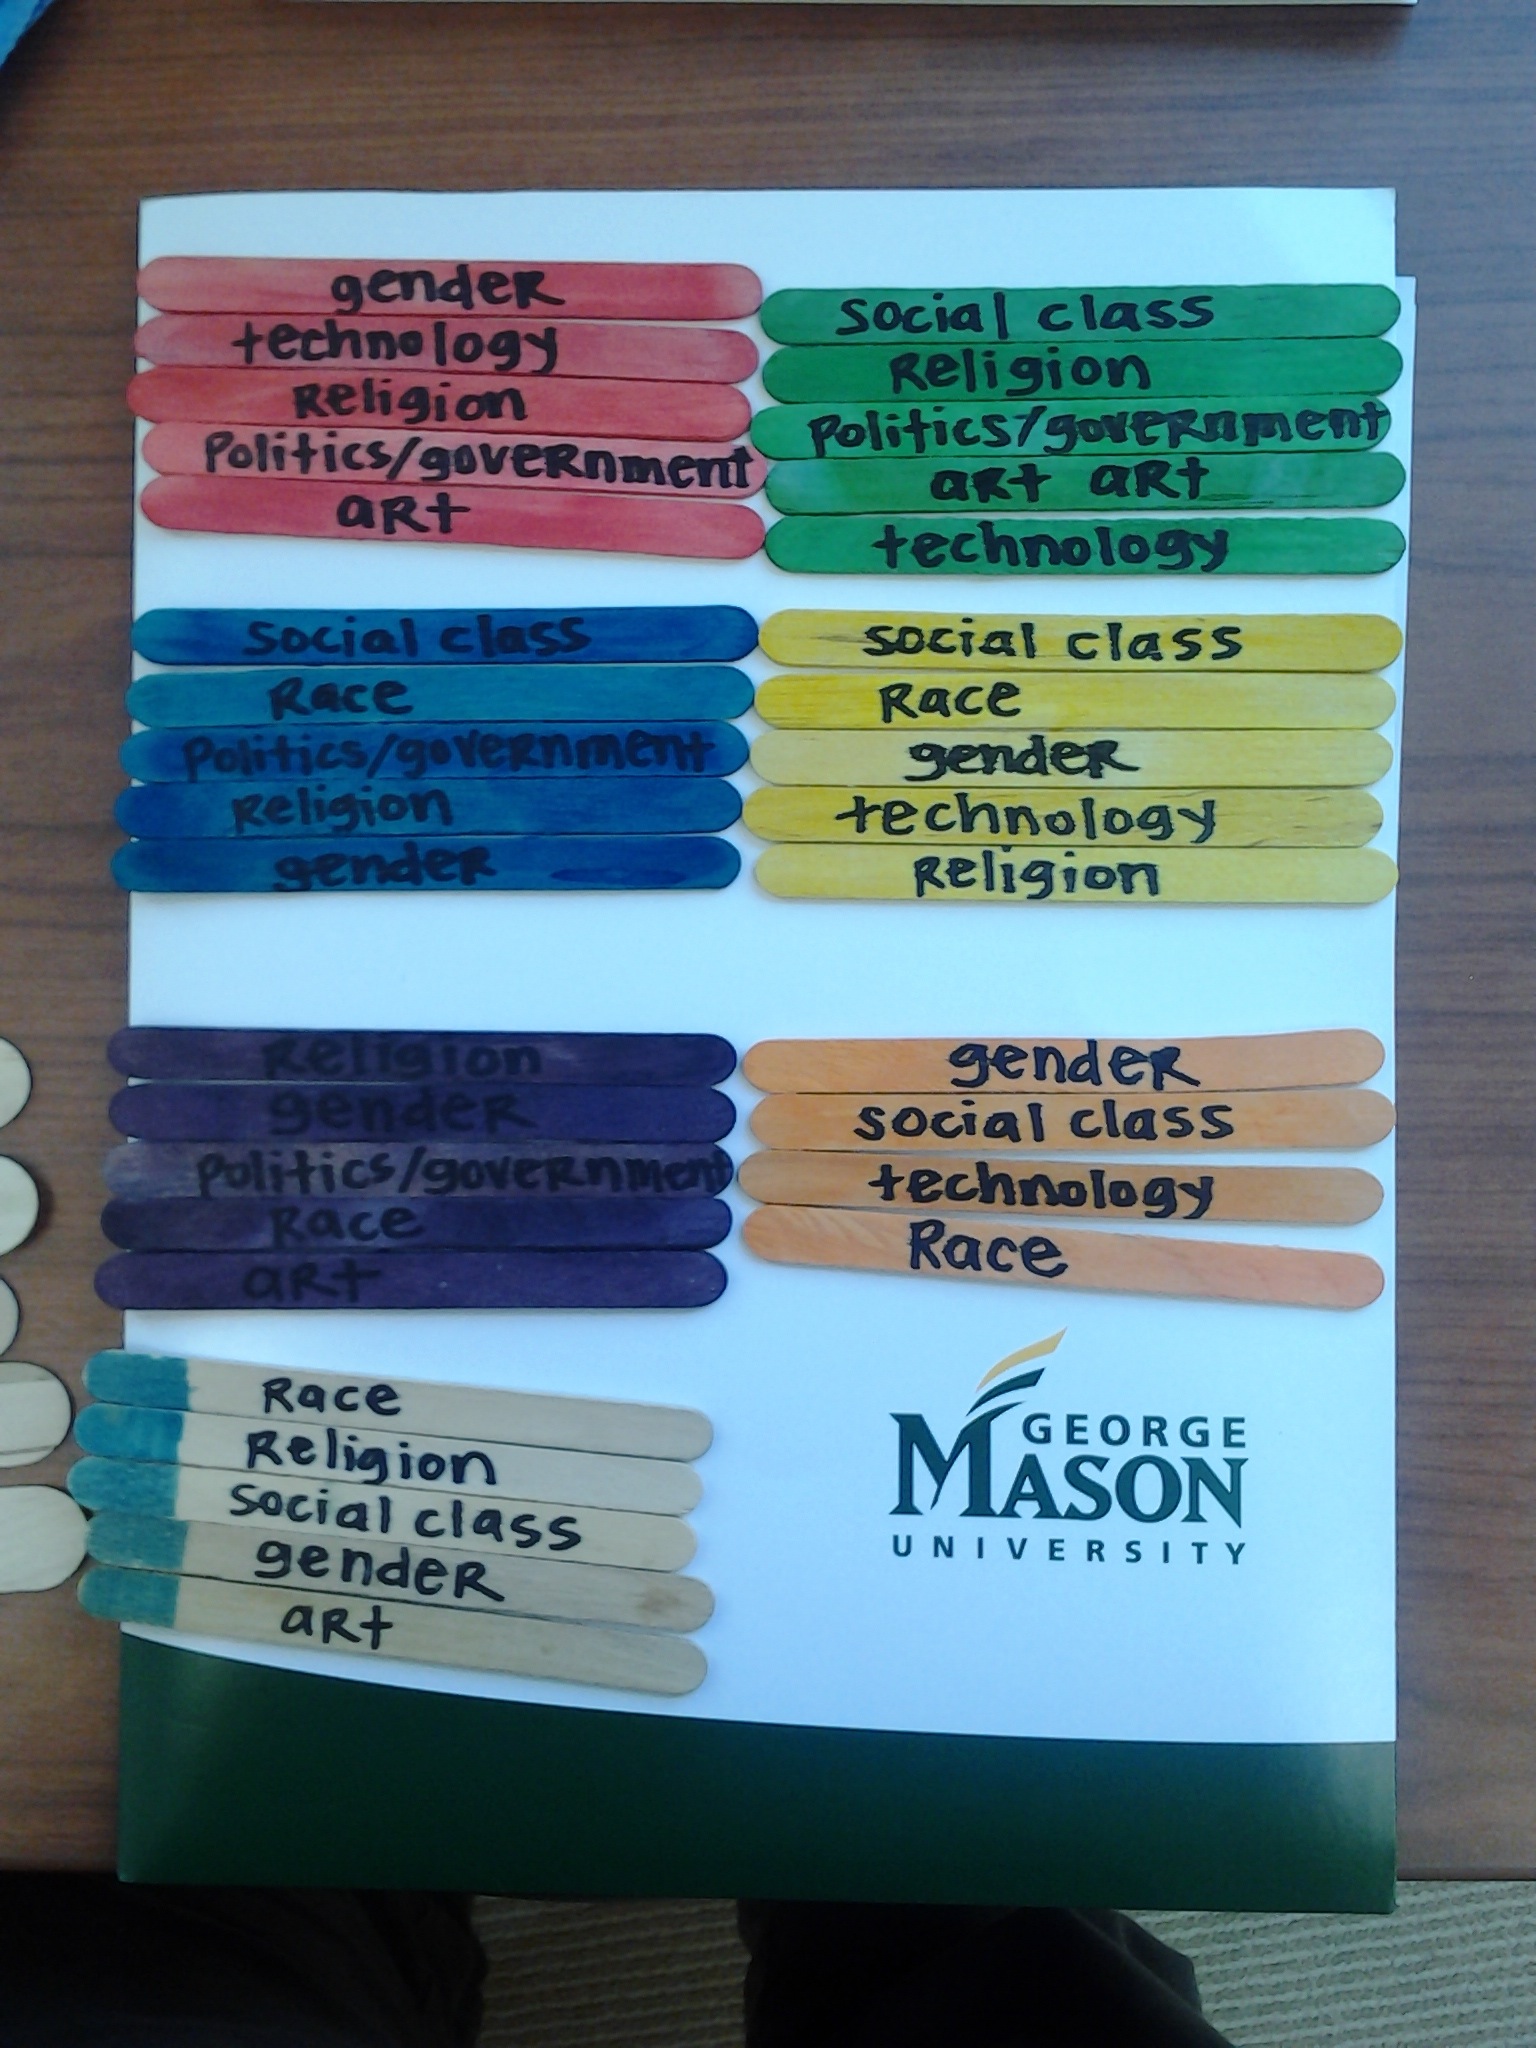
Today was our first History Lab, and it went very well, I think. I will get the students opinion on Monday, to make this exercise an all around learning experience. For today’s History Lab I divided the students into groups of five (any more than that gets a bit unmanageable). They each picked a popsicle stick I had in a cup at the front of the desk. There were five popsicle sticks with the same color, but a different “filter” written on each of the five sticks. The filters are the biases, or lenses through which to look at history. They included race, gender, science/technology, social class, art, religion, and politics/government. After the students organize into groups, I give them a primary source document to read together, then discuss the document based on the filter that they have. After enough time to allow individual groups to discuss, we discuss altogether as a class. To track participation, attendance and provide accountability, each group had to write a summary of their discussion on the back of the paper, including their names and which filter they had, to be turned in at the end of class.

This seemed to work out pretty well, and the students had great comments. We looked at “The Spartan Creed”, a poem written by Tyrtaeus in the 7th Century B.C. (unfortunately no reliable source found, just this post in a forum). The most noticeable thing about this document is how heavily male centric it is. Granted, it’s a man writing about war, but there is absolutely no mention of a female. It can be implied by the use of the word “children”, but no fighting for the protection of wife and family, just city and children. Here are some of the comments the students made on their papers for a few of the filters.

2013-09-06 10.23.17
Directions are an absolute necessity for group work to function well.

Gender: Men are dominant, only men are warriors. No reference to women. The society was very male dominated. Women had no role in the Spartan military, so the code is less relevant to them. Females are not even mentioned in the creed, so men are obviously the dominant gender. Among the men, they are expected to be strong, courageous, honorable, every trait that makes them a mighty soldier, a protector of their city-state.

Art: War is their art, the structure of their army, how they fought, etc. It doesn’t specifically say anything about art, but the way this is written is a form of art and the way the author makes out a man to be is like a piece of art.

Religion: War was treated as a religion. Soldiers were treated as gods when they returned. In death, a Spartan man becomes immortal as his memory is honored as if he is a god. To understand this one must know that in his life he was worshiped for being a good fighter and so that is carried over in a glorious death. Religion and personal values seem to all be related to war; gods are mentioned but the creed is centered around the personal honor of a warrior.

I was pleased with the results. All of the students were engaged in the group work and came up with something intelligent to write about. The beauty of this model is that each student has a focused purpose to look at a historical document, and then is held accountable for sharing something.

Do you have ideas for what we can do in our History Lab? Leave a comment below, and I’ll give it a try!

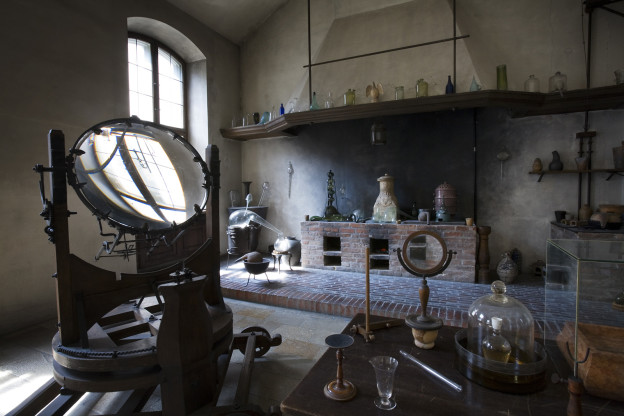
[Post image from Wikimedia Commons: Glass containers, experimental magnifiers and chemical or alchemy paraphernalia in the Lavoisier Lab 1775 by Jorge Royan. http://commons.wikimedia.org/wiki/File:Munich_-_Deutsches_Museum_-_07-9631.jpg]

3D printing in the field of history

I was asked to lead a discussion on the current status of 3D printing in the humanities, particularly the field of history with a great group of fellow PhD students here at GMU during one of their classes.

Here is what we came up with.

First of all, 3D printing (in general, but specifically for history) can be summarized by the following formula.

3D printing for history now = HTML for history in the early 1990's
2013-08-27 14.01.13
A replica of the Antikythera Machine, a 1 BCE clockwork device discovered on a shipwreck near Greece in the early 1900’s.

There is much that can be done, but using a 3D printer for historical research, study, learning, etc, is still very much in a nascent stage. So the question are, what can be done with 3D printing and how does it help us learn about history? We came up with a few ideas.

First, what can we print with a 3D printer? The limits are just about endless, as long as then are condensed to a 5-inch x 11-inch x 12-inch box.

The bigger question is what do 3D printed objects help us learn about history? Here we had some good ideas. Printing buildings to scale, along with figurines, can help us determine the scale of real life objects. Determining scale can help us analyze why some things are larger than others, for instance monuments. Why would the Lincoln monument be larger than the Jefferson, and what does that say about our views (or the creators views) about the subject? Life size objects can show true size that are often distorted or masked when never seen in person, like the Mona Lisa, for example, which is remarkably small.

Preserving rare, fragile, or expensive artifacts has obvious benefits in that it keeps things from getting lost, broken or stolen. 3D historical prints also put physical objects in the hands of students, especially those who might never have the opportunity to handle a real civil war cannonball, a Roman sword, a model of the Antikythera Mechanism, or a scale model of the Titanic. A physical object also offers the additional learning opportunity of tactile feedback over images in a book or on screen.

2013-08-27 14.01.01
Chopstick holder.

3D printing also offers the opportunity to create inventions that may never have made it into production, such as those from old patents. We even got to look at one, a chop-stick holder from 1967.

Using a 3D printer and associated hardware and software in a history classroom provides yet another opportunity to combine multiple disciplines in an educational atmosphere. Everybody benefits when science, engineering, math, technology and the humanities combine (as was noted about a high school class that built a trebuchet).

We also talked about the ramifications of 3D printing on the future. Interestingly, similar issues that have voiced throughout history to the introduction of new technology, were also raised during the discussion. What happens when we move production of items back to the individual and away from factories? How do we cope with the replacement of humans by technology?

At present, the cost to own a printer in your home is still a bit much, but definitely within reach. Three different printers range from $800 (the do-it-yourself RepRap) to $2500 (Makerbot Replicator 2), with a middle priced option by Cubify at $1500. Filament, the plastic line used to create objects, costs around $50 a spool.

Items printed:

http://www.thingiverse.com/thing:22849 – chopstick holder

http://www.thingiverse.com/thing:32413 – Antikythera machine

Have an idea how 3D printers can be used in education? Add a comment below.

It has been two years.

My dad passed away two years ago today. I was recently in Arizona, but didn’t visit his grave site. This is what I wrote to my family about that.

Dad as I knew him growing up.

It was great to be in Arizona at the end of June and July. I had really wanted to visit Dad’s grave while I was there. I even got up early the day after I got back from Germany to run over there, like literally run over there, but I only made it to Longmore and 8th Street (now for some dumb reason renamed Rio Solado Pwky). I never did make it to the cemetery, though. This made me a bit sad, like I wasn’t honoring Dad, or remembering him appropriately.

But then I thought, you know, Dad’s body is the only thing over there, and it’s only been there for 2 years. Dad really isn’t there, he’s at home, where he lived for nearly (or over?) 40 years of his life. Then I started seeing how I remembered and honored him when I was there, at home, for a few short days. I honored Dad when I fixed the toilet and changed the light bulb in the ceiling fan in Mom and Dad’s room. Dad always fixed up the house, was always doing repairs. I paused for a moment and looked at his dresser. Much cleaner now than before. But I loved the mystery that was always Dad’s dresser. I just knew there were interesting and exciting things to find in thereā€¦ as well as $300 in quarters.

Dad loved fishing, and he loved taking his grandkids fishing.

I remembered Dad when I sat at the computer desk to do some emails. Dad sure did love solitaire. Which also reminded me of pre-computer times when Dad taught us how to play solitaire with cards. He used to do that a lot when I was young.

I remembered Dad when I would read books to my kids, on the trip to AZ and since. Dad read us the Hobbit, the Lord of the Rings trilogy and more (even though I fell asleep all the time, which is probably the original goal anyways).

My kids at the Kids Club House

I remembered Dad every time I went into the back yard. He planted all of those trees (well, Aaron and I planted the big Ash tree, if I remember right). But he was a good landscaper designer. He put those sheds in the back yard to hold all of his tools. I remember how good he was at making, fixing, and repairing things. I like to think he knew enough to put an AC unit out there so that Mom would be able to turn it into the Kids Club House (or the Black Light District, as I like to call it).

I made pancakes one morning, and that reminded me of Dad, too. They were plain, no ham or corn in them. Dad loved to cook, so I remember Dad every time I cook.

So, it doesn’t matter that I didn’t go to the cemetery, because Dad’s not really there. He’s at home with Mom, right where he always is.

You are the best family ever. I am so thankful we are eternal.

Love,
Ammon


OSSEC, Suhosin, and WordPress

I had a problem show up on some of our servers. Visiting sites would work fine, but as soon as you log in to a WordPress site, then your IP was blocked at the firewall level. It took a bit of hunting around the OSSEC logs to figure out the cause, and then finally tipped off to a local rule to combat the blockage. I outline the process of figuring out what was wrong, and how to fix it below.

DENIED!

gareth-davies-logo3So initially, this was quite confusing. All of a sudden people would have their IP blocked. I checked the different sites, and seemed to have no problem. Then when I logged in to the back end, BAM, blocked as well. We have Shorewall running, so doing:

shorewall show dynamic

Showed all of the IPs that Shorewall had blocked. This could also be done by using iptables

iptables -nL --line-numbers

Sure enough, my IP had been blocked. I unblocked my IP with:

shorewall allow ip.ad.dr.es

Or could also do

iptables -D INPUT 2

where INPUT is the position or section of the firewall chain, and “2” is the line number containing my IP address.

Then I checked with other web applications on that server. Where they also causing an issue? I logged in to an Omeka install. No problems.

FOUND IT!

ossec_logoOK. I know OSSEC is to blame some how. It’s an awesome HIDS (Host Intrusion Detection Software) that actively responds to issues on the server based on scanning through the system logs and various rules.

OSSEC keeps itself chroot’ed to /var/ossec/, so all of the ossec logs are located in /var/ossec/logs/.

I first looked in the /var/ossec/logs/active-responses.log. Sure enough, a couple of lines like this show my IP being completely blocked to the server.

Fri Jun 14 06:50:47 EDT 2013 /var/ossec/active-response/bin/host-deny.sh add - XXX.XX.XX.XX 1371207047.5913585 20101
Fri Jun 14 06:50:47 EDT 2013 /var/ossec/active-response/bin/firewall-drop.sh add - XXX.XX.XX.XX 1371207047.5913585 20101

So, there we are. OSSEC blocking the IP for some reason. Now why is it blocking the IP?

Taking a look in the /var/ossec/logs/alerts/alerts.log file to see why it thinks it needs to block the IP…

** Alert 1371206381.5698606: - ids,
2013 Jun 14 06:39:41 (server1) 127.0.0.1->/var/log/messages
Rule: 20101 (level 6) -> 'IDS event.'
Src IP: XXX.XX.XX.XX
Jun 14 06:39:40 server1 suhosin[18563]: ALERT - script tried to increase memory_limit to 268435456 bytes which is above the allowed value (attacker 'XXX.XX.XX.XX', file '/var/html/wp-admin/admin.php', line 109)

There were other lines in there with my IP, but nothing would/should have caused blocking, like a WordPress login event, or an SSH login event. Also, the error above is categorized as an IDS event with level 6, which by default OSSEC rules means it gets blocked.

HOW TO FIX IT!

As a quick fix, I changed the “suhosin.memory_limit” option in /etc/php.d/suhosin.ini to 256M, and the “memory_limit” in /etc/php.ini to 256M so that no error would be generated.

Now came the hard part of finding out how to fix it for real. OSSEC is a pretty big beast to tackle, so I turned to my friendly web search engine to help out.

To fix the issue, I would need to write a decoder or new rule to ignore the suhosin rule causing the problem. OSSEC has descent documentation to get you started, but fortunately the blog linked above had the solution already. https://www.atomicorp.com/forum/viewtopic.php?f=3&t=5612

From user ‘faris’ in the forum linked above:

Add the following lines the the /var/ossec/etc/rules.d/local_rules.xml file.

<group name="local,ids,">
  <!-- First Time Suhosin event rule -->
  <rule id="101006" level="14">
    <if_sid>20100</if_sid>
    <decoded_as>suhosin</decoded_as>
    <description>First Time Suhosin Event</description>
  </rule>
  <!-- Generic Suhosin event rule -->
  <rule id="101007" level="12">
    <if_sid>20101</if_sid>
    <decoded_as>suhosin</decoded_as>
    <description>Suhosin Event</description>
  </rule>
  <!-- Specific Suhosin event rule -->
  <rule id="101008" level="5">
    <if_sid>101006,101007</if_sid>
    <match>script tried to increase memory</match>
    <description>Suhosin Memory Increase Event</description>
  </rule>
</group>

What these new rules do is change the level of the default rules that were tagged/decoded as being suhosin errors. In the first rule, if the default error is 20100, and is decoded (or tagged, or matches) as suhosin, then set the level to 14 instead of the default 8.

The second rule detects if the default error 20101 is decoded as coming from suhosin and sets the level to 12 instead of the default 6.

The third new rule looks at any error tagged as suhosin and if the error has the matching text in it, then it sets the error level to 5 (below the limit for firing an active response).

So, just add that group of rules to the local_rules.xml file and restart the OSSEC service. BA-DA-BING! no more blocking the IP when logging in to WordPress.

Four Steps to a Personal Website

There are four basic steps to creating a personal website.

1. Content

You may want to start out with a cool design, or fun idea on how to interact with visitors, or what have you. But really, the most important thing a website has going for it is the content. Design is a close second (but we’ll talk about that last), because people tend to shy away from “ugly” sites. But they won’t even go in the first place if the content isn’t relevant.

You’ll need to ask yourself a few questions to get an idea of what kind of website you need. The answers will even help define the design, and determine the platform, or website technology, that you use.

  • What information do you want to share?
  • Why do you want to make a website?
  • Do you want conversations to take place on your website?
  • Do you want a blog, a simple website with information about you or a topic, or something else?

2. Domain Name

All computers on the Internet or World Wide Web have a unique number associated with them, called an IP (Internet Protocol) Address. Kind of like a Social Security Number. In order to get data from a server (a computer that “serves” content, either data, websites, videos, pictures, etc), you would need to type in the specific number into your web browser. IP Addresses are in the format XXX.XXX.XXX.XXX. If you connect to the Internet at home, you might see your laptop get an IP Address like 192.168.1.20.

Since humans remember letters and words better than numbers, there is a system set up to translate words into the IP Address for a server. It is kind of like the old fashioned telephone directory. You can remember the telephone number to a person’s house, or look up the person in the phone directory to get their number. This also allows for multiple names to be pointed at one IP Address, like multiple people living in oneĀ  house, sharing a phone number.

This set of characters or words is called a domain name. A domain name allows for an almost unlimited number of unique identifiers to point to a limited number of IP Addresses. The domain name plays an important role in search engine rankings. If this is your personal site, try to get your name, or part of it, as the domain name. It can be all you need for “brand” identification.

Shop around before you buy a domain name. There are plenty of options out there, just do a search for domain registrar. Often a hosting provider will sell domain names as well. As of this writing, you should be able to get a domain name for around $10-$11 a year. Make sure the registrar includes DNS management.

.org, .net, .com, .info, .us, … What type of domain name should you buy? There are 19 top level domains (TLDs the very last part of a domain name, the part followed by the last period), and over 250 country code top-level domains (.us, .me, .de, .uk, etc.) That depends on a few things, the most important being, which one is available. Generally, .com and .org are the most sought after. Here is a list of the top-level domains and their intended purposes (from Wikipedia).

.com commercial This is an open TLD; any person or entity is permitted to register. Though originally intended for use by for-profit business entities, for a number of reasons it became the “main” TLD for domain names and is currently used by all types of entities including nonprofits, schools and private individuals. Domain name registrations may be challenged if the holder cannot prove an outside relation justifying reservation of the name, to prevent “squatting“.
.info information This is an open TLD; any person or entity is permitted to register.
.name individuals, by name This is an open TLD; any person or entity is permitted to register; however, registrations may be challenged later if they are not by individuals (or the owners of fictional characters) in accordance with the domain’s charter.
.net network This is an open TLD; any person or entity is permitted to register. Originally intended for use by domains pointing to a distributed network of computers, or “umbrella” sites that act as the portal to a set of smaller websites.
.org organization This is an open TLD; any person or entity is permitted to register. Originally intended for use by non-profit organizations, and still primarily used by some.

Country code top-level domains can be used as well, often to create clever domain names (called domain hacks) like del.icio.us, bit.ly, instagr.am, pep.si, and redd.it.


source, creative commons search on flickr.com

3. Hosting

A hosting provider is the company that owns the servers where your website lives. There are many free options. Look for a hosting provider that offers “easy” installations of common software like WordPress, Drupal, etc.

Paid options:

You can find a hosting provider from anywhere between $5/month to $100/month.

source: creative commons search on flickr.com

4. Design

Independent on the platform you choose, there are usually thousands of free themes available for easy download and install. When you pick a platform, look on their site for places to find free themes.

Designing a website takes lots of work to make it look nice. The better the design, the more resources are needed (be they time, or money).

Setting up a Hosting Environment, Part 3: RedHat Cluster and GFS2

Previous posts in this series:

Part 1: Setting up the servers

Part 2: Connecting the Array

RedHat Cluster and GFS2 Setup

Set date/time to be accurate and within a few minutes of each other.

  • Install the ntp program and update to current time.
    • yum install ntp
    • ntpdate time.nist.gov
  • Set time servers and start ntpd
    • service ntpd start
    • Edit the /etc/ntp.conf file to use the following servers:
    • server 0.pool.ntp.org
      server 1.pool.ntp.org
      server 2.pool.ntp.org
      server 3.pool.ntp.org
  • Restart ntpd
    • service ntpd restart
    • chkconfig ntpd on

Cluster setup

RedHat Cluster must be set up before the GFS2 File systems can be created and mounted.

  • Instal the necessary programs
    • yum install openais cman rgmanager lvm2-cluster gfs2-utils ccs
    • Create a /etc/cluster/cluster.conf REMEMBER: Always increment the ā€œconfig_versionā€ parameter in the cluster tag!
      • <?xml version=ā€œ1.0ā€?>
            <cluster config_version=ā€œ24ā€ name=ā€œweb-productionā€>
                <cman expected_votes=ā€œ1ā€ two_node=ā€œ1ā€/>
                <fence_daemon clean_start=ā€œ1ā€ post_fail_delay=ā€œ6ā€ post_join_delay=ā€œ3ā€/>
                <totem rrp_mode=ā€œnoneā€ secauth=ā€œoffā€/>
                <clusternodes>
                    <clusternode name=ā€œbillā€ nodeid="1">
                        <fence>
                            <method name="ipmi">
                                <device action=ā€œrebootā€ name=ā€œipmi_billā€/>
                            </method>
                        </fence>
                    </clusternode>
                    <clusternode name=ā€œtedā€ nodeid="2">
                        <fence>
                            <method name="ipmi">
                                <device action=ā€œrebootā€ name=ā€œipmi_tedā€/>
                            </method>
                        </fence>
                    </clusternode>
                </clusternodes>
                <fencedevices>
                    <fencedevice agent=ā€œfence_ipmilanā€ ipaddr=ā€œbillspā€ login=ā€œrootā€ name=ā€œipmi_billā€ passwd=ā€œPASSWORD-HEREā€/>
                    <fencedevice agent=ā€œfence_ipmilanā€ ipaddr=ā€œtedspā€ login=ā€œrootā€ name=ā€œipmi_tedā€ passwd=ā€œPASSWORD-HEREā€/>
                </fencedevices>
                <rm log_level="5">
                    <resources>
                        <clusterfs device=ā€œ/dev/mapper/StorageTek2530-sitesā€ fstype=ā€œgfs2ā€ mountpoint=ā€œ/sitesā€ name=ā€œsitesā€/>
                        <clusterfs device=ā€œ/dev/mapper/StorageTek2530-databasesā€ fstype=ā€œgfs2ā€ mountpoint=ā€œ/databasesā€ name=ā€œdatabasesā€/>
                        <clusterfs device=ā€œ/dev/mapper/StorageTek2530-logsā€ fstype=ā€œgfs2ā€ mountpoint=ā€œ/logsā€ name=ā€œlogsā€/>
                    </resources>
                    <failoverdomains>
                        <failoverdomain name=ā€œbill-onlyā€ nofailback=ā€œ1ā€ ordered=ā€œ0ā€ restricted="1">
                            <failoverdomainnode name=ā€œbillā€/>
                        </failoverdomain>
                        <failoverdomain name=ā€œted-onlyā€ nofailback=ā€œ1ā€ ordered=ā€œ0ā€ restricted="1">
                            <failoverdomainnode name=ā€œtedā€/>
                        </failoverdomain>
                    </failoverdomains>
                </rm>
            </cluster>
    • Weā€™ll be adding more to this later, but this will work for now.
    • Validate the config file
      • ccs_config_validate
    • Set a password for the ricci user
      • passwd ricci
    • Start ricci, and set to start on boot
      • service ricci start
      • chkconfig ricci on
    • Start modclusterd and set to start on boot
      • service modclusterd start
      • chkconfig modclusterd on
    • Sync the cluster.conf file to other node
      • ccs -f /etc/cluster/cluster.conf -h ted --setconf
    • Start cman on both servers at the same time
      • service cman start
    • Set cman to start on boot
      • chkconfig cman on
  • Check the tutorial on testing the fencing

Create GFS2 partitions

Create a partition on the new scsi device /dev/mapper/mpatha using parted. NOTE: This part only needs to be done once on one server

  • parted /dev/mapper/mpatha
  • mklabel gpt
  • mkpart primary 1 -1
  • set 1 lvm on
  • quit
  • Now you can see a partition for the storage array.
    • parted -l

Edit the /etc/lvm/lvm.conf file and set the value for locking_type = 3 to allow for cluster locking.

In order to enable the LVM volumes you are creating in a cluster, the cluster infrastructure must be running and the cluster must be quorate.

  • service clvmd start
  • chkconfig clvmd on
  • chkconfig gfs2 on

Create LVM partitions on the raw drive available from the StorageTek. NOTE: This part only needs to be done once on one server.

  • pvcreate /dev/mapper/mpatha1
  • vgcreate -c y StorageTek2530 /dev/mapper/mpatha1

Now create the different partitions for the system: sites, databases, logs, home, root

  • lvcreate --name sites --size 350GB StorageTek2530
  • lvcreate --name databases --size 100GB StorageTek2530
  • lvcreate --name logs --size 50GB StorageTek2530
  • lvcreate --name root --size 50GB StorageTek2530

Make a temporary directory /root-b and copy everything from rootā€™s home directory to there, because it will be erased when we make the GFS2 file system.

Copy /root/.ssh/known_hosts to /etc/ssh/root_known_hosts so the file is different for both servers.

Before doing the home directory, we have to remove it from the local LVM.

  • unmount /home
  • lvremove bill_local/home and on ted lvremove ted_local/home
  • Remove the line from /etc/fstab referring to the /home directory on the local LVM
  • Then add the clustered LV.
    • lvcreate --name home --size 50GB StorageTek2530

Create GFS2 files systems on the LVM partitions created on the StorageTek. Make sure they are unmounted, first. NOTE: This part only needs to be done once on one server.

  • mkfs.gfs2 -p lock_dlm -j 2 -t web-production:sites /dev/mapper/StorageTek2530-sites
  • mkfs.gfs2 -p lock_dlm -j 2 -t web-production:databases /dev/mapper/StorageTek2530-databases
  • mkfs.gfs2 -p lock_dlm -j 2 -t web-production:logs /dev/mapper/StorageTek2530-logs
  • mkfs.gfs2 -p lock_dlm -j 2 -t web-production:root /dev/mapper/StorageTek2530-root
  • mkfs.gfs2 -p lock_dlm -j 2 -t web-production:home /dev/mapper/StorageTek2530-home

Mount the GFS2 partitions

  • NOTE: GFS2 file systems that have been mounted manually rather than automatically through an entry in the fstab file will not be known to the system when file systems are unmounted at system shutdown. As a result, the GFS2 script will not unmount the GFS2 file system. After the GFS2 shutdown script is run, the standard shutdown process kills off all remaining user processes, including the cluster infrastructure, and tries to unmount the file system. This unmount will fail without the cluster infrastructure and the system will hang.
  • To prevent the system from hanging when the GFS2 file systems are unmounted, you should do one of the following:
    • Always use an entry in the fstab file to mount the GFS2 file system.
    • If a GFS2 file system has been mounted manually with the mount command, be sure to unmount the file system manually with the umount command before rebooting or shutting down the system.
  • If your file system hangs while it is being unmounted during system shutdown under these circumstances, perform a hardware reboot. It is unlikely that any data will be lost since the file system is synced earlier in the shutdown process.

Make the appropriate folders on each node (/home is already there).

  • mkdir /sites /logs /databases

Make sure the appropriate lines are in /etc/fstab

#GFS2 partitions shared in the cluster
/dev/mapper/StorageTek2530-root        /root        gfs2   defaults,acl    0 0
/dev/mapper/StorageTek2530-home        /home        gfs2   defaults,acl    0 0
/dev/mapper/StorageTek2530-databases      /databases      gfs2   defaults,acl    0 0
/dev/mapper/StorageTek2530-logs        /logs        gfs2   defaults,acl    0 0
/dev/mapper/StorageTek2530-sites    /sites    gfs2   defaults,acl    0 0

Once the GFS2 partitions are set up and in /etc/fstab, rgmanager can be started. This will mount the GFS2 partions.

  • service rgmanager start
  • chkconfig rgmanager on

Starting Cluster Software

To start the cluster software on a node, type the following commands in this order:

  • service cman start
  • service clvmd start
  • service gfs2 start
  • service rgmanager start

Stopping Cluster Software

To stop the cluster software on a node, type the following commands in this order:

  • service ossec-hids stop
    • (ossec monitors the apache log files, so the /logs partition will not be unmounted unless ossec is stopped first.)
  • service rgmanager stop
  • service gfs2 stop
  • umount -at gfs2
  • service clvmd stop
  • service cman stop

Cluster tips

If a service shows as ā€˜failedā€™ when checking on services with clustat

  • Disable the service first: clusvcadm -d service-name
  • Then re-enable it: clusvcadm -e service-name

Have Shorewall start sooner in the boot process.

  • It was necessary to move shorewall up in the boot process, otherwise cman had no open connection to detect the other nodes.
  • Edit the /etc/init.d/shorewall and change the line near the top from # chkconfig: - 28 90 to
    • # chkconfig: - 18 90
  • Then use chkconfig to turn off shorewall and then back on.
    • chkconfig shorewall off
    • chkconfig shorewall on

Research Trip!

Not quite the same feeling and fun as a road trip, but fun enough.
Yeah, archive work! Yeah, Germany! Yeah, yeah archive work in Germany! So I just spent the last two weeks in Germany (by myself, not so yeah) doing some archival research for the dissertation. Here are some thoughts on the trip.

1. Internet!

Starbucks
The Starbucks with Internet… saved my bacon.

Make sure you have a good internet connection where you will stay. I booked a decent hotel with Internet included, and free breakfast. The only problem is, the connection to the Internet is spotty at best. I have to get a new user/pass combination to connect to the Internet every 24 hours, too. It’s so frustrating to want to communicate, but not be able to. Especially when you’re trying to get in touch with family back home. So, do some research and hope you get lucky. Also, it is important to know any quirks about the Internet in the country you go to, if going out side of the USA. In Germany, they use 13 channels for their routers, in the USA we only use 11. So if your place of stay uses channel 12 or 13, you’re almost out of luck. You can pick up a relatively cheap USB wireless adapter in the country that should get you all of their available channels. But you will most likely have to find some place with Internet to download software. Enter in the great Internet hubs scattered throughout the world: Starbucks and McDonalds! Even BurgerKing has Internet available. Find out where they are and use them.


2. This is only a test.

weinachtsmarkt
Getting ready for Christmas!

Don’t get your hopes up too high for your first trip. I kind of went on this trip with the attitude that it would be a test run of a later real trip. This was possible because I know that I’m coming back in a few months. If you don’t know if you’ll ever go back, then you need to do a lot of background research and contacting before hand. I had scheduled to go to the archive Tuesday through Friday the first week and Monday through Thursday the second week. The first day ended up being a get settled day; exchanging money, finding my way around, finding the Starbucks for Internet, etc. It often felt like I was wasting time, but if you know you are going to go back, then it is time well spent to get your bearings and figure things out. I lived in Germany for two years, but that was a life time ago (like 15 years ago). So I am a bit rusty on speaking German, and German customs, and such. Luckily that mostly all came back easily.

3. Talk to me.

Divided
A house divided… will make a good restaurant.

Talk with your contacts before leaving home. Or email them. Let them know exactly what you want to do, what you want to research, where you are going to look, etc. They can save you lots of time. I had one contact at the University of Freiburg, Professor Ulricht Herbert. I met with him twice, and he gave me sound advice. I should have emailed him more often before hand, but nothing really beats face to face contact anyway. My one contact here has turned into two or three. He also helped me realize I am trying to do too much in my dissertation. As it stands, its really a life’s work project. Going through the sources helped me understand that too. There is just way too much for me to be able to grasp it in two years time (my goal). Instead, I’m going to scale back and only cover one tunnel project, and cover that in depth. The reason there is no all encompassing history about the underground projects from World War II is because it was a huge project. Basically the whole of the German economy was turned to focus on these projects towards the end of the War. There is just too much to understand, too many documents to go through, and too much to grasp before this history can be written. That’s why nobody has done it, yet. It would take lots of financing and lots of time. Dr. Herbert suggested four years of work, but only after I had perfect understanding of German, have read all that has been written on the subject so far, and had an intimate grasp of Germany in World War II. That ain’t gonna happen in two years when I have a full-time job, a family, and no financial support. Perhaps that will be my ongoing project as a professor…


4. I’ll make a note of that…

Schemmer
Hotel Schemmer. Home away from home.

Figure out a good note taking routine. I have several hundred documents digitized from another archive already, and figured out a good naming scheme for them. I have a spread sheet for taking notes on each file, and for later import into Omeka for an online archive. This time around was a little different. The Bundesarchiv-MilitƤrarchiv in Freiburg had lots of documents for me to go through. Whereas before it was one collection/folder in one archive, I now had many collections/folders in one archive. So I had to figure out something a little different. I also didn’t have enough money to make digital copies of any of the records I found. It turned out that I didn’t need to make any, but that should be budgeted and planned for as well. There were a handful of documents that I wanted copies of, so I just transcribed them into a word processing document. I thought about making them plain text documents, but ran into a few formatting issues. I chose to make them LibreOffice (OpenOffice) Text documents, because there will always be a program that can open those, and that program is free. Of course, any program nowadays can open Microsoft Word documents, too, and there is no fancy formatting, so that would work fine too. One of my greatest struggles so far is keeping the documents in place chronologically. So my naming scheme for the files takes care of that. Start the name of the file with the year, then month number, then day number (YYYY-MM-DD), and the documents sort themselves! The file viewer (File Explorer for Windows or Finder for Macs) will usually sort by alphabet, so there’s nothing to it. Another thing I did was to go through the documents as quickly as I could. If It looked like it was helpful, I jotted notes about it, or quickly transcribed it. I will be able to go through the notes and transcriptions later to make sense out of them. That leads into the next point.

5. Plan it right.

Trolly
Trolly going through the tunnel.

Leave a day on either end for miscellaneous things. I unintentionally had a whole day with nothing to do. I was finished with the archives on Wednesday, and didn’t need to leave until Friday. That left me with the whole day on Thursday to tie things up and get ready to leave. I did some laundry, packed my bags and wrote this. It’s also a good time to go through the notes to make sure you don’t forget anything.

6. Enjoy!

The final tip is to just enjoy the time. If you’re in a foreign country, take a day to go see the sights. I had a weekend where the archive was not even open, so I spent the day walking around the awesome Altstadt (the oldest part of town, buildings from the 1400’s!). If you have funding for your trip, just think, who else gets paid to go look at old documents. Man, history is great! šŸ™‚

If at first you don’t succeed

…copy somebody’s code. Or at least your own from the past that works.

I finally got the map to work for my Exhibit exhibit. See.


First I copied the tutorial here. When that was working, I carefully copied it to the file I wanted it to be in and… nothing. Still broken.

So next I commented out all extraneous stuff, and finally got it to work. Now came the fun part of tracking down what code was making my awesome map look like nothing. I narrowed it down to something within the <header> tag. So line by line I uncommented and tested until I tracked the issue down to the bootstrap.css file I was using.

Then came the same process within the bootstrap.css file. It was easily 1000 lines long, so a line by line process wasn’t going to work. Instead I commented out the first have of the file. Bing, the map displayed, so it was somewhere within that first 500 lines. Then I commented out the first 250 lines. Bing again. I kept dividing the culprits in half until I narrowed it down to styles for the img tag. Commented those out and I was in business.

Through that grueling process I lost the images of the documents on the first page. Now I have to figure out how to get those back, apply some styling and we’re all set.

Unfortunately I wasn’t ever able to get it to pull in the data from a spreadsheet, so the JSON file will have to do. The process for making a JSON file from a spreadsheet is simple:

1. Make the spreadsheet file so that the headers are encapsulated with curly braces ‘{ }’

2. If you’re using Google spreadsheets, export it as an Excel file. You’ll have to open it in Excel and save it as an older file format, because the next step doesn’t like .xlsx.

3. Next, use Similie’s Babel tool to convert the spreadsheet to JSON.

4. Select “Excel” as the “from format” and “Exhibit JSON” as the “to format” and then browse to find the xls file you just made.

5. Click the “Upload and Convert” button.

6. The next screen is all of your spreadsheet data output into a nice JSON format.

7. Now you can use this JSON file for any number of things. But it’s especially nice to use it in an Exhibit to display your data.

This is cross posted at the class blog http://www.fredgibbs.net/clio3workspace/blog/if-at-first-you-dont-succeed/

When your OS updates break your CAM

As I’m sure many people have run into this before, and from personal experience, found nothing roaming the Interwebs on how to fix it, and seeings how I just fixed it, I’ll write up a little how to fix it post.


The set up:

Two SunFire X2100 M2 servers connected to a StorageTek 2530 via iscsi. The two nodes are running CentOS 6.2 with RedHat cluster software. I have a server running Nagios for monitoring and it checks for failed disks on the StorageTek by running a script on either node that returns the number of “optimal” and “failed” disks.


Two nodes connected to an array via iscsi (Ethernet)

The problem:

Updating system software is important. Keeping packages up to date protects from security vulnerabilities. Unfortunately, sometimes it breaks things. In this case, updating the suggested packages broke my set up, making it so that the Sun Storage CAM (Common Array Manager) software did not work anymore.

I first became alerted to this when Nagios sent me errors from the script checking the StorageTek disks. I checked the command that runs in the script to see what was up, and it returned several errors. Here they are for future googlers:

sscs list -i 192.168.128.101 device

returned “Command failed due to an exception. null” and

sscs list -a arrayname host

returned “arrayname : The resource was not found.”

Not particularly helpful messages.

Fortunately the nodes could still mount the array partitions, which allowed them to continue running as web and mysql servers. I just couldn’t run management commands on the array.

Since some of the required software for CAM was updated, I supposed that was causing the issue. The required software is listed below:

  • libXtst-1.0.99.2-3.el6.i686.rpm and its dependent rpm (InstallShield requirement)
  • libselinux-2.0.94-2.el6.i686.rpm
  • audit-libs-2.0.4-1.el6.i686.rpm
  • cracklib-2.8.16-2.el6.i686.rpm
  • db4-4.7.25-16.el6.i686.rpm
  • pam-1.1.1-4.el6.i686.rpm
  • libstdc++-4.4.4-13.el6.i686.rpm
  • zlib-1.2.3-25.el6.i686.rpm
  • ksh-20100621-2.el6.x86_64.rpm


The solution:

I couldn’t figure out on my own exactly what was wrong, so I contacted Oracle support, and they finally tipped me off to the solution. Completely remove the CAM software and reinstall it. Those steps are outlined below:

  • Go to the CAM software folder in /var/opt/CommonArrayManager/Host_Software_6.9.0.16/bin/and run
./uninstall -f
  • Here is a good spot to run yum update and restart the server if needed.
  • Change directories to where you have the CAM software install CD. There should be a folder called components in there. Change into that directory and install the jdk available there:
rpm -Uvh jdk-6u20-linux-i586.rpm
  • Next run the RunMe.bin file in the CAM Software CD folder.
./RunMe.bin -c
  • Install the RAID Proxy Agent package located in the Add_On/RaidArrayProxy directory of the latest CAM software distribution.
rpm -ivh SMruntime.xx.xx.xx.xx-xxxx.rpm
rpm -ivh SMagent-LINUX-xx.xx.xx.xx-xxxx.rpm
  • Register the array with the host/node. This process can take several minutes.
sscs register -d storage-system

One additional issue I ran into, was that some update or other process shutdown the NIC connecting the node to the array. I had to make sure that was running before I ran the register -d storage-system command above.

Making Multiple MySQL Instances on One Server

I’m trying this new idea for backing up our production MySQL servers. I have a backup server that basically runs rdiff-backup in the morning across several servers, but then does nothing for the rest of the day. It’s a pretty decent machine, so I’d like to utilize some resources. Replicating a MySQL server is a good way to ensure High Availability in case of a failure. The backup server acts as a slave to the master (production) server. Basically, the slave is an exact copy of the master. They are two separate instances of MySQL server running on two physical servers. Whatever queries run on the master are sent to the slave so it can do the same. This way they are kept completely in sync. You could also have the slave take over for the master, should the master server happen to fail.

The slave is an ever updating duplicate of the master.

The only problem I face with this set up, though, is that I have multiple production servers out there. So this only works if this backup server could be a slave for multiple machines.

No slave can serve two masters.

This is not possible, though, because, of course, no slave can serve two masters. Fortunately, a server can have multiple instances of MySQL running on it! So, in a sense, we have a server with multiple MySQL instances, to which a master can replicate. More about that set up in an upcoming post.

The slave has multiple instances of MySQL running.

A how to on this blog, shows how this can be done. I’ll replicate the process below.

STEPS TO MULTIPLE MYSQL MADNESS

On the slave server

Step 1. Install MySQL

We’ll be working with CentOS 5.8, but this could really apply for any OS. First we’ll need to install MySQL like normal.

yum install mysql mysql-server

There are plenty of good tutorials out there on how to install the specific version of MySQL you want on the specific OS you’re running.

Step 2. Set up the data area.

You’ll need to have a different folder for each of the MySQL instances, say /dbases/master-a/, /dbases/master-b/, and /dbases/master-c/.

mkdir -p /dbases/{master-a,master-b,master-c}

Step 3. Copy the default my.cnf file

This is the default MySQL config file, it may be named differently on other OSes.

cp /etc/my.cnf /etc/master-a.cnf; cp /etc/my.cnf /etc/master-b.cnf; cp /etc/my.cnf /etc/master-c.cnf

Step 4. Edit the new MySQL config files.

For each new config file, you’ll need to specify some unique variables.

[mysqld]
port=3307
datadir=/dbases/master-a
socket=/dbases/master-a/mysql.sock
user=mysql
server_id=3307
log-bin=/dbases/master/mysql-bin.log

# Disabling symbolic-links is recommended to prevent assorted security risks;
# to do so, uncomment this line:
symbolic-links=0

[mysqld_safe]
log-error=/dbases/master-a/mysqld.log
pid-file=/dbases/master-a/mysqld.pid

The port option sets this MySQL instance on a different port than the default 3306. The datadir, socket, log-bin, log-error, and pid-file options make sure the necessary files are not using the default files.

Step 5. Create new init scripts.

The init script allows the server to start and stop the service at boot time, and allows for easy start up and shutdown (on CentOS/RedHat, at least – with an easy service mysqld start).

cp /etc/init.d/mysqld /etc/init.d/mysqld-master-a

Just do one for now. We’ll copy the new one to create the others, then just do a quick search and replace in those files to change the master-a to master-b and master-c.

Step 6. Edit the init script

#!/bin/bash
#
# mysqld        This shell script takes care of starting and stopping
#               the MySQL subsystem (mysqld).
#
# chkconfig: - 64 36
# description:  MySQL database server.
# processname: mysqld
# config: /etc/master-a.cnf
# pidfile: /dbases/master-a/mysqld.pid

# Source function library.
. /etc/rc.d/init.d/functions

# Source networking configuration.
. /etc/sysconfig/network

prog="MySQL"

# extract value of a MySQL option from config files
# Usage: get_mysql_option SECTION VARNAME DEFAULT
# result is returned in $result
# We use my_print_defaults which prints all options from multiple files,
# with the more specific ones later; hence take the last match.
get_mysql_option(){
        result=/usr/bin/my_print_defaults "$1" | sed -n "s/^--$2=//p" | tail -n 1
        if [ -z "$result" ]; then
            # not found, use default
            result="$3"
        fi
}

get_mysql_option mysqld datadir "/dbases/master-a"
datadir="/dbases/master-a"
get_mysql_option mysqld socket "/dbases/master-a/mysql.sock"
socketfile="/dbases/master-a/mysql.sock"
get_mysql_option mysqld_safe log-error "/dbases/master-a/mysqld.log"
errlogfile="/dbases/master-a/mysqld.log"
get_mysql_option mysqld_safe pid-file "/dbases/master-a/mysqld.pid"
mypidfile="/dbases/master-a/mysqld.pid"

defaultfile="/etc/master-a.cnf"

start(){
        touch "$errlogfile"
        chown mysql:mysql "$errlogfile"
        chmod 0640 "$errlogfile"
        [ -x /sbin/restorecon ] && /sbin/restorecon "$errlogfile"
        if [ ! -d "$datadir/mysql" ] ; then
            action $"Initializing MySQL database: " /usr/bin/mysql_install_db --datadir="$datadir" --user=mysql
            ret=$?
            chown -R mysql:mysql "$datadir"
            if [ $ret -ne 0 ] ; then
                return $ret
            fi
        fi
        chown mysql:mysql "$datadir"
        chmod 0755 "$datadir"
        # Pass all the options determined above, to ensure consistent behavior.
        # In many cases mysqld_safe would arrive at the same conclusions anyway
        # but we need to be sure.
        /usr/bin/mysqld_safe  --defaults-file="$defaultfile" --datadir="$datadir" --socket="$socketfile" \
                --log-error="$errlogfile" --pid-file="$mypidfile" \
                --user=mysql >/dev/null 2>&1 &
        ret=$?
        # Spin for a maximum of N seconds waiting for the server to come up.
        # Rather than assuming we know a valid username, accept an "access
        # denied" response as meaning the server is functioning.        
        if [ $ret -eq 0 ]; then
      Ā      STARTTIMEOUT=30
            while [ $STARTTIMEOUT -gt 0 ]; do
Ā                RESPONSE=/usr/bin/mysqladmin --socket="$socketfile" --user=UNKNOWN_MYSQL_USER ping 2>&1 && break
                echo "$RESPONSE" | grep -q "Access denied for user" && break
                sleep 1
                let STARTTIMEOUT=${STARTTIMEOUT}-1
            done
            if [ $STARTTIMEOUT -eq 0 ]; then
                    echo "Timeout error occurred trying to start MySQL Daemon."
                    action $"Starting $prog: " /bin/false
                    ret=1
            else
                    action $"Starting $prog: " /bin/true
            fi
        else
            action $"Starting $prog: " /bin/false
        fi
        [ $ret -eq 0 ] && touch /dbases/master-a/mysqld
        return $ret
}

stop(){ 
        MYSQLPID=cat "$mypidfile"  2>/dev/null 
        if [ -n "$MYSQLPID" ]; then
            /bin/kill "$MYSQLPID" >/dev/null 2>&1
            ret=$?
            if [ $ret -eq 0 ]; then
                STOPTIMEOUT=60
                while [ $STOPTIMEOUT -gt 0 ]; do
                    /bin/kill -0 "$MYSQLPID" >/dev/null 2>&1 || break
                    sleep 1
                    let STOPTIMEOUT=${STOPTIMEOUT}-1
                done
                if [ $STOPTIMEOUT -eq 0 ]; then
                    echo "Timeout error occurred trying to stop MySQL Daemon."
                    ret=1
                    action $"Stopping $prog: " /bin/false
                else
                    rm -f /dbases/master-a/mysqld
                    rm -f "$socketfile"
                    action $"Stopping $prog: " /bin/true
                fi
            else
                action $"Stopping $prog: " /bin/false
            fi
        else
            ret=1
            action $"Stopping $prog: " /bin/false
        fi
        return $ret
}

restart(){
    stop
    start
}

condrestart(){
    [ -e /dbases/master-a/mysqld ] && restart || :
}

# See how we were called.
case "$1" in
  start)
    start
    ;;
  stop)
    stop
    ;;
  status)
    status mysqld
    ;;
  restart)
    restart
    ;;
  condrestart)
    condrestart
    ;;
  *)
    echo $"Usage: $0 {start|stop|status|condrestart|restart}"
    exit 1
esac

exit $?

Step 7. Start each MySQL instance.

Now you can start each instance with the handy service command.

service mysqld-master-a start

Step 8. Connect to MySQL instances.

Now, to connect to each MySQL instance, you’ll need to specify the port and/or socket file.

mysql -P3307 --socket="/dbases/mysql-master-a/mysql.sock"