Filling in the missing dates with AWStats

Doh!

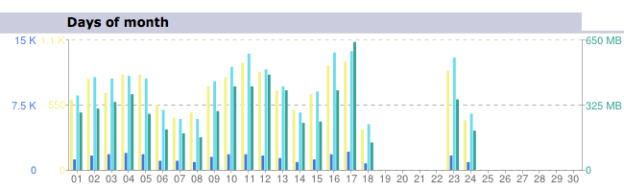
Sometimes AWStats will miss some days in calculating stats for your site, and that leaves a big hole in your records. Usually, as in my case, it’s because I messed up. I reinstalled some software on our AWStats machine, and forgot to reinstall cron. Cron is the absolutely necessary tool for getting the server to run things on a timed schedule. I didn’t notice this until several days later, leading to a large gap in the stats for April.

What to do?

Fortunately, there is a fix. Unfortunately, it’s a bit labor intensive, and depends on how you rotate your apache logs (if at all, which you should). The AWStats Documentation (see FAQ-COM350 and FAQ-COM360) has some basic steps to fix the issue, outlined below:

  1. Move the AWStats data files for months newer to a temporary directory.
  2. Copy the Apache logs with all of the stats for the month with the missing days to a temporary directory.
  3. Run the AWStats update tool, using AWStat’s logresolvemerge tool and other changed paramaters, to re-create the AWStats data file for that month
  4. Replace the AWStats data files for the following months (undo step 1).

The Devil’s in the Details

Again, depending on how you have Apache logs set up, this can be an intensive process. Here’s how I have Apache set up, and the process I went through to get the missing days back into AWStats.

We have our Apache logs rotate each day for each domain on the server (or sub-directory that is calculated separately). This means I’ll have to do this process about 140 times. Looks like I need to write a script…

Step 1. Move the data files of newer months

AWStats can’t run the update on older months if there are more recent months located in the data directory. So we’ll need to move the more recent month’s stats to a temporary location out of the way. So, if the missing dates are in June, and it is currently August, you’ll need to remove the data files for June, July, and August (they look like this awstatsMMYYYY.domain-name.com.txt where MM is the two digit month and YYYY is the four digit year) to a temporary directory so they are out of the way.

Step 2. Get the Apache logs for the month.

First step is to get all of the logs for each domain for the month. This will work out to about 30 or 31 files (if the month is already past), or however many days have past in the current month. For me, each domain archives the days logs in the following format domain.name.com-access_log-X.gz and domain.name.com-error_log-X.gz where the X is a sequential number. So the first problem is how to get the correct file name without having to look in each file to see if it has the right day? Fortunately for me, nothing touches these files after they are created, so their mtime (the time stamp of when they were last modified) is intact and usable. Now, a quick one-liner to grab all of the files within a certain date range and put their content in a new file.

We’ll use the find command to find the correct files. Before we construct that command, we’ll need to create a couple of files to use for our start and end dates.

touch --date YYYY-MM-DD /tmp/start
touch --date YYYY-MM-DD /tmp/end

Now we can use those files in the actual find command. You may need to create the /tmp/apachelogs/ directory first.

find /path/to/apache/logs/archive/ -name "domain-name.com-*" -newer /tmp/start -not -newer /tmp/end -exec cp '{}' /tmp/apachelogs/ \;

Now unzip those files so they are usable. Move into the /tmp/apachelogs/ directory, and run the gunzip command.

gunzip *log*

If you are doing the current month, then copy in the current apache log for that domain.

cp /path/to/apache/logs/current/domain-name.com* /tmp/apachelogs/

This puts all of the domains log files for the month into a directory that we can use in the AWStats update command

Things to note: You need to make sure that each of the log files you have just copied use the same format. You also need to make sure they only contain data for one month. You can edit the files by hand or throw some fancy sed commands at the files to remove any extraneous data.

Step 3. Run the AWStats logresolvemerge and update tool

Now comes the fun part. We first run the logresolvemerge tool on the log files we created in the previous step to create one single log file for the whole month. While in the <code>/tmp/apachelogs/</code> directory, run:

perl /path/to/logresolvemerger.pl *log* > domain-name.com-YYYY-MM-log

Now, we need to run the AWStats update tool with a few parameters to account for the location of the new log file.

perl /path/to/awstats.pl -update -configdir="/path/to/awstats/configs" -config="domain-name.com" -LogFile="/tmp/apachelogs/domain-name.com-YYYY-MM-log"

Step 4. Move back any remaining files

If you moved any of the AWStats data files (awstatsMMYYYY.domain-name.com.txt like for July and August in our example) now’s the time to move them back where they go.


Yeah, that fixed it!


Phew! The missing dates are back!


Multiple PHP Instances With One Apache


Long-winded Introduction

It took me a couple of days to figure this out due to lack of decent tutorials and not enough confidence in my Linux skills to build programs from source. I think I have the hang of it now, and write this up with the intent on providing another, or the only, tutorial on setting up CentOS 5 with multiple instances of PHP using one Apache install. That being said, there are a number of good tutorials out there, just none of them explicitly for CentOS and some leave out some details that n00bs like me get confused about.

PHP4 and PHP5 on SuSE 10.1 – This was by far the most helpful of the tutorials. Even though it was written for SuSE, it works almost straight across for CentOS.

There is also a great list of instructions in the comments on the php.net site under installing PHP for Apache 2.0 on Unix systems (see http://www.php.net/manual/en/install.unix.apache2.php#90478).

I found this one after I wrote up this tutorial at http://cuadradevelopment.com. It’s a bit different, but should work as well.

There are basically two different ways I could have done this. 1- run a single instance of Apache, and run one instance of PHP as a module, and other installs as CGI. 2- run several instances of Apache, each with it’s own instance of PHP as a module. I chose to do the first method for no particular reason. Dreamhost has a post about the good and bad with running PHP as CGI.

So basically, the steps are: 1. Set up Apache and have PHP install as a module. 2. Configure and make another instance of PHP to run as CGI. 3. Add a virtual host to Apache running under a different port to access the PHP as CGI.
Continue reading Multiple PHP Instances With One Apache

Converting WordPress to static html

UPDATE: Check out the new post on a better way to do this here: Convert WP to Static HTML Part 2. Or see the page devoted to the script here: Make WordPress Static.

Usually people are wanting to convert their static html pages to some dynamic content management system. I’ve run into the issue of needing to go the other way.

A few professors at GMU love to use WordPress for their classes. It’s a really great way to get more student participation and involve some of those who aren’t so talkative in class.

But these blogs are usually only needed for one semester, and then just sit there. This can be a security risk if they are not kept up to date, and is cumbersome when trying to update many of them (one professor had over 30 blogs!).

Sometimes the content should still be viewable, but the need for a whole cms type back-end no longer exists. Sometimes the professor would just like a copy of the pages for their own future research or whatever.

So, I figured out a way to convert a dynamic WordPress site into static html pages.

Here are the basic steps I used:

  1. Change the permalink structure in the WordPress admin section. Alternatively, directly in the database change wp_options.permalink_structure.option_value to “/%postname%.html”.
    [code lang=”SQL”]
    UPDATE `database`.`prefix_options` SET `option_value` = ‘/%year%/%monthnum%/%day%/%postname%/’ WHERE `prefix_options`.`option_name` = ‘permalink_structure’ LIMIT 1 ;
    [/code] 

    UPDATE (2.12.08): Reading a post from Christopher Price (who linked to this post) about WP permalinks, I’m thinking using this structure (/archives/%post_id%.html) might afford the best results. I often found a page that displayed the raw HTML instead of being rendered. This just might fix that issue.

    UPDATE (3.11.08): I did some more dynamic to static conversions today, and found out the best permalink structure to use is just the post name. No extra categories and such. So the best structure to use would be this (/%postname%.html). The benefit is that the every page is unique with a descriptive name for the url (albeit sometime very long), and there are not as many subdirectory issues that arise.

    UPDATE (7.17.09): This time around, I have found that the following seems to work best for permalink: /%year%/%monthnum%/%day%/%postname%/ And cleaned up the SQL statement.

  2. Add the .htaccess to /path/to/wp/ if not already there (where /path/to/wp/ is from http://somedomain.com/path/to/wp/ ). If there already is a .htaccess file and it is set to have permalinks, then you can probably leave it as it is.
    RewriteEngine On
    RewriteBase /path/to/wp/
    RewriteCond %{REQUEST_FILENAME} !-f
    RewriteCond %{REQUEST_FILENAME} !-d
    RewriteRule . /path/to/wp/index.php [L]
  3. Use wget to copy all of the files as static html files.
    [code lang=”bash”]wget –mirror –wait=2 -P blogname-static -nH -np -p -k -E –cut-dirs=3 http://sitename.com/path/to/blog/[/code]
    *** Change –cut-dirs to the appropriate number associated with how many directories are after the domain name. The trailing slash plays a part too. ****
    UPDATE (03.11.08): I found that the –cut-dirs doesn’t really do anything this time around.
    UPDATE (7.17.09): This time around, I find the following to work best, even the –cut-dirs. 

    wget --mirror -P wpsite-static --cut-dirs=3 -nH -p -k -E https://site.com/path/to/wp/

    This has the bonus of making the directory for you, thus negating the make directory step. Make sure to use two dashes and not an em dash.

  4. Copy the contents of wp-content to save uploaded files, themes, etc. This way copies a lot of unnecessary php files, which could be potentially dangerous, but is really easy if you’re just converting to archive. To remove the security threat, just pick and choose the files you need.
    [code lang=”bash”]cp -r /path/to/wp/wp-content/* /path/to/static/wp-content/[/code]
  5. Sometimes the files are created with folders in the archives folder. To fix this run the following three commands in the archive folder to fix that up. To get rid of the feed file in all of the directories:
    [code]rm -f */feed [/code]
    To delete all of the now empty direcotries:
    [code]find . -type d -exec rmdir ‘{}’ \;[/code]
    To rename the files ###.1 to ###
    [code]rename .1 ” `find . -type f -name “*.1″`[/code] That’s two single quotes after the first ‘.1’
  6. UPDATE (03.11.08): I have found that the old ‘rename‘ command [rename .1 ” *.1]only works on the current directory. If you want to do a recursive renaming you have to use the ‘find‘ command. The above code has changed to reflect this.
    UPDATE (7.14.09): When the rename with find doesn’t work, it’s probably because the post has comments, so there is a folder with the same name as the post’s filename. In this case, just move the file (with the .1 extension) into the folder of the same name, but change the name of the file to index.html

  7. move to wp folder. make a backup of database: [code lang=”bash”]mysqldump -u [userfromwp-config.php] -p –opt databasename > databasename.sql[/code]
    UPDATE (03.11.08): I found I needed to backup just a few tables from a database that contained many copies of wordpress. To do this more easily, I used a little script I wrote earlier to dump tables with a common prefix. This could also work if you just put in the full name of only the tables you wanted to backup.
  8. move one directory above wp install. make tar backup of old wordpress folder: [code lang=”bash”]tar -cf wordpress.tar wordpress/[/code]
  9. rename the old wordpress folder [code]mv wordpress wordpress-old[/code]
  10. move the static copy into place [code]mv static/wordpress/ wordpress/[/code]
  11. test out the site. If it’s totally broke, just delete the wordpress directory and restore the original from the tar file.
  12. remove the tar file and wordpress-old directory as needed.

Tabledump

I had the need once again to dump only certain tables from a database, instead of all 100+ tables. This was where I had a database with about 5-8 wordpress installs. I wanted to backup all of the tables for only one install. There is a way with mysqldump to do this, by listing out all of the tables you want to dump. So I just wrote a bash script to take care of making the list of tables to dump.

It has an array of database table names (without the common prefix) in the script. Then it prompts for the mysql user, database, and prefix. It could be changed to prompt for a file that contains a list or array of table names.

Anyhow, here it is for anyone’s use:

[code lang=”Bash”]
#!/bin/bash

#—————————————–#
# Ammon Shepherd #
# 09.05.07 #
# Dump a database with only the tables #
# containing the prefix given. #
#—————————————–#

echo “This will dump just the tables with the specified prefix from the specified database.”

echo -n “Enter the database name: ”
read dbase

echo -n “Enter the table prefix: ”
read prefix

echo -n “The mysql user: ”
read sqluser
echo -n “The mysql pass: ”
read -s sqlpass

# Get list of tables with the desired prefix
list=( $(mysql -u$sqluser -p$sqlpass $dbase –raw –silent –silent –execute=”SHOW TABLES;”) )

for tablename in ${list[@]}
do
if [[ “$tablename” =~ $prefix ]]; then
tablelist+=”$tablename ”
fi
done

`mysqldump -u$sqluser -p$sqlpass –opt $dbase $tablelist > $dbase.$prefix.bak.sql`

echo

exit 0

[/code]