When your OS updates break your CAM

As I’m sure many people have run into this before, and from personal experience, found nothing roaming the Interwebs on how to fix it, and seeings how I just fixed it, I’ll write up a little how to fix it post.


The set up:

Two SunFire X2100 M2 servers connected to a StorageTek 2530 via iscsi. The two nodes are running CentOS 6.2 with RedHat cluster software. I have a server running Nagios for monitoring and it checks for failed disks on the StorageTek by running a script on either node that returns the number of “optimal” and “failed” disks.


Two nodes connected to an array via iscsi (Ethernet)

The problem:

Updating system software is important. Keeping packages up to date protects from security vulnerabilities. Unfortunately, sometimes it breaks things. In this case, updating the suggested packages broke my set up, making it so that the Sun Storage CAM (Common Array Manager) software did not work anymore.

I first became alerted to this when Nagios sent me errors from the script checking the StorageTek disks. I checked the command that runs in the script to see what was up, and it returned several errors. Here they are for future googlers:

sscs list -i 192.168.128.101 device

returned “Command failed due to an exception. null” and

sscs list -a arrayname host

returned “arrayname : The resource was not found.”

Not particularly helpful messages.

Fortunately the nodes could still mount the array partitions, which allowed them to continue running as web and mysql servers. I just couldn’t run management commands on the array.

Since some of the required software for CAM was updated, I supposed that was causing the issue. The required software is listed below:

  • libXtst-1.0.99.2-3.el6.i686.rpm and its dependent rpm (InstallShield requirement)
  • libselinux-2.0.94-2.el6.i686.rpm
  • audit-libs-2.0.4-1.el6.i686.rpm
  • cracklib-2.8.16-2.el6.i686.rpm
  • db4-4.7.25-16.el6.i686.rpm
  • pam-1.1.1-4.el6.i686.rpm
  • libstdc++-4.4.4-13.el6.i686.rpm
  • zlib-1.2.3-25.el6.i686.rpm
  • ksh-20100621-2.el6.x86_64.rpm


The solution:

I couldn’t figure out on my own exactly what was wrong, so I contacted Oracle support, and they finally tipped me off to the solution. Completely remove the CAM software and reinstall it. Those steps are outlined below:

  • Go to the CAM software folder in /var/opt/CommonArrayManager/Host_Software_6.9.0.16/bin/and run
./uninstall -f
  • Here is a good spot to run yum update and restart the server if needed.
  • Change directories to where you have the CAM software install CD. There should be a folder called components in there. Change into that directory and install the jdk available there:
rpm -Uvh jdk-6u20-linux-i586.rpm
  • Next run the RunMe.bin file in the CAM Software CD folder.
./RunMe.bin -c
  • Install the RAID Proxy Agent package located in the Add_On/RaidArrayProxy directory of the latest CAM software distribution.
rpm -ivh SMruntime.xx.xx.xx.xx-xxxx.rpm
rpm -ivh SMagent-LINUX-xx.xx.xx.xx-xxxx.rpm
  • Register the array with the host/node. This process can take several minutes.
sscs register -d storage-system

One additional issue I ran into, was that some update or other process shutdown the NIC connecting the node to the array. I had to make sure that was running before I ran the register -d storage-system command above.

Backing up MySQL with Replication and Incremental Files – Part 1

I’m trying this new idea for backing up our production MySQL servers. I have a backup server that basically runs rdiff-backup in the morning across several servers, but then does nothing for the rest of the day. It’s a pretty decent machine, so I’d like to utilize some resources. Databases are a tough cookie to backup. You can’t just copy the data files and then expect to copy them back over and have them just work. Especially if your databases have a mixture of InnoDB and MyISAM tables. In order to do a clean and accurate database backup, you need to stop the MySQL server, then copy the files, then restart MySQL.

If you have a live production MySQL server, stopping it to make a backup is not really an option. Fortunately there are a few options. Before you decide on which option to choose, here is a list of things to keep in mind when choosing a backup solution (from the MySQL gurus at Percona):

WHAT TO LOOK FOR

http://www.mysqlperformanceblog.com/2009/03/03/10-things-you-need-to-know-about-backup-solutions-for-mysql/

  1. Does the backup require shutting down MySQL? If not, what is the impact on the running server? Blocking, I/O load, cache pollution, etc?
  2. What technique is used for the backup? Is it mysqldump or a custom product that does something similar? Is it a filesystem copy?
  3. Does the backup system understand that you cannot back up InnoDB by simply copying its files?
  4. Does the backup use FLUSH TABLES, LOCK TABLES, or FLUSH TABLES WITH READ LOCK? These all interrupt processing.
  5. What other effects are there on MySQL? I’ve seen systems that do a RESET MASTER, which immediately breaks replication. Are there any FLUSH commands at all, like FLUSH LOGS?
  6. How does the system guarantee that you can perform point-in-time recovery?
  7. How does the system guarantee consistency with the binary log, InnoDB logs, and replication?
  8. Can you use the system to set up new MySQL replication slaves? How?
  9. Does the system verify that the backup is restorable, e.g. does it run InnoDB recovery before declaring success?
  10. Does anyone stand behind it with support, and guarantee working, recoverable backups? How strong is the legal guarantee of this and how much insurance do they have?


BACKUP PROGRAMS

There are a few MySQL backup products out there as well. I have used the first two on this list.

  • AutoMySQLBackup script (handy for making a rotating incremental backup of your MySQL databases).
  • Percona XtraBackup (nice way to ensure InnoDB and MyISAM tables are backed up properly, also does it incrementally)
  • Zmanda (seems to be similar to Percona’s set up)

There’s probably a gazillion more out there. Google’s your friend in finding things you need.

HOW TO DO IT

How to get a copy of the master to the slave?

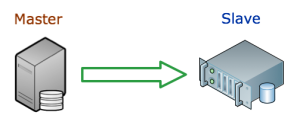
There are several options. You could use a script above, or create a slave of the database (basically an exact copy of the production MySQL server – all changes that occur in the master are sent to the slave), or some combination. I’ll use a combination. I’ll replicate the production server onto the backup server, then run the incremental backups from there. This first part will walk through the process of setting up MySQL replication.

To give proper credit, here are several other how to’s I found helpful.

On the master server

Step 1. Edit the my.cnf file to include at least the following (if needed) lines. Note: you will have to restart MySQL for these changes to take affect.

[mysqld]
server_id=1
innodb_flush_log_at_trx_commit=1
log_bin=mysql-bin.log
sync_binlog=1

Step 2. Make a MySQL user for the slave to use.

In a MySQL session on the terminal, type in the command:

GRANT REPLICATION SLAVE ON *.* TO 'rep_user'@'localhost' IDENTIFIED BY 'passwordhere';

Step 3. Open a terminal session and log in to a MySQL prompt. Type the following command and hit enter.

FLUSH TABLES WITH READ LOCK

Note: This will lock your database so that no changes can be made from any web applications or other programs. This session should remain open, and the database locked for the next few steps.

Step 4. After the FLUSH TABLES command finishes, run the following command and press enter.

SHOW MASTER STATUS

Record the information under “File Name” and “Position”.

Step 5.  Make a copy of the database files.

5.1 LVM Snapshot:

In another terminal session, run the following command to make an LVM snapshot of the database.

lvcreate -L10G -s -n mysql-backup /dev/mapper/dbases

This creates a snapshot of the database files very quickly. We can use the snapshot later to copy the data to the backup server without interfering with the original database files.

After this command finishes, you can unlock the database as shown in the next step. Then you can mount the new LVM partition and copy the files to the backup server.

mkdir -p /mnt/mysql-backup
mount -o nouuid /dev/mapper/mysql-backup /mnt/mysql-backup
rsync -avz -e "ssh -c blowfish" /mnt/mysql-backup user@remote.host:/backup/location

5.2 RSYNC:

If you don’t have your database files on an LVM partition, you can just copy the files to the backup server now using rsync, scp or what have you. This will take significantly longer (depending on the size of your database), leaving the database in a locked state.

rsync -avz -e "ssh -c blowfish" /dbases/mysql user@remote.host:/backup/location

5.3 MySQL Dump:

You could also take a mysqldump of the database and copy that SQL file to the other server.

mysqldump -uuser -p --all-databases > mysql-backup.sql
scp mysql-backup.sql user@remote.host:/backup/location

Step 6. Once the lvcreate command has finished, you can unlock the database.

UNLOCK TABLES

Step 7. If you haven’t already, copy the copy of the database files to the backup server.

On the slave server

Step 1. Edit the my.cnf file to include at least the following (if needed) lines. Note: you will have to restart MySQL for these changes to take affect.

[mysqld]
server_id=2

Step 2. Start MySQL and run the following commands in a mysql session to start the MySQL slave.

CHANGE MASTER TO
MASTER_HOST = "master.server.com",
MASTER_USER = "rep_user",
MASTER_PASSWORD = "passwordhere",
MASTER_LOG_FILE = "mysql-bin.log",
MASTER_LOG_POS = 2341234;

The MASTER_HOST is the domain name or IP address of the master server. MASTER_USER, MASTER_PASSWORD were created on the master server in Step 2. MASTER_LOG_FILE and MASTER_LOG_POS were gathered in Step 4.Then, finally, to start the slave, issue the following command in mysql.

START SLAVE;