/**
 * Loop.
 *
 * Shows how to load and play a QuickTime movie file.
 *
 */

import processing.video.*;

Movie movie;

void setup() {
  size(560, 406);
  background(0);
  // Load and play the video in a loop
  movie = new Movie(this, "tac.mov");
  movie.loop();
}


void draw() {
  image(movie, 0, 0, width, height);

  if (mousePressed == true) {
    movie.play();
    movie.read();
  } else {
    movie.stop();
    fill(0);
    rect(0, 0, width, height);
  }

}
Code language: Java (java)
There’s the code. It’s the basic default code to show a movie. But what if you want some event (mouse press, input from Arduino, etc) to control if and when the movie plays.
Not so intuitive, and hence this post.
The trick is to use the play() and read() methods in the if…else statement. In the code above. If the mouse button is pressed, then the movie will play from the beginning.
And if you want the video to disappear after the video is played, then after the movie stops, cover the draw window with a rectangle (filled with black, in this example).
]]>Well, this is no panacea for development, but it does a good job of setting up a basic environment pretty quickly.
You’re in for a special treat, because I’m going to show you not one (1), but two (2) different development environments; one for PHP, MySQL, Apache and phpMyAdmin, and one for Python (Flask) and PostgreSQL with pgAdmin. Each of these in a Docker container for ease of use.
Pre-requisites
For any of this to work, make sure you have Docker Desktop installed and running.
We’ll be using a terminal application for running some commands, so you’ll need some familiarity with that too.
Git is used to copy the files from the GitHub repo, but you can also download them as a zip file.

PMAMP
We’ll tackle the PhpMyadmin Apache Mysql Php (PMAMP) environment first.
After setting this up, we’ll have a place to put PHP code, a running Apache web server, a MySQL server and a running instance of phpMyAdmin.
The quickest way to get this going is to download the files from this GitHub repo https://github.com/ammonshepherd/pmamp
git clone https://github.com/ammonshepherd/pmamp.git
Change into that directory.
cd pmamp
And start the Docker containers
docker-compose up -d
You can view the website at http://lvh.me. lvh.me is just a nice service that points back to your local machine (127.0.0.1 or localhost). It makes it look like you are using a real domain name.
You can view phpMyAdmin at http://pma.lvh.me.
You can even use a real domain name. Just edit the docker-compose.yml file. There is a line like this:
- "traefik.http.routers.php-apache.rule=Host('lvh.me', 'pmamp.lvh.me', 'example.com')"
Just add your domain to the list (or remove the other ones). Each entry must use the backtick, rather than the single quotes. WordPress mangles the backticks, so I am using single quotes here.
Now you just need to let your computer know to redirect all traffic to that domain name to itself.
You’ll need to edit the /etc/hosts file (Linux or Mac), or c:\windows\system32\drivers\etc\hosts (Windows). Now you can develop for any domain name right on your computer as if it were using the actual domain name.
Put all of your website files in the ‘www’ folder and you’re ready to develop!
Check the README at https://github.com/ammonshepherd/pmamp for more details on how it works and things to change.
To stop the services (turn off Apache, MySQL and phpAdmin) run
docker-compose down
in the same directory where the docker-compose.yml file lives.

pFp
The set up for Python (using a Flask app) and PostgreSQL is exactly the same process.
Grab the files from https://github.com/ammonshepherd/pfp.
git clone https://github.com/ammonshepherd/pfp.git
cd pfp
docker-compose up -d
You now have a running Flask app at http://lvh.me, or http://pfp.lvh.me and a running pgAdmin application at http://pga.lvh.me.
The same trick for custom domain names applies here too.
And also check out the README for more details: https://github.com/ammonshepherd/pfp
Follow the same commands above to shutdown the Python, PostgreSQL and pgAdmin containers.
]]>In playing with my Bash prompt, I used this site to generate the prompt: http://bashrcgenerator.com/
Another one that is great is here: http://ezprompt.net/
The prompt that is generated uses a command to clear the text color that I hadn’t seen before: tput sgr0
My prompt (which I put in the ~/.bash_profile file) is:
#PROMPT
# To enter an emoji, while in insert mode type Ctrl-v, then enter the UTF8 code
# for the emoji, ex. U26A1 (note, use capital letters), then type ESC key. You
# can get a list of UTF8 emoji codes here: http://graphemica.com/
export PS1="\[\033[38;5;39m\]\u\[$(tput sgr0)\]\[\033[38;5;15m\]@\[$(tput sgr0)\]\[\033[38;5;229m\]\h\[$(tput sgr0)\]\[\033[38;5;15m\] [\[$(tput sgr0)\]\[\033[38;5;76m\]\w\[$(tput sgr0)\]\[\033[38;5;15m\]]\n\[$(tput sgr0)\]\[\033[38;5;215m\]⚡\[$(tput sgr0)\] "
So, of course, I spent the next 40 minutes trying to figure out all I could about that command, and more specifically, what ‘sgr’ meant.
I first scoured Google search results. Mostly just information about tput. Then I took to the manual pages: man tput was helpful in learning about what tput does. That led to man terminfo and finally to man ncurses. None of those man pages define ‘sgr’, but ‘ncurses’ did give a better clue by stating that “The ncurses library can exploit the capabilities of terminals which implement the ISO-6429 SGR 39 and SGR 49 controls”
So a Google search of ‘ISO-6429 SGR 39’ turns up an old 1990’s ECMA standardization for “Control Functions and Coded Character Sets”, Standard ECMA-48, https://www.ecma-international.org/publications/files/ECMA-ST/Ecma-048.pdf
(More on ECMA history here: https://www.ecma-international.org/memento/history.htm) [sidenote: ECMA may sound familiar. ECMAScript. Wait isn’t that Javascript? See here: https://medium.freecodecamp.org/whats-the-difference-between-javascript-and-ecmascript-cba48c73a2b5]
And there we go! Page 75 of the PDF (page 61 internally numbered), section 8.3.117!
SGR – SELECT GRAPHIC RENDITION
And the 0 means = “default rendition (implementation-defined), cancels the effect of any preceding occurrence of SGR in the data stream regardless of the setting of the GRAPHIC RENDITION COMBINATION MODE (GRCM)”
To make things a little more readable, I made the color codes into variables:
#PROMPT
# To enter an emoji, while in insert mode type Ctrl-v, then enter the UTF8 code
# for the emoji, ex. U26A1 (note, use capital letters), then type ESC key. You
# can get a list of UTF8 emoji codes here: http://graphemica.com/
BLUE='\[\033[38;5;39m\]'
PALE_YELLOW='\[\033[38;5;229m\]'
RESET='\[$(tput sgr0)\]'
GREEN='\[\033[38;5;76m\]'
export PS1="${BLUE}\u${RESET}@${PALE_YELLOW}\h${RESET} [${GREEN}\w${RESET}]\n⚡${RESET} "
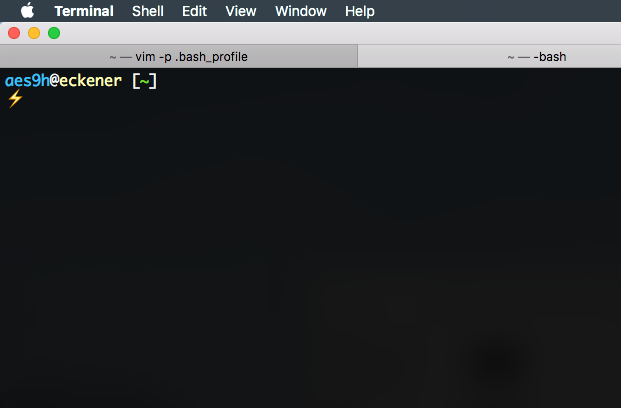
And there we go. Much too much time learning stuff! And my prompt looks like this:
And all of that to figure out what ‘sgr’ means.
]]>Requirements
- ssh access to your server
- wp-cli command installed (instructions for installing wp-cli at http://wp-cli.org/)
Install/Upgrade WP CLI
- wp-cli should be upgraded each time a WordPress installation is upgraded.
wp cli update
Upgrade WP
Prep work
Change into the WP directory
cd /path/to/wordpress/installation/
Make a list of active plugins
wp plugin list --status=active --format=csv --fields=name | tail -n +2 > ../active-plugins.txt
Update all plugins
wp plugin update --all
Deactivate all of the plugins
wp plugin deactivate --all
Upgrade WordPress
wp core update
Reactivate all of the previously active plugins.
cat ../active-plugins.txt | xargs wp plugin activate
Check the site in various browsers (make sure cache has been cleared).
]]>#!/bin/bash
if [ -e alldomains ]
then
rm alldomains
fi
alldomains=( $(find /etc/httpd/conf.vhosts/ -name *.conf) )
for domain in ${alldomains[*]}
do
cat $domain | egrep "ServerName|ServerAlias" | egrep -v "#" | sed -e 's|ServerName||' -e 's|ServerAlias||' -e 's|www.||' -e 's|:80||' | tr -s ' ' '\n' | tr -d ' ' | sed -e '/^\s*$/d' >> alldomains
done
sort alldomains | uniq | sort -o alldomains
This gets all of the domains from ServerName and ServerAlias lines, takes out all of the white space and empty lines, and creates a file with just a list of the unique domain names.
This accounts for subdomains that use ‘www’ or have port :80 on the end.
For instance, www.somedomain.com and somedomain.com are the same, so the script takes out the ‘www.’ which leaves to copies of somedomain.com, which it then deletes one of them in the final output to the file. The same for ‘:80’.
]]>
DENIED!
![]() So initially, this was quite confusing. All of a sudden people would have their IP blocked. I checked the different sites, and seemed to have no problem. Then when I logged in to the back end, BAM, blocked as well. We have Shorewall running, so doing:
So initially, this was quite confusing. All of a sudden people would have their IP blocked. I checked the different sites, and seemed to have no problem. Then when I logged in to the back end, BAM, blocked as well. We have Shorewall running, so doing:
shorewall show dynamic
Showed all of the IPs that Shorewall had blocked. This could also be done by using iptables
iptables -nL --line-numbers
Sure enough, my IP had been blocked. I unblocked my IP with:
shorewall allow ip.ad.dr.es
Or could also do
iptables -D INPUT 2
where INPUT is the position or section of the firewall chain, and “2” is the line number containing my IP address.
Then I checked with other web applications on that server. Where they also causing an issue? I logged in to an Omeka install. No problems.
FOUND IT!
![]() OK. I know OSSEC is to blame some how. It’s an awesome HIDS (Host Intrusion Detection Software) that actively responds to issues on the server based on scanning through the system logs and various rules.
OK. I know OSSEC is to blame some how. It’s an awesome HIDS (Host Intrusion Detection Software) that actively responds to issues on the server based on scanning through the system logs and various rules.
OSSEC keeps itself chroot’ed to /var/ossec/, so all of the ossec logs are located in /var/ossec/logs/.
I first looked in the /var/ossec/logs/active-responses.log. Sure enough, a couple of lines like this show my IP being completely blocked to the server.
Fri Jun 14 06:50:47 EDT 2013 /var/ossec/active-response/bin/host-deny.sh add - XXX.XX.XX.XX 1371207047.5913585 20101
Fri Jun 14 06:50:47 EDT 2013 /var/ossec/active-response/bin/firewall-drop.sh add - XXX.XX.XX.XX 1371207047.5913585 20101
So, there we are. OSSEC blocking the IP for some reason. Now why is it blocking the IP?
Taking a look in the /var/ossec/logs/alerts/alerts.log file to see why it thinks it needs to block the IP…
** Alert 1371206381.5698606: - ids,
2013 Jun 14 06:39:41 (server1) 127.0.0.1->/var/log/messages
Rule: 20101 (level 6) -> 'IDS event.'
Src IP: XXX.XX.XX.XX
Jun 14 06:39:40 server1 suhosin[18563]: ALERT - script tried to increase memory_limit to 268435456 bytes which is above the allowed value (attacker 'XXX.XX.XX.XX', file '/var/html/wp-admin/admin.php', line 109)
There were other lines in there with my IP, but nothing would/should have caused blocking, like a WordPress login event, or an SSH login event. Also, the error above is categorized as an IDS event with level 6, which by default OSSEC rules means it gets blocked.
HOW TO FIX IT!
As a quick fix, I changed the “suhosin.memory_limit” option in /etc/php.d/suhosin.ini to 256M, and the “memory_limit” in /etc/php.ini to 256M so that no error would be generated.
Now came the hard part of finding out how to fix it for real. OSSEC is a pretty big beast to tackle, so I turned to my friendly web search engine to help out.
To fix the issue, I would need to write a decoder or new rule to ignore the suhosin rule causing the problem. OSSEC has descent documentation to get you started, but fortunately the blog linked above had the solution already. https://www.atomicorp.com/forum/viewtopic.php?f=3&t=5612
From user ‘faris’ in the forum linked above:
Add the following lines the the /var/ossec/etc/rules.d/local_rules.xml file.
<group name="local,ids,">
  <!-- First Time Suhosin event rule -->
  <rule id="101006" level="14">
    <if_sid>20100</if_sid>
    <decoded_as>suhosin</decoded_as>
    <description>First Time Suhosin Event</description>
  </rule>
  <!-- Generic Suhosin event rule -->
  <rule id="101007" level="12">
    <if_sid>20101</if_sid>
    <decoded_as>suhosin</decoded_as>
    <description>Suhosin Event</description>
  </rule>
  <!-- Specific Suhosin event rule -->
  <rule id="101008" level="5">
    <if_sid>101006,101007</if_sid>
    <match>script tried to increase memory</match>
    <description>Suhosin Memory Increase Event</description>
  </rule>
</group>
What these new rules do is change the level of the default rules that were tagged/decoded as being suhosin errors. In the first rule, if the default error is 20100, and is decoded (or tagged, or matches) as suhosin, then set the level to 14 instead of the default 8.
The second rule detects if the default error 20101 is decoded as coming from suhosin and sets the level to 12 instead of the default 6.
The third new rule looks at any error tagged as suhosin and if the error has the matching text in it, then it sets the error level to 5 (below the limit for firing an active response).
So, just add that group of rules to the local_rules.xml file and restart the OSSEC service. BA-DA-BING! no more blocking the IP when logging in to WordPress.
]]>I finally got the map to work for my Exhibit exhibit. See.
First I copied the tutorial here. When that was working, I carefully copied it to the file I wanted it to be in and… nothing. Still broken.
So next I commented out all extraneous stuff, and finally got it to work. Now came the fun part of tracking down what code was making my awesome map look like nothing. I narrowed it down to something within the <header> tag. So line by line I uncommented and tested until I tracked the issue down to the bootstrap.css file I was using.
Then came the same process within the bootstrap.css file. It was easily 1000 lines long, so a line by line process wasn’t going to work. Instead I commented out the first have of the file. Bing, the map displayed, so it was somewhere within that first 500 lines. Then I commented out the first 250 lines. Bing again. I kept dividing the culprits in half until I narrowed it down to styles for the img tag. Commented those out and I was in business.
Through that grueling process I lost the images of the documents on the first page. Now I have to figure out how to get those back, apply some styling and we’re all set.
Unfortunately I wasn’t ever able to get it to pull in the data from a spreadsheet, so the JSON file will have to do. The process for making a JSON file from a spreadsheet is simple:
1. Make the spreadsheet file so that the headers are encapsulated with curly braces ‘{ }’

2. If you’re using Google spreadsheets, export it as an Excel file. You’ll have to open it in Excel and save it as an older file format, because the next step doesn’t like .xlsx.
3. Next, use Similie’s Babel tool to convert the spreadsheet to JSON.
4. Select “Excel” as the “from format” and “Exhibit JSON” as the “to format” and then browse to find the xls file you just made.
5. Click the “Upload and Convert” button.

6. The next screen is all of your spreadsheet data output into a nice JSON format.

7. Now you can use this JSON file for any number of things. But it’s especially nice to use it in an Exhibit to display your data.

This is cross posted at the class blog http://www.fredgibbs.net/clio3workspace/blog/if-at-first-you-dont-succeed/
]]>Step 1: Upgrade
The first thing to do is update to the latest version. This ensures that if you need to turn this back into a dynamic site, it should hopefully be compatible with whatever the latest version is at that time.
Step 2: Make it public
Next, we’ll need to make it public to guests, so that wget has access to the pages.
Go to the Admin->Features and Options page and check the “Allow guests to browse the forum” box, then click save. Now we have to change the permissions on each board separately. Or with a bit of MySQL magic, we can change them all at once using the CONCAT operator. Open of phpMyAdmin, or something else of your choice. Before we mess with the data, make a copy of the table, just in case we totally hose it.
Browse to the ‘boards’ table, and then to the SQL tab. We’re going to enter an SQL command that will pre-pend (that’s append but onto the front rather than the end) some data.
UPDATE boards SET member_groups=CONCAT('-1,', member_groups) WHERE 1
This will add a -1, to the beginning of each field, which makes the board viewable by guests. No need to log in, which means wget can scrape the pages and turn them into HTML.
Step 3: Edit Theme files
Now we get to play around with the theme files to get rid of forum specific items that we won’t need, like links to member info, the login, help, and search links, and anything else that we don’t want.
Here are some items to delete or alter, and the files I found them in for our home-made theme based off of an old default theme.
index.template.php
- Add a title
- Get rid of date stamp
- Get rid of the main menu (Home, Help, Search, Login, etc)
BoardIndex.template.php
- Search for [‘member’][‘link’] and change it to [‘member’][‘name’] This will take out all links to member profile pages.
Display.template.php
- Search for [‘member’][‘link’] and change it to [‘member’][‘name’] This will take out all links to member profile pages.
- Get rid of the drop down menu to select pages.
MessageIndex.template.php
- Search for [‘member’][‘link’] and change it to [‘member’][‘name’] This will take out all links to member profile pages.
- Delete the ‘Jump to’ drop-down box and the icons explaining post/board types
Step 4: Fix the URLs
As it stands, SMF has some pretty ugly URLs. There are a couple of mods that I could never get to work. But editing a file and adding an .htaccess file seems to do the trick.
Open the Sources/QueryString.php file and look for the line like this:
$scripturl = $boardurl . '/index.php';
and get rid of the /index.php
Now create a .htaccess file in the root of the forum (in the same folder as the Settings.php file). It should look similar to this:
RewriteEngine On
RewriteBase /7tah/forum/
RewriteCond %{REQUEST_FILENAME} !-f
RewriteCond %{REQUEST_FILENAME} !-d
RewriteRule . /7tah/forum/index.php [L]
Step 5: Wget it
Now we run wget on the command line to grab the pages.
wget --mirror -P static-forum -nH -np -p -k -E --cut-dirs=2 http://domain.com/path/forum/
All of the static HTML files will now be located in a directory called static-forum.
Step 6: Fix filenames
Some filenames will be a bit broken. Specifically the style.css has an extra “?fin11” in the html files where the file is called. Also, it get’s name that way. So fix that by changing the name of the file to just style.css (it’s in your Theme directory). Then run this one-line command to search and replace throughout all of the static html files (run the command when you are in the static-forum directory.
find . -name '*.html' -type f -exec perl -pi -e 's/style.css%3Ffin11/style.css/g' {} \;
This will look for all of the references to the style.css%3Ffin11 file and change them to style.css. Then the pretty colors and formatting will work. Just for clarification, the %3F is code for a question mark. It shows up as such in the HTML source when viewing from a browser, but is displayed as such in the actual code.
Don’t forget to change the the actual name of the css file to style.css.
Step 7: Protect it
Depending on your needs, you may want to password protect your new static forum with an htaccess account. The good peoples at Dynamic Drive have an helpful tool for making the two files necessary to make this happen. Just plug in your desired user name, password, and location of the htpasswd file, and then it’s copy and paste into those files on the server.
I change the last line of the htaccess file to require user username so that it works only with the given user, not any valid. But since it only pulls from the specified htpasswd file, it’s kind of pointless.
Step 8: Backup the old
It’s a good idea to make a backup of the database and site files before getting rid of them. I just make a mysqldump of the database, throw it in the forum folder, and then make a tar or zip file of that and put the file in the new static forum folder for safe keeping.
Step 9: That’s it.
Sit back and relax. Your forum is interactive no longer.
]]>I need to set up Trac .12 on CentOS 5, but want to do that without interfering with the current setup of Trac and Subversion on the system.
So in comes virtualenv. This allows you to create a virtual environment for python. Like a separate install. The beauty is, once this is set up you can install different versions of python packages (like Trac and Subversion) that don’t have to interact with each other.
To install virtualenv was pretty simple. With root permissions do
easy_install virtualenv
Now, as your normal user, you can install a virtual environment.
virtualenv --no-site-packages foo
This will create a new folder called foo with a virtual environment for python. It won’t reference any of the other installed python packages (like the old Trac version).
Now upgrade the Genshi package with
easy_install --upgrade Genshi
Then, to install Trac do
easy_install Trac==0.12
That’s the part that always hung me up. I would just do easy_install Trac which would cough up this ugly error:
Searching for trac
Reading http://pypi.python.org/simple/trac/
Reading http://trac.edgewall.org/
Reading http://trac.edgewall.org/wiki/TracDownload
Reading http://trac.edgewall.com/
Reading http://projects.edgewall.com/trac
Reading http://projects.edgewall.com/trac/wiki/TracDownload
Best match: Trac 0.12.2
Downloading ftp://ftp.edgewall.com/pub/trac/Trac-0.12.2.zip
Processing Trac-0.12.2.zip
Running setup.py -q bdist_egg --dist-dir trac-dir/trac/egg-dist-tmp-JmdQXW
Traceback (most recent call last):
File "/home/ammon/foo/bin/easy_install", line 7, in ?
sys.exit(
File "/home/ammon/foo/lib/python2.4/site-packages/setuptools-0.6c12dev_r88795-py2.4.egg/setuptools/command/easy_install.py", line 1712, in main
with_ei_usage(lambda:
File "/home/ammon/foo/lib/python2.4/site-packages/setuptools-0.6c12dev_r88795-py2.4.egg/setuptools/command/easy_install.py", line 1700, in with_ei_u
sage
return f()
File "/home/ammon/foo/lib/python2.4/site-packages/setuptools-0.6c12dev_r88795-py2.4.egg/setuptools/command/easy_install.py", line 1716, in <lambda>
distclass=DistributionWithoutHelpCommands, **kw
File "/usr/lib64/python2.4/distutils/core.py", line 149, in setup
dist.run_commands()
File "/usr/lib64/python2.4/distutils/dist.py", line 946, in run_commands
self.run_command(cmd)
File "/usr/lib64/python2.4/distutils/dist.py", line 966, in run_command
cmd_obj.run()
File "/home/ammon/foo/lib/python2.4/site-packages/setuptools-0.6c12dev_r88795-py2.4.egg/setuptools/command/easy_install.py", line 211, in run
self.easy_install(spec, not self.no_deps)
File "/home/ammon/foo/lib/python2.4/site-packages/setuptools-0.6c12dev_r88795-py2.4.egg/setuptools/command/easy_install.py", line 446, in easy_insta
ll
return self.install_item(spec, dist.location, tmpdir, deps)
File "/home/ammon/foo/lib/python2.4/site-packages/setuptools-0.6c12dev_r88795-py2.4.egg/setuptools/command/easy_install.py", line 476, in install_it
em
dists = self.install_eggs(spec, download, tmpdir)
File "/home/ammon/foo/lib/python2.4/site-packages/setuptools-0.6c12dev_r88795-py2.4.egg/setuptools/command/easy_install.py", line 655, in install_eg
gs
return self.build_and_install(setup_script, setup_base)
File "/home/ammon/foo/lib/python2.4/site-packages/setuptools-0.6c12dev_r88795-py2.4.egg/setuptools/command/easy_install.py", line 930, in build_and_
install
self.run_setup(setup_script, setup_base, args)
File "/home/ammon/foo/lib/python2.4/site-packages/setuptools-0.6c12dev_r88795-py2.4.egg/setuptools/command/easy_install.py", line 919, in run_setup
run_setup(setup_script, args)
File "/home/ammon/foo/lib/python2.4/site-packages/setuptools-0.6c12dev_r88795-py2.4.egg/setuptools/sandbox.py", line 61, in run_setup
DirectorySandbox(setup_dir).run(
File "/home/ammon/foo/lib/python2.4/site-packages/setuptools-0.6c12dev_r88795-py2.4.egg/setuptools/sandbox.py", line 105, in run
return func()
File "/home/ammon/foo/lib/python2.4/site-packages/setuptools-0.6c12dev_r88795-py2.4.egg/setuptools/sandbox.py", line 64, in <lambda>
{'__file__':setup_script, '__name__':'__main__'}
File "setup.py", line 110, in ?
File "/usr/lib64/python2.4/distutils/core.py", line 110, in setup
_setup_distribution = dist = klass(attrs)
File "/home/ammon/foo/lib/python2.4/site-packages/setuptools-0.6c12dev_r88795-py2.4.egg/setuptools/dist.py", line 260, in __init__
self.fetch_build_eggs(attrs.pop('setup_requires'))
File "/home/ammon/foo/lib/python2.4/site-packages/setuptools-0.6c12dev_r88795-py2.4.egg/setuptools/dist.py", line 283, in fetch_build_eggs
for dist in working_set.resolve(
File "/home/ammon/foo/lib/python2.4/site-packages/setuptools-0.6c12dev_r88795-py2.4.egg/pkg_resources.py", line 569, in resolve
raise VersionConflict(dist,req) # XXX put more info here
pkg_resources.VersionConflict: (Genshi 0.6dev (/usr/local/lib/python2.4/site-packages/Genshi-0.6dev-py2.4-linux-x86_64.egg), Requirement.parse('Genshi
>=0.6'))
Notice the last line referencing a version conflict with the “old” Genshi at /usr/local/lib/python2.4/site-packages. That’s the system-wide default install. So making explicit that you want to install Trac==0.12 is the way to get it installed in a virtual environment.
Now I just need to figure out how to configure Trac and Subversion using this virtual environment, and copy over a live older version of each.
]]>john,[email protected],89,tuesday
bertha,[email protected],2716,monday
dillan,[email protected],289,saturday
xavier,[email protected],839,wednesday
The script would create four numbered folders (1, 2, 3, 4), and put a file in each folder corresponding with the row number and column.

So, within folder number one would be four text files named 1-1.txt, 2-1.txt, 3-1.txt, 4-1.txt. Text file 1-1.txt would contain the content “john”. File 3-1.txt would contain the text “dillan”. Within folder number 3 would be four text files named 1-3.txt, 2-3.txt, 3-3.txt, and 4-3.txt.
Well, anyhow, I hope that explanation makes sense. Here’s the code:
[code lang=”perl”]
#!/usr/bin/perl
use strict;
use warnings;
use Text::CSV::Encoded;
my $csv = Text::CSV::Encoded->new();
# file to be used given on the command line as an argument to the script
open (CSV, “<:encoding(UTF-8)”, $ARGV[0]) or die $!;
my $rownum = 1;
while () {
if ($csv->parse($_)) {
# Put the rows into an array
my @columns = $csv->fields();
# Make the directories, as many as there are columns
# Get the number of columns (which is the number of elements in the
# array).
my $size = scalar(@columns);
my $count = 1;
# Check if the directories are created. Only want to make them on the
# interration through the first row
if ( !-d $count ) {
while ($count <= $size) { mkdir “$count” or die $!; $count++; } } # Now make a file from each cell, putting the file in the directory # corresponding to the column my $colnum = 1; for my $column (@columns) { # Create a new file (or overwrite an existing one) in the # appropriate column folder and name it row#-col#.txt open FILE, “+>$colnum/row$rownum-col$colnum.txt” or die $!;
# This sets the correct encoding on writing to the file
binmode FILE, “:utf8”;
print FILE $column;
close FILE;
$colnum++;
}
} else {
my $err = $csv->error_input;
print “Failed to parse line: $err”;
}
$rownum++;
}
close CSV;
[/code]
]]>