- RedHat changed an important part of their system with the upgrade from version 5 to 6. This affects CentOS which is the same thing, but rebranded.
I was updating one server to use CentOS 6, and ran into this issue of setting up the iDRAC for remote console use. In previous versions, I would add a line to the /etc/inittab file. This is now unused. RedHat is favoring the “Upstart” system developed by and for Ubuntu. It starts services on request, rather than all at once.
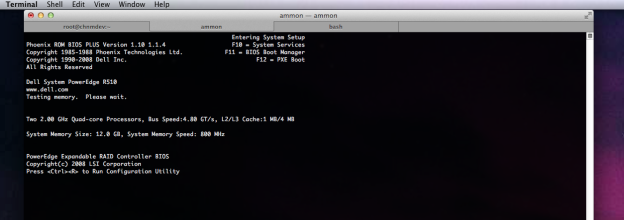
So here is how I set up my Dell PowerEdge R510 with CentOS 6 to use the iDRAC6.
Info was taken from the RedHat manual, the Dell iDRAC manual, and probably a bunch of other sites that I googled for.
These steps are by no means comprehensive or detailed. I barely even know what’s going on myself, but it seems to work. It’s kind of cool to see a system boot up in your terminal. It’s like your terminal turns into a monitor connected to the server.

Setting up the iDrac6
Edit BIOS
- Boot the server.
- Press
F2to enter the BIOS setup utility during POST. - Scroll down and select Serial Communication by pressing
<Enter>. - Set the Serial Communication screen options as follows:
serial communication....On with serial redirection via com2- NOTE: You can set serial communication to ‘On with serial redirection via com1’ as long as the serial port address field, serial device2, is set to com1, also.
serial port address....Serial device1 = com1, serial device2 = com2external serial connector....Serial device 1failsafe baud rate....57600remote terminal type....vt100/vt220redirection after boot....Enabled- Save the changes and exit.
Edit iDRAC settings
- Turn on or restart your system.
- Press
<Ctrl><E>when prompted during POST. If your operating system begins to load before you press<Ctrl><E>, allow the system to finish booting, and then restart your system and try again. - Configure the LOM.
- Use the arrow keys to select LAN Parameters and press
<Enter>. NIC Selection is displayed. - Use the arrow keys to select one of the following NIC modes:
- Dedicated — Select this option to enable the remote access device to utilize the dedicated network interface available on the iDRAC6 Enterprise. This interface is not shared with the host operating system and routes the management traffic to a separate physical network, enabling it to be separated from the application traffic. This option is available only if an iDRAC6 Enterprise is installed in the system. After you install the iDRAC6 Enterprise card, ensure that you change the NIC Selection to Dedicated. This can be done either through the iDRAC6 Configuration Utility, the iDRAC6 Web Interface, or through RACADM.
- Configure the network controller LAN parameters to use DHCP or a Static IP address source.
- Using the down-arrow key, select LAN Parameters, and press
<Enter>. - Using the up-arrow and down-arrow keys, select IP Address Source.
- Using the right-arrow and left-arrow keys, select DHCP, Auto Config or Static.
- If you selected Static, configure the Ethernet IP Address, Subnet Mask, and Default Gateway settings.
- Press
<Esc>.
- Press
<Esc>. - Select Save Changes and Exit.
Set up Linux OS (to do after OS is installed)
- Configuring Linux for Serial Console Redirection During Boot
- The following steps are specific to the Linux GRand Unified Bootloader (GRUB). Similar changes would be necessary if you use a different boot loader.
- NOTE: When you configure the client VT100 emulation window, set the window or application that is displaying the redirected console to 25 rows x 80 columns to ensure proper text display; otherwise, some text screens may be garbled.
- Make a copy of the
/boot/grub/grub.conffile as follows:cp /boot/grub/grub.conf /boot/grub/grub.conf.orig - Edit the
/boot/grub/grub.conffile as follows:
- Locate the General Setting sections in the file and add the following two new lines:
serial --unit=0 --speed=57600terminal --timeout=10 serial console - Append two options to the kernel line:
kernel ............. console=ttyS1,57600 console=tty1 - If the /etc/grub.conf contains a splashimage directive, comment it out.Sample File:
/boot/grub/grub.conf# grub.conf generated by anaconda
#
# Note that you do not have to rerun grub after making changes to this file
# NOTICE: You have a /boot partition. This means that
# all kernel and initrd paths are relative to /boot/, eg.
# root (hd0,0)
# kernel /vmlinuz-version ro root=/dev/Logical1/LogVol00
# initrd /initrd-version.img
#boot=/dev/sda
default=0
timeout=5
#splashimage=(hd0,0)/grub/splash.xpm.gz
#hiddenmenu
serial –unit=1 –speed=57600
terminal –timeout=5 console serialtitle CentOS (2.6.18-164.11.1.el5) SOL Redirection
root (hd0,0)
kernel /vmlinuz-2.6.18-164.11.1.el5 ro root=/dev/Logical1/LogVol00 console=tty1 console=ttyS1,57600
initrd /initrd-2.6.18-164.11.1.el5.img
title CentOS (2.6.18-164.el5)
root (hd0,0)
kernel /vmlinuz-2.6.18-164.el5 ro root=/dev/Logical1/LogVol00
initrd /initrd-2.6.18-164.el5.img
Enabling Login to the Console After Boot
- Create a new
/etc/init/serial-ttyS1.conffile.Sample File:/etc/inittab# This service maintains a getty on /dev/ttyS1.start on stopped rc RUNLEVEL=[2345]
stop on starting runlevel [016]respawn
exec /sbin/agetty -h -L 57600 ttyS1 vt102
Edit the file /etc/securetty
- Make a copy of the
/etc/securettyfile as follows:cp /etc/securetty /etc/securetty.orig - Edit the file
/etc/securettyas follows:Add a new line with the name of the serial tty for COM2:ttyS1Sample File:/etc/securettyvc/1
vc/2
vc/3
vc/4
vc/5
vc/6
vc/7
vc/8
vc/9
vc/10
vc/11
tty1
tty2
tty3
tty4
tty5
tty6
tty7
tty8
tty9
tty10
tty11
*ttyS1*
Redirect the video output over ssh connections
Starting a Text Console Through SSH (Remote Access, SOL)
To connect to the managed system text console, open an iDRAC6 command prompt (displayed through an SSH session):
ssh root@xxx.xxx.xxx.xxx
and type:
console com2
Only one console com2 client is supported at a time. The console -h com2 command displays the contents of the serial history buffer before waiting for input from the keyboard or new characters from the serial port.
To exit the console type these three keys: <Ctrl ><Shift >\
The default (and maximum) size of the history buffer is 8192 characters. You can set this number to a smaller value using the command:
racadm config -g cfgSerial -o cfgSerialHistorySize < number >


Hi ammon,
i have one R710 running idrac6 on Centos.
Everythings running okay. i even can reboot/shutdown my server thru remote browser. but my problem is Virtual Console..i can see the server console but i can’t pass the keyboard input. please help. thanks bro!
Hi Haekal,
Sometimes this is a problem with the baud rate not matching in the various places it is set. I’d double check the grub.conf, /etc/init/serial-ttyS1.conf, and BIOS settings again for the same baud rate. I’ve also had luck changing it to a lower setting. Sometimes 9600 works.
Thanks to share this “vato” …
vato = “homie”
Glad to help out.
What key do you press to get into the BIOS during POST? In your description above the key is shown as a gray square …
Thanks!
I updated the post to fix the missing commands. The instructions are basically taken directly from the Dell Docs: http://support.dell.com/support/edocs/software/smdrac3/idrac/idrac10mono/en/ug/html/racugc3.htm
Excellent article! I am able to watch the server boot up process and even access the BIOS and RAID configuration, but once the Os boots and I am prompted for a username the output on the redirceted console goes blank.
Any ideas why the console goes blank when connecting via the redirection at this point?
I am using a Dell R515 (AMD version of the R510), CentOS 6.2 and iDRAC6 Enterprise. The server is booting to a command line, not the Gnome desktop. Cheers!