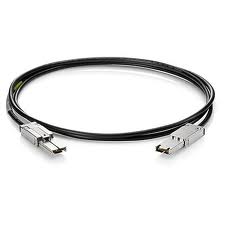
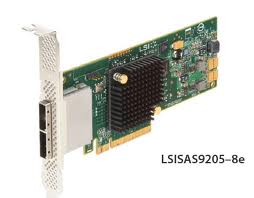
One of the most frustrating parts of this set up was getting the storage array talking to the servers. I finally got it figured out. I’m using a StorageTek 2530 to connect to two SunFire X2100 M2’s via SAS (Serial Attached SCSI) cables. I put in a dual port SAS HBA (Host Bus Adapter) in the X2100 M2’s, but for real redundancy, I should have used two single port HBA’s. The Sun/Oracle documentation is pretty good about how to physically set up the servers and storage array, but are pretty lacking from there on.
StorageTek 2530 Set Up
Replace the parts in squares brackets below with whatever you want.
- Install the Sun CAM software.
- Grab the latest version from http://support.oracle.com
- You’ll need an active support contract and have an account.
- Go to the ‘Patches and Updates’ tab.
- Click on the ‘Product or Family (Advanced)’ link
- In the ‘Product is’ section start typing in ‘Sun Storage Common Array Manager (CAM)’ and select it from the list
- In the ‘Release is’ section select the most recent version
- For the last section, select ‘Platform’ and then select ‘Linux x86-64’
- Click ‘Search’
- Click the ‘Download’ link for the software.
- Upload the tar file to the server.
- Pre-requisite software that needs to be installed.
yum install ksh bc /lib/ld-linux.so.2 libgcc.i686 libstdc++.i686 libzip.i686 gettext
- Once CAM software is downloaded, un-zipped, un-tarred or what have you, change directories to HostSoftwareCD_6.9.0.16/components and install the jdk available there:
rpm -Uvh jdk-6u20-linux-i586.rpm
- Next run the RunMe.bin file in the HostSoftwareCD_6.9.0.16 folder
./RunMe.bin -c
- Agree to all License Agreement stuffs
- Select the Typical install.
- Grab the latest version from http://support.oracle.com
- Add the
/opt/sun/cam/binfolder to path- With root using tcsh add this to .tcshrc
setenv PATH ${PATH}:/opt/sun/cam/bin
- Then do
source .tcshrc
- With root using tcsh add this to .tcshrc
- Make sure there is an IP on the same subnet as the array (192.168.128.xxx)
- Make a
/etc/sysconfig/network-scripts/ifcfg-eth1:1file and put this in there-
DEVICE=“eth1:1”
BOOTPROTO=static
HWADDR=“xx:xx:xx:xx:xx:xx:xx”
IPADDR=192.168.128.xxx
NM_CONTROLLED=“no”
ONBOOT=“yes”
-
- Install the RAID Proxy Agent package located in the Add_On/RaidArrayProxy directory of the latest CAM software distribution. (I found this to be optional.)
rpm -ivh SMruntime.xx.xx.xx.xx-xxxx.rpmrpm -ivh SMagent-LINUX-xx.xx.xx.xx-xxxx.rpm
- Make a
- Register the StorageTek with the host. Process can take several minutes.
sscs register -d storage-system
- Once registered, you can name the array anything you want. Note what the array is named from the previous step.
sscs modify -T [Array-Name] array ARRAY1
- If using the web interface, you have to use a windows laptop hooked up to the local network (192.168.128.xxx), or perhaps a server in the same local network that is not running CentOS 6, which has a known issue where the web interface does not work. For the web interface connect to https://localhost:6789 using the laptop or server Administrator/root account information.
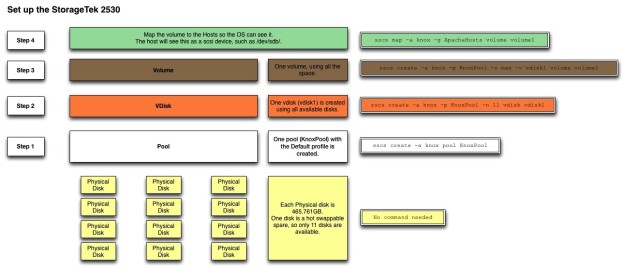
sscs create -a knox pool [Pool-Name]
sscs create -a knox -p [Pool-Name] -n 11 vdisk [Vdisk-Name]
sscs create -a knox -p [Pool-Name] -s max -v [Vdisk-Name] volume [Volume-Name]
sscs create -a knox hostgroup [ApacheHosts]
sscs create -a knox -g [ApacheHosts] host [Host-Name]and repeat for other hosts.
sscs map -a knox -g ApacheHosts volume Volume-Name
It took me a while to grasp the meaning for the different terms: pool, volume, volume groups, disks, etc. I drew up a chart with the appropriate commands to create the different aspects.

To utilize both cables connecting the server to the storage array, the OS needs to use multi-pathing. I had lots of troubles trying to set this up after the OS was installed, so I just let it be done by the installer. Here’s what should happen if you find the OS already installed and need to set up multi-paths.

- Set up DM-Multipath
- NOTE: This is taken care of during the OS installation.
- Multipath allows both SAS connections to the storage array to appear as one connection to the server. This allows for data to pass through even if one cable suddenly stops working, it seamlessly fails to the other path. For example, taken the image above, if the connection between hba1->cntrlr1 goes down, you still have connection hba2->cntrlr2. The OS sees one connection, and just uses whichever path is working.
- After Multipath is set up, the storage array will be available as a device at
/dev/mapper/mpatha. This will be the device to partition, format, and throw LVM on. - Install the multipath program and dependents
yum install device-mapper-multipath
- Run
mpathconf --enableto create a default/etc/multipath.conffile or create one using the following:-
# multipath.conf written by anacondadefaults {
user_friendly_names yes
}
blacklist {
devnode “^(ram|raw|loop|fd|md|dm-|sr|scd|st)[0-9]*”
devnode “^hd[a-z]”
devnode “^dcssblk[0-9]*”
device {
vendor “DGC”
product “LUNZ”
}
device {
vendor “IBM”
product “S/390.*”
}
# don’t count normal SATA devices as multipaths
device {
vendor “ATA”
}
# don’t count 3ware devices as multipaths
device {
vendor “3ware”
}
device {
vendor “AMCC”
}
# nor highpoint devices
device {
vendor “HPT”
}
wwid “3600508e000000000c9c1189277b84b05”
device {
vendor TEAC
product DV-28E-V
}
wwid “*”
}
blacklist_exceptions {
wwid “3600a0b80003abca4000007284f33c167”
}
multipaths {
multipath {
uid 0
gid 0
wwid “3600a0b80003abca4000007284f33c167”
mode 0600
}
}
-
- Set multipathd to start on boot, and if not on, turn it on
chkconfig multipathd onservice multipathd start


